
Preservation
I’m still trying to wrap my head around what happened and why, but a friend of mine passed this weekend. I got a call Sunday night from one of her friends who I know from the rock climbing wall in Mankato. I didn’t know how to react, and I was in a state of shock until later that night. After that phone call, I raced home and started searching for the negatives I had of Abigail, the ones I had taken almost four years ago.

I’m still trying to wrap my head around what happened and why, but a friend of mine passed this weekend. I got a call Sunday night from one of her friends who I know from the rock climbing wall in Mankato. I didn’t know how to react, and I was in a state of shock until later that night. After that phone call, I raced home and started searching for the negatives I had of Abigail, the ones I had taken almost four years ago.
I don’t remember how exactly I met Abigail, but I know we both shared a passion for photography and rock climbing. She was bubbly and always smiling, and it was contagious. She became one of my better friends that year. We spent a lot of time together, whether it was rock climbing, hiking, photography, or just hanging out at her apartment listening to music. When I started my film class in the spring semester, Abigail was absolutely ecstatic to help.

On one of the many dreary spring mornings we had that year, I headed over to Abigail’s apartment to hang out with her and her roommate Brooke. My assignment that week for my photography class was to shoot portraits, so Brooke and Abigail became my subjects for the day. I pulled out my brand new light reflector and started bouncing light around like any photographer with a new tool would. I moved them all around the living room, which had nice white walls and an open window, essentially acting as one giant light reflector.

Abigail wasn’t very good at acting serious, but at the time that’s what I wanted to photograph. She dealt with my requests and gave me her all the entire time. I photographed her and Brooke for maybe 30 minutes, or as long as it took to finish the roll of film. After I got done shooting, and since it was still morning, Abigail wanted to do her thing and make some coffee. I don’t know where she got the idea from, but she heard about turkish coffee readings. Turkish coffee is very finely ground, so when you finish drinking it, all of the grounds are left on the bottom.

The method (from what I remember) goes like this: drink the coffee in one go, and flip the cup upside down on the plate. Let it sit for a few minutes so the grounds have time to settle. Different patterns and shapes carry different meaning. After my coffee sat for a bit, Abigail flipped it over and gave me the news. (Sorry for the proceeding picture as I took it with my phone over 3 years ago)
Abigail saw the creature that had formed, and described it as a demon that was haunting my life. At that point in time, I was drowning in my depression, and knew exactly what that demon represented. Abigail asked if I knew what it could be, and I told her I had a couple things in mind. We hung out for a couple more hours, I said my good byes and headed home with a lot to think about.

Abigail was the first catalyst in me getting help with my depression. I think I told her later that night about it. I truly do not know where I would be without having met Abigail. She was an incredibly positive influence in my life, and I will always be grateful for having the opportunity to know her. I’m especially grateful to have these pictures of her. They bring a lot of emotion to the surface, and help me remember that day and the others that followed.
So I’ll end this emotional roller coaster of a post by saying this: Please take pictures of the ones close to you; friends, family, whoever, just take photos of them. The more time that passes, the more meaning they start to carry. Holding the negatives with Abigail on them brought me a weird happiness, but one I’ll hold onto for a while.
Abigail, thank you for being in my life, I’m going to miss you a lot.

Olympus XA2 Review
Let me start out this review by saying this; I never thought I would own a point and shoot camera. I went to an estate sale on my day off, looking for film cameras, and ended up leaving with two point and shoots, both from the same era.

The Olympus XA2 and all of its plasticky goodness.
DISCLAIMER: This post contains affiliate links. If you make a purchase through these links, I may earn a small commission at no extra cost to you. I only recommend products I personally use and trust.
Let me start out this review by saying this; I never thought I would own a point and shoot camera. I went to an estate sale on my day off, looking for film cameras, and ended up leaving with two point and shoots, both from the same era.
The XA2 is not nearly as popular as its predecessor, the original XA. The XA put a little bit more of the exposure equation in the hands of the photographer, allowing them to choose focus distance, ISO, AND the aperture. The XA also had a slightly faster lens, with an f/2.8 instead of the XA2’s f/3.5 lens. While there are slight differences between the original XA and all its subsequent siblings, they all revolve around a 35mm lens in a very pocketable body. Most came new with some sort of flash unit attachment, which adds a little bit of length as it attaches to the side. The XA2 came with the A-11 flash unit, which I have, for the most part, left at home. The flash is like a bomb going off, usually providing a wonderful ‘deer in the headlights’ look.
The Body
Now that I’ve said my part about the flash, I’ll start with the body itself. It’s basically a plastic brick that fits in the palm of your hand, slides easily into any pocket, and does not draw any attention to the one holding it. The slider conveniently covers the lens, viewfinder, and light meter when closed, and also deactivates the shutter so you can’t accidentally take any shots. This small plastic brick houses a 35mm f/3.5 lens which is surprisingly sharp for it’s age. To keep the body as small as possible, they used a leaf shutter instead of a focal plane shutter. For those don’t know what either of those terms mean, just know that a leaf shutter is massively quieter than a focal plane shutter. The leaf shutter in this camera is one of the few things that isn’t plastic. Pressing the shutter button provides a quick click sound. Maybe the sound of a pen clicking, but much quieter? I’m not sure honestly, but it’s quiet.
The loudest thing about this camera is advancing the film to the next frame. Think disposable camera wind on noisy, and that’s exactly what this sounds and feels like. My particular copy doesn’t have the most consistent framing, but I have not had any shots overlap, yet. Besides pressing the shutter and selecting ISO sensitivity for the lighter meter, you can also shoot the focus range! The options are located to the left of the lens and show pictures interpreting the distance that the lens should about focus to.
Bottom - Head & Shoulders - 4 feet
Center - Full Body - 9 feet
Top - Mountain - 40 feet
This method is called zone focusing, and is essentially a guess as to where your subject is. If it’s bright enough out, it doesn’t really matter if you set it in the right place, though I usually leave mine in the default center position. Which reminds me, the tab for the focus resets to the center when you close the slider, handy, but also annoying at times.
So there are three different things you can control, focus, ISO, the flash (if you have it on), and firing of the shutter. There are a few things about this camera that I don’t quite understand. There is the red light on the front of the camera, and I have no idea what it does. I haven’t seen it light up at any point in time since I’ve had it. There is a red light on the inside of the viewfinder that lights up if the shutter will be too slow, but the front light does not light up with it? Superfluous red light cover to make it look better? Another thing I don’t quite understand was the addition of a tripod socket on the bottom. I can’t imagine any person, ever, mounting this on a tripod. The socket itself is plastic, so I’m not sure how many uses it could take before it breaks. Also on the bottom of the camera is a little switch for a self-timer (which would explain the need for a tripod socket), and the battery check. I have no idea if it’s just my camera, but when I turn the switch to battery check, it makes a horrendously high-pitched whining noise. It doesn’t sound right, but the camera works so I haven’t worried about it. I haven’t tested the self-timer, but I’m sure it’s something like two or ten seconds before it goes off. I’ll try it one of these days.

Fuji Superia 400
Shooting Experience
Now that I’ve covered most of the body, I’ll dive into what I like and don’t like about shooting with it.
First off, sometimes it’s nice not to have to think about what you’re doing. See something cool? Point, and shoot. These cameras are great for a quick capture, a moment. If that sounds like your perfect shooting scenario, go ahead and get one of these, because they’re perfect for it! Most of the time I am very methodical about what and how I shoot. This camera is simply fun to use, so it’s an appreciated deviation from my normal style. I wish I had a little bit more control like I could with the original XA, but I’m not sure it would be quite as enjoyable of an experience.
So far, the camera is quiet, fun, and easy to use. The thing I absolutely love about this camera is how incredibly portable it is. Back pocket, front pocket, fanny pack; you name it, and it’ll fit. I haven’t tested the durability of it, but you could take this camera along with you just about anywhere, and it wouldn’t add more than half a pound of weight.

Fuji Superia 400. My therapists building is incredibly photogenic in the morning light.
Portable, quiet, fun, and easy to use. It’s honestly a great camera, one of the only major complaints I have is the rewind crank. Remember when I said the camera is a plastic brick? So is the rewind crank. It feels like it is going to break the entire time I’m rolling up a finished canister of film. 36 frames feels monstrously worse than 24 as you have 12 more frames of resistance to fight back into the film canister. I’m honestly surprised it hasn’t broken yet. Another thing I despise about the rewind crank is how it’s engaged. There is a tiny little button on the bottom of the camera, it unlocks the gears in the camera that advances the frame. If you don’t press this little button in, you can still get the film rewound, but each and every sprocket will rip and tear, and your entire roll of film with essentially be destroyed. Any guesses as to how I figured this out?

Kodak Portra 400, wine tour in Wisconsin.
If this does happen to you, I wish you the best of luck in cleaning out the tiny little squares of broken film sprockets, and I hope developing it goes as smoothly as possible. I’m surprised I even wasted time developing that roll of film after how fucked it got. I ended up throwing the entire roll of film away, just glad that the camera could take pictures.
If it weren’t for the rewind crank, and the rewind crank button, I think this would be an almost perfect camera. But since I can’t get over the rewind crank, I’ll probably keep looking for a better point and shoot that will work for me better. My next review will be on the Canon Sure Shot, which is another point and shoot that I’ve enjoyed using these past couple of months. The review for the Canon Sure Shot/Autoboy can be found here! If point and shoot cameras aren’t really your thing, I have a review on the classic Leica M3 here.
TLDR: It’s fun and easy to use, get it, but be careful rewinding the film.
And if you purchase an Olympus XA2 (Affiliate link to eBay) through that link, I get a little bit of a kickback so I can keep making reviews like this! And please feel free to let me know other cameras you’d like to see reviewed in the future.
Now onto more pictures!

Fuji Superia 400, taken 5 minutes from my house.

Kodak Portra 400, parking lot of the place above after a lot of rain.

Kodak Portra 400, lake after the rain. Featuring Miah in her constant state of movement.

Kodak Portra 400. Winona, Minnesota.
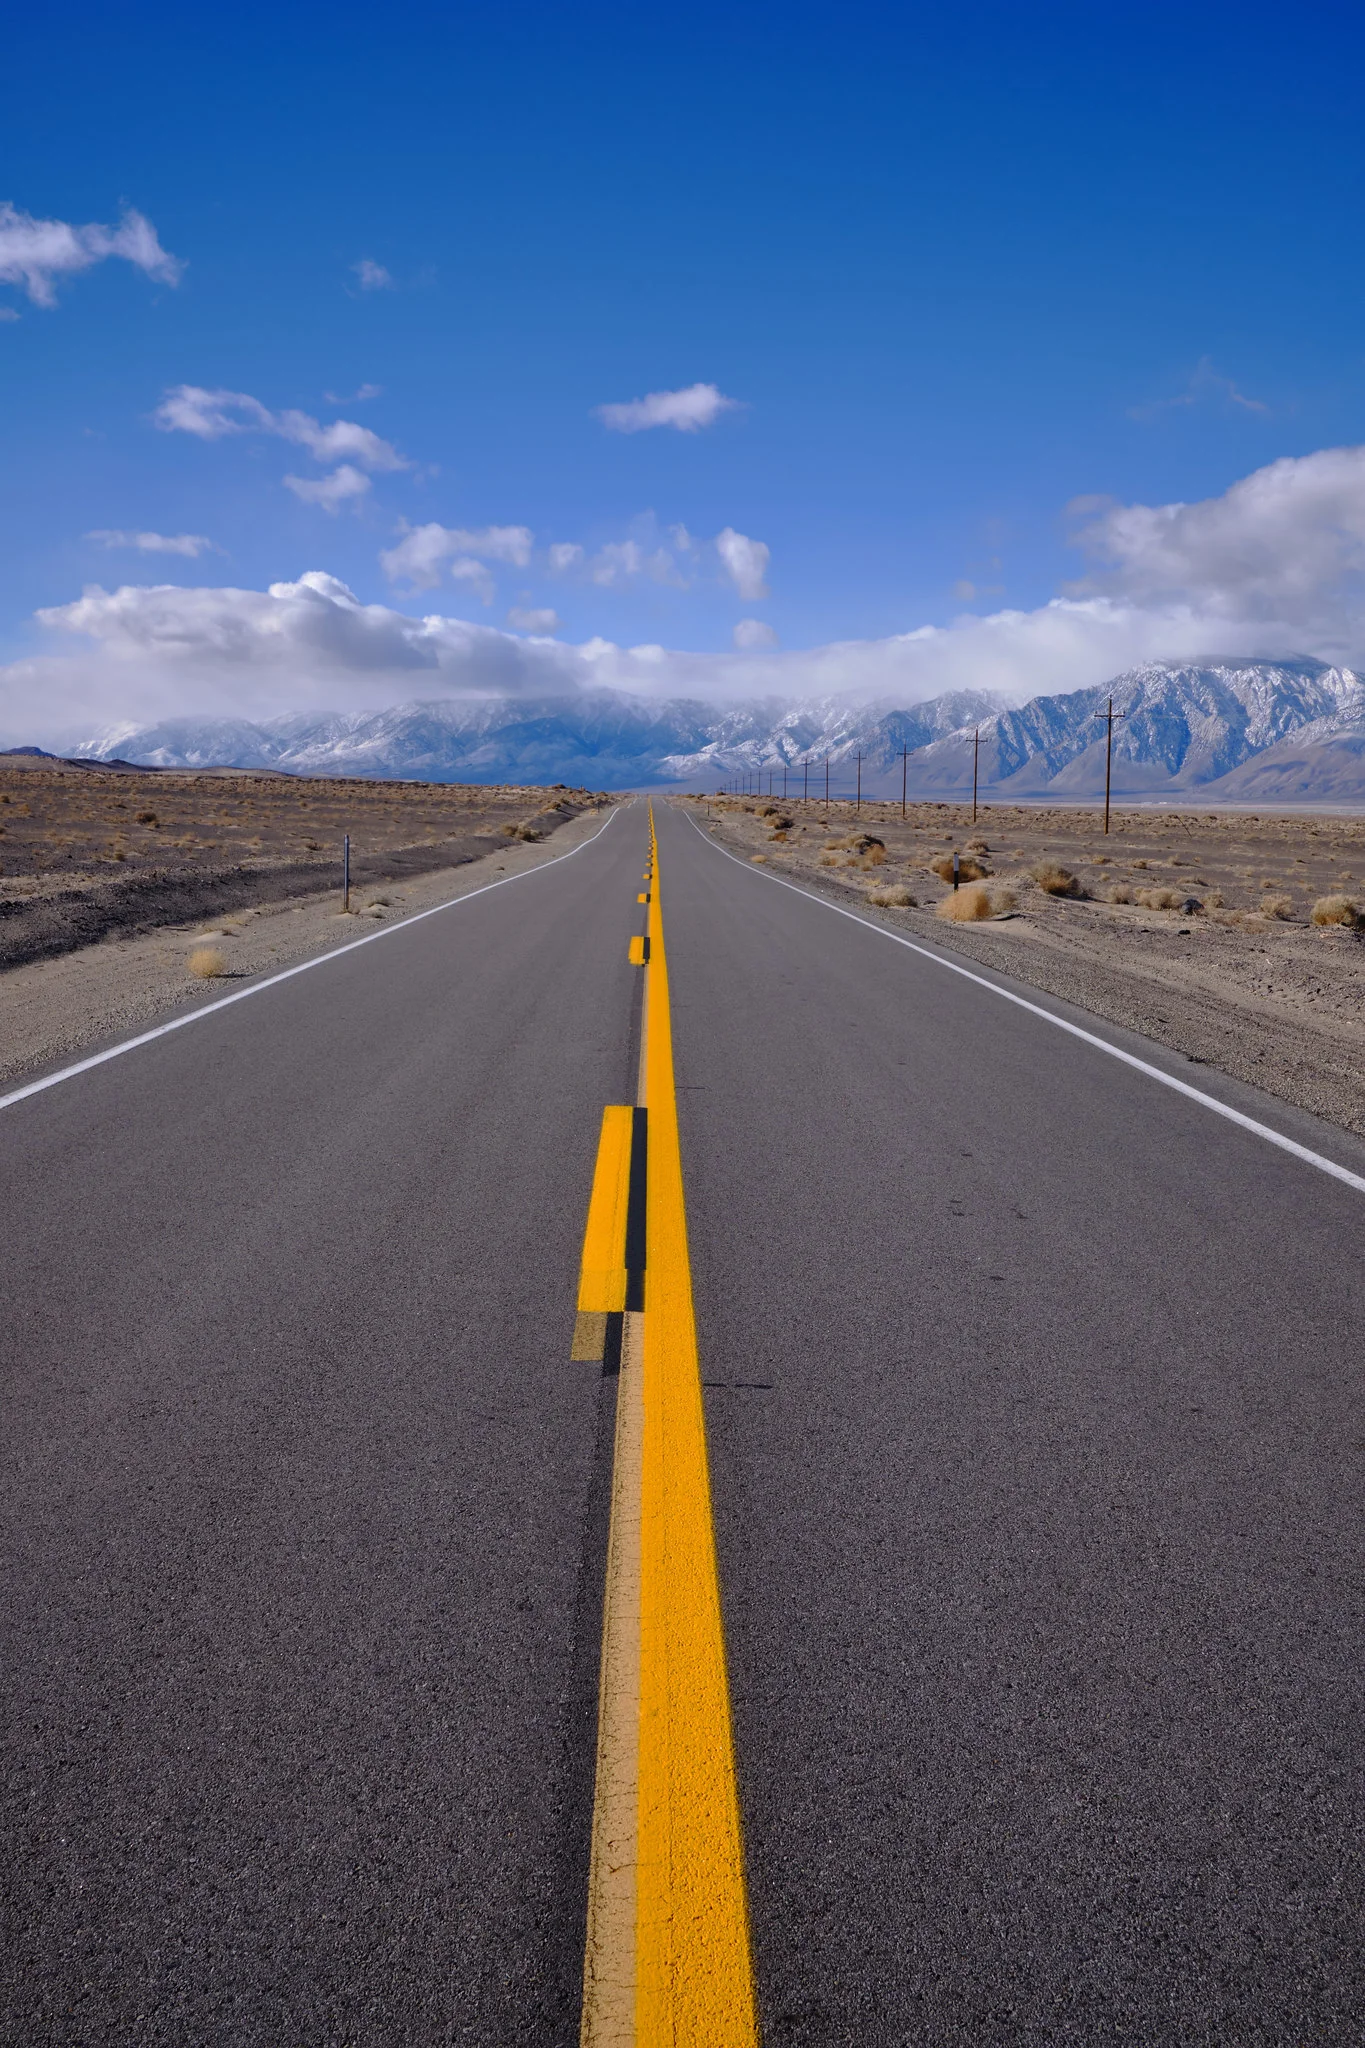
Drive and Direction
Every second or third Thursday, I go and see my therapist. I’ve been seeing him on and off for the past year and a half. He’s been absolutely instrumental in helping me with my direction, my personal issues, and life in general. He inspired this blog post, so, thank you Jeff.
Every second or third Thursday, I go and see my therapist. I’ve been seeing him on and off for the past year and a half. He’s been absolutely instrumental in helping me with my direction, my personal issues, and life in general. He inspired this blog post, so, thank you Jeff.
Almost every person you meet along your way in life, has a passion of some sort. Some people have a passion for sewing, maybe painting. No matter the craft, bringing an idea into fruition is one of the most validating and rewarding things you can do. Holding something tangible, something real, that you made, it’s pure bliss.
At this very moment, I’m surrounded by different cameras, film I have developed myself, and photos I made are hanging on the wall. It’s clear to me that this is my passion. I love learning about the world around me, but this is the one thing that I have always come back to. It’s one of the few consistent things in my life (Miah of course is one), and sometimes that consistency provides solace in this hectic world of ours.
For the past two years, I’ve been trying to figure out how to turn this passion that I have into a career, something I can do day after day, and still be happy.
Jeff explained the situation as this (not exactly):
Passion is the engine, the fuel that makes the car go. People have the fuel, the energy, but they don’t always have the ability to direct themselves where they want to go. The steering wheel is that direction, it’s how you channel that passion.
The artist’s dilemma, how do I make this my reality? When you’re starting at the bottom, you won’t just fall into success. You have to sit down, figure out a plan, and execute it. I’ve been slowly piecing together this steering wheel, so I can finally drive the car with the roaring engine, where I want. It’s slow, there’s lots of friction, it’s frustrating, but I’m figuring it out.
I applied for a part time job, making more money hourly, but will be working much fewer hours in total. In this particular situation, getting a new job and no longer working at my full-time gig is the catalyst that will kick my ass into the next step. It’s motivation to keep pressing forward; motivation to make my dreams a reality.
I’m on the right road, at least I think I am. Wherever it takes me, I’m excited to see where it goes.
Cult Classics
These three cameras have some what of a cult following in the 35mm film community. Each one easily slips into a pocket without much fuss. Prices vary considerably between the three, but all will cost easily above $75 depending on where you purchase them.

Canon Sure Shot, Rollei 35s, and Olympus XA2.
These three cameras have some what of a cult following in the 35mm film community. Each one easily slips into a pocket without much fuss. Prices vary considerably between the three, but all will cost easily above $75 depending on where you purchase them.
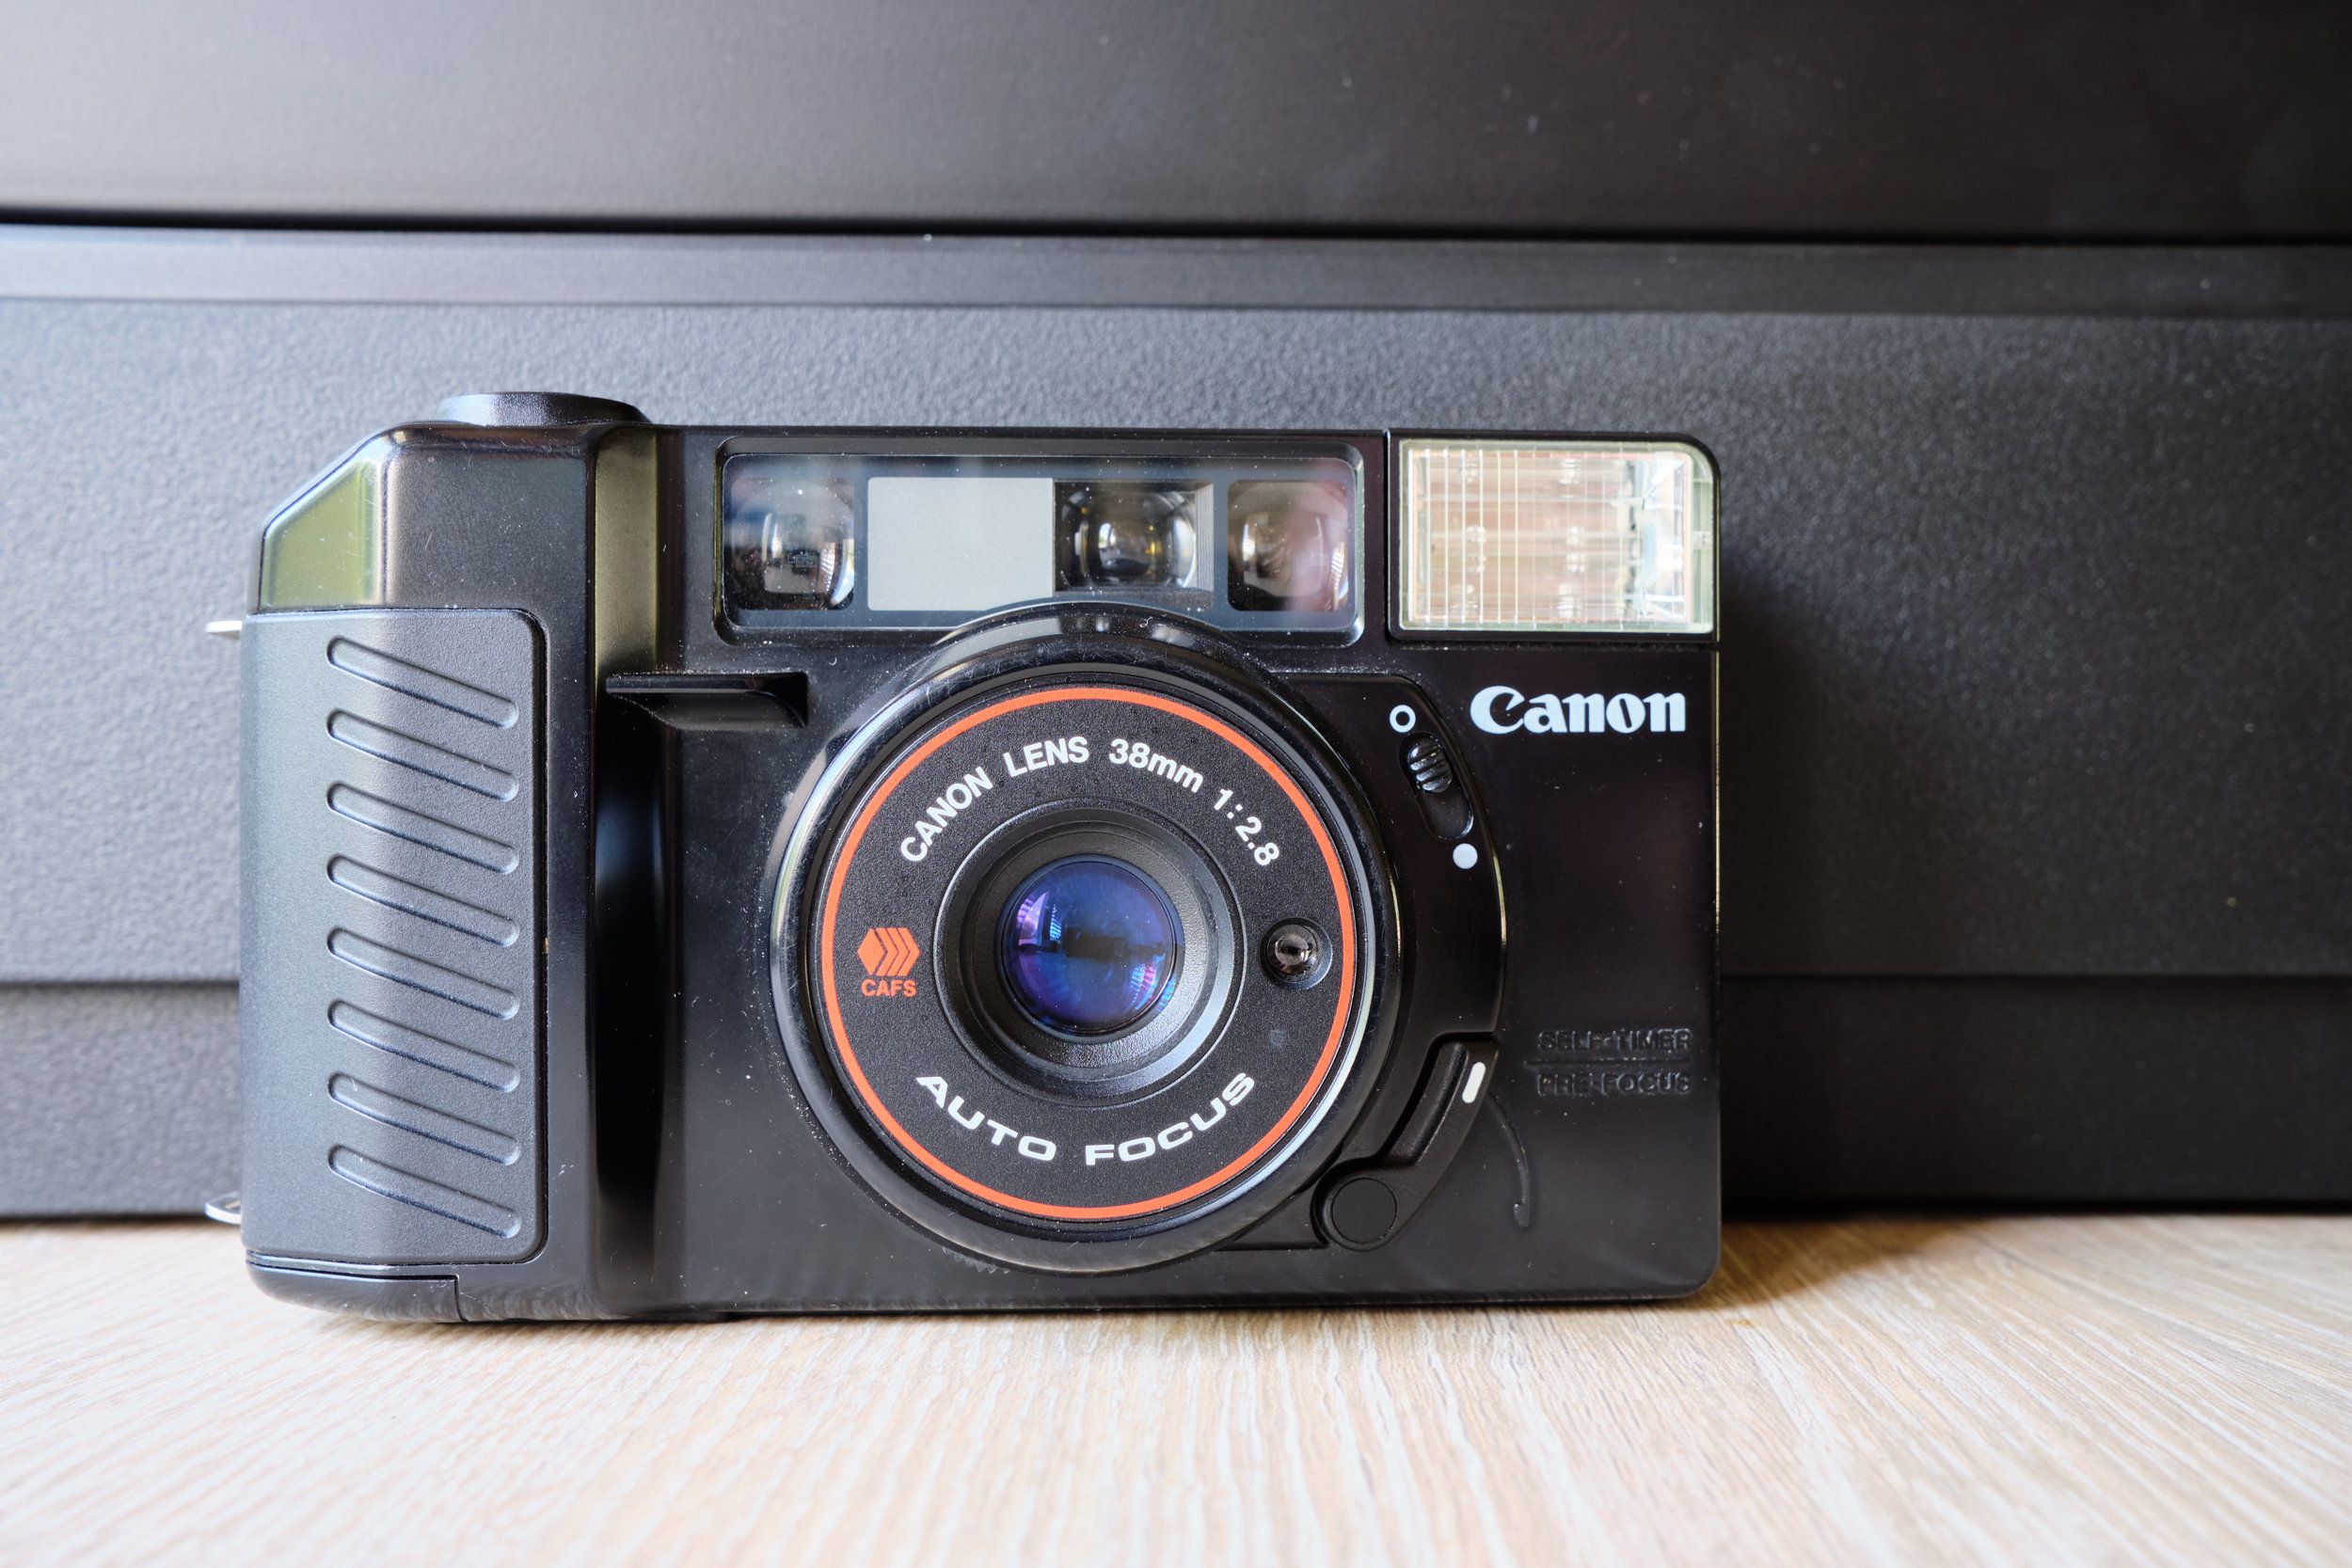
The Canon Sure Shot is the most automated of the three cameras. The only thing you have control over (sort of), is the focus. The switch on the front allows you to “Pre-focus”, though it’s anybody’s best guess where it’s actually focusing. There is a small scale in the viewfinder showing you about where it’s focusing, but I really have no idea what the scale means in practice. Other than the pre-focusing option, all you do is point and shoot and hope that the photo turns out.
A little bit about the camera:
35mm film
38mm f/2.8 Lens
Completely automatic point & shoot (except for the pre-focus)
Decently sharp lens
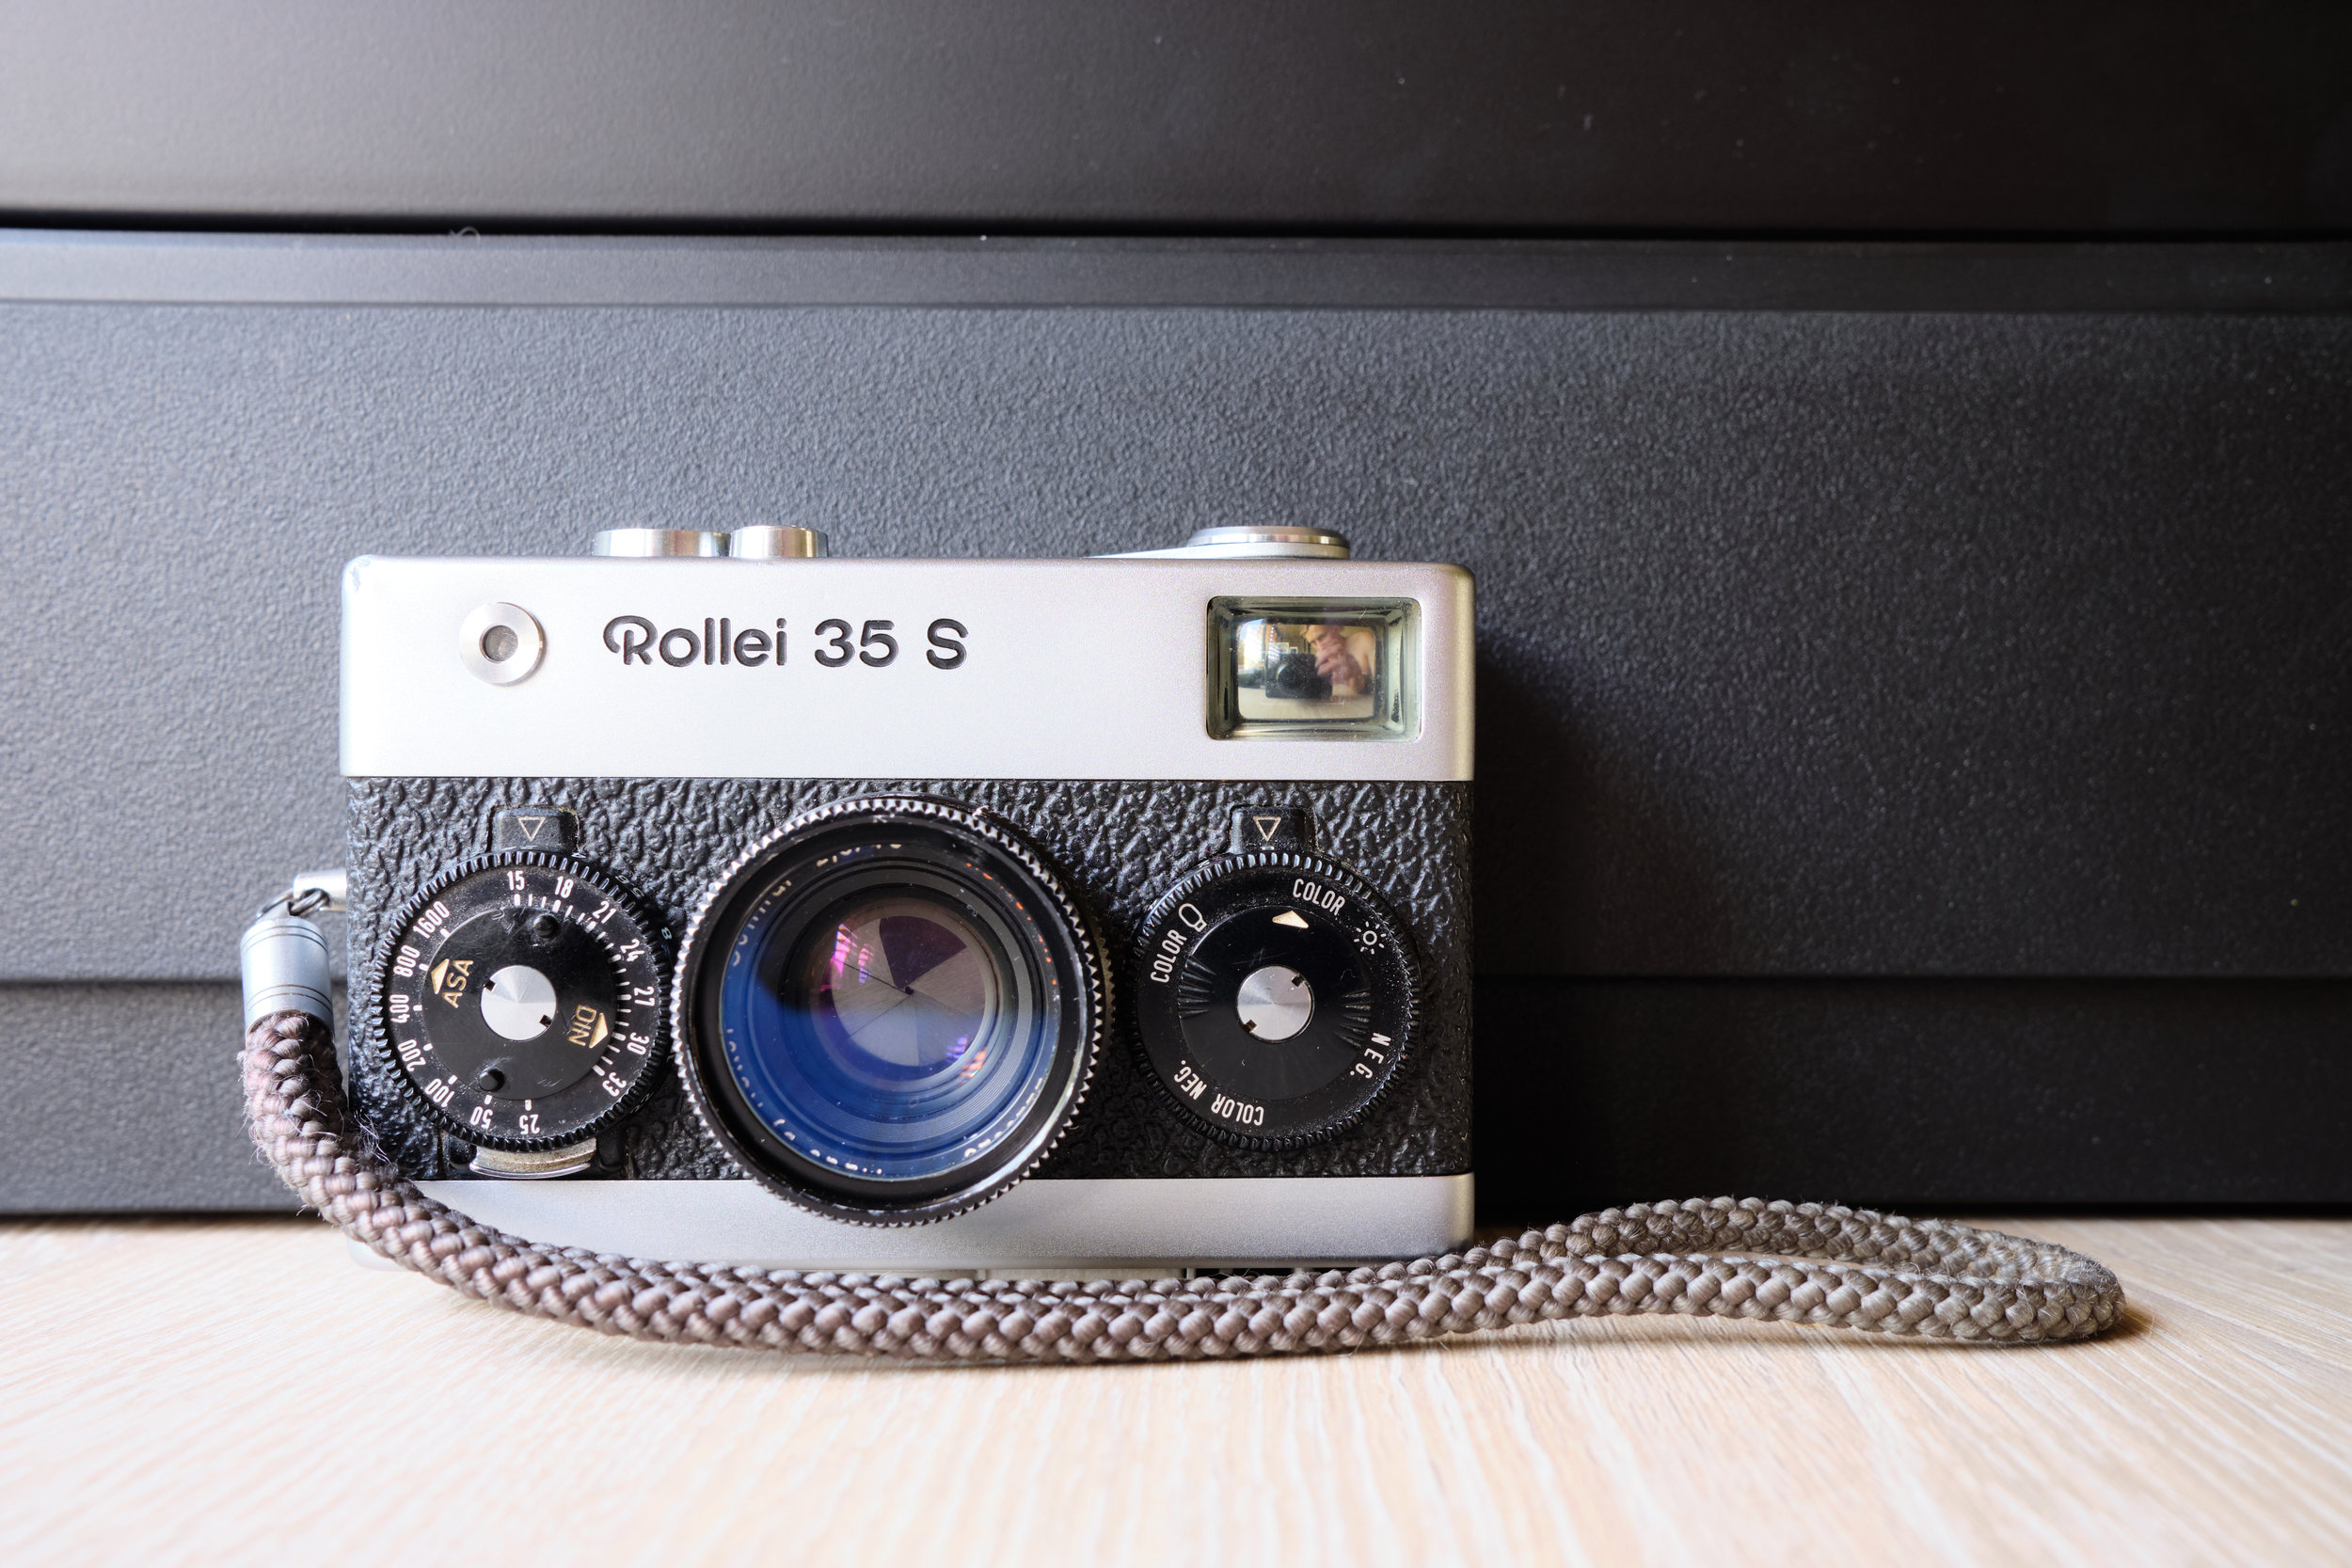
The Rollei 35 S is completely manual and the most compact of the three cameras. It does have a light meter to help determine proper exposure but finding a battery for it isn’t the easiest; I’ve been guessing exposure. Shutter speed and aperture are controlled by the two front dials. Focus is of the zone-focusing style, which is basically guessing distance and hoping you get it right. This is the most well made camera of the three as well. 1960’s german engineering is something else.
A little bit about the camera:
35mm film
Completely manual
40mm f/2.8 Sonnar Lens
Most compact and extremely well built

The Olympus XA2 is a strange mix between the two other cameras. You must move the switch on the left of lens to determine where it will focus, so a much less accurate version of zone-focusing. Exposure is completely automatic. I feel most comfortable sliding this camera in a pocket since the lens is covered when closed. I’m not sure which one is quieter, this camera or the Rollei. Advancing to the next frame is the same as disposable cameras, with an edged wheel on the right side.
A little bit about the camera:
35mm film
35mm f/3.5 Zuiko Lens
Mix of manual and automatic
Easily the lightest of the three
I will write up a full review of each of the three cameras in the next month or so, going into more detail and showing pictures I’ve taken with each one. In the mean time, I’m going to hunt for a battery for the Rollei so I hopefully get some in focus shots.
Enjoying *Most* of the Process
There are multiple reasons I started shooting film again, but the biggest reason is that it slows me down and makes me more present in the moment. Shooting film is inherently a slow process, and since I started developing and scanning at home, it has become even slower.
There are multiple reasons I started shooting film again, but the biggest reason is that it slows me down and makes me more present in the moment. Shooting film is inherently a slow process, and since I started developing and scanning at home, it has become even slower. I’m learning to set aside an hour or two a week to develop film that has been sitting idly by for sometimes two months before I get to it.
Shooting is obviously my favorite part of the whole experience. Developing only takes about 20 minutes from start to finish, hanging to dry takes about two hours. I find the process of developing very therapeutic; I am fully engulfed in the moment, and it feels like my own form of meditation.
After the film has dried, I get to cutting it up into scannable sections to hopefully make it a little more efficient.
BUT, scanning is awful. It’s painfully slow, the software is buggy and reminiscent of early 2000’s Internet Explorer. It’s like someone designed the software back in ‘01 and failed to ever update the interface. Trying to edit within the scanning software feels like walking through the woods on an unknown trail, blindfolded. You take one step off the trail, kick a rock, trip and fall into a ditch. I’m only being slightly dramatic. Pull up the histogram to edit the blacks, mid-tones, and highlights, and what you see happening to your photo doesn’t make any sense compared to what you’re doing to the histogram. It’s incredibly inaccurate and doesn’t loan much confidence in the scanning program.

Epson V750 - Nothing PRO about it.
Another issue I had with scanning was the inability to leave the computer and software to run and go do something else. If you didn't keep clicking on the screen between every photo, it would stop. How incredibly efficient. After digging through a couple pages of Google results, I actually found out there is a solution to this stop-go issue I was having. I had to download another file which was separate from the main program, restart the whole software, and then it would scan continuously like it’s supposed to. I have no clue as to why they chose to keep those things separate instead of just including it in an update. But again, early 2000’s design.
Scanning does go quite a bit faster now, but it’s still the worst part of shooting film. If I have a professional lab do the scanning, I have to pay at least $20 a roll, and that adds up quickly with how much I shoot. Scanning at home is the more economic option, but my $300 scanner doesn’t quite give the quality that the professional lab’s $15,000 scanner is capable of.
If I try to push the scans too much while editing afterwards, they get some gnarly lines going up and down the frame. Everyone loves seeing lines going across the frame and spending 30+ minutes trying to edit them out right?

Unedited scan from an unnamed lab in Arizona. Notice the vertical lines across the entire image.
Any attempt to make the scanner do what it’s designed to do, and it’ll wreak havoc on the scans. I tried to apply the “Digital ICE” function to this picture to have the dust, scratches and other blobs removed from the photo. It didn’t work in the least bit, and honestly I think it made the entire scan worse than if I had kept it off like usual. These scans were a cluster from the beginning, as the lab I went to in Arizona mailed back the negatives on top of one another, which in the film world is a huge no-no. They stuck together, ready to rip off the emulsion from the negatives.
Thing is, just because there’s one awful part to shooting film, doesn’t mean I’ll stop anytime soon. The majority of the process is a blast, scanning just sucks. I leave the negatives under books for a couple days to help flatten them out anyways, and I’ve found myself doing that more often now that I’m scanning at home. Maybe one day I’ll be able to invest in a $15,000 scanner, but that ain’t happening for a long, long time. Until then, I’ll keep dealing with this crap shoot of a system.