
Old Photos
DISCLAIMER: I wrote this at the end of February, so before all of the insanity of COVID-19 was around.
For the past couple months, I’ve been thinking about going through and editing old photos to bring them up to my current standards and editing style. For the first couple of years with my digital camera, I was exporting images in the wrong color profile, which would wash out the colors, making them look dull and lifeless.
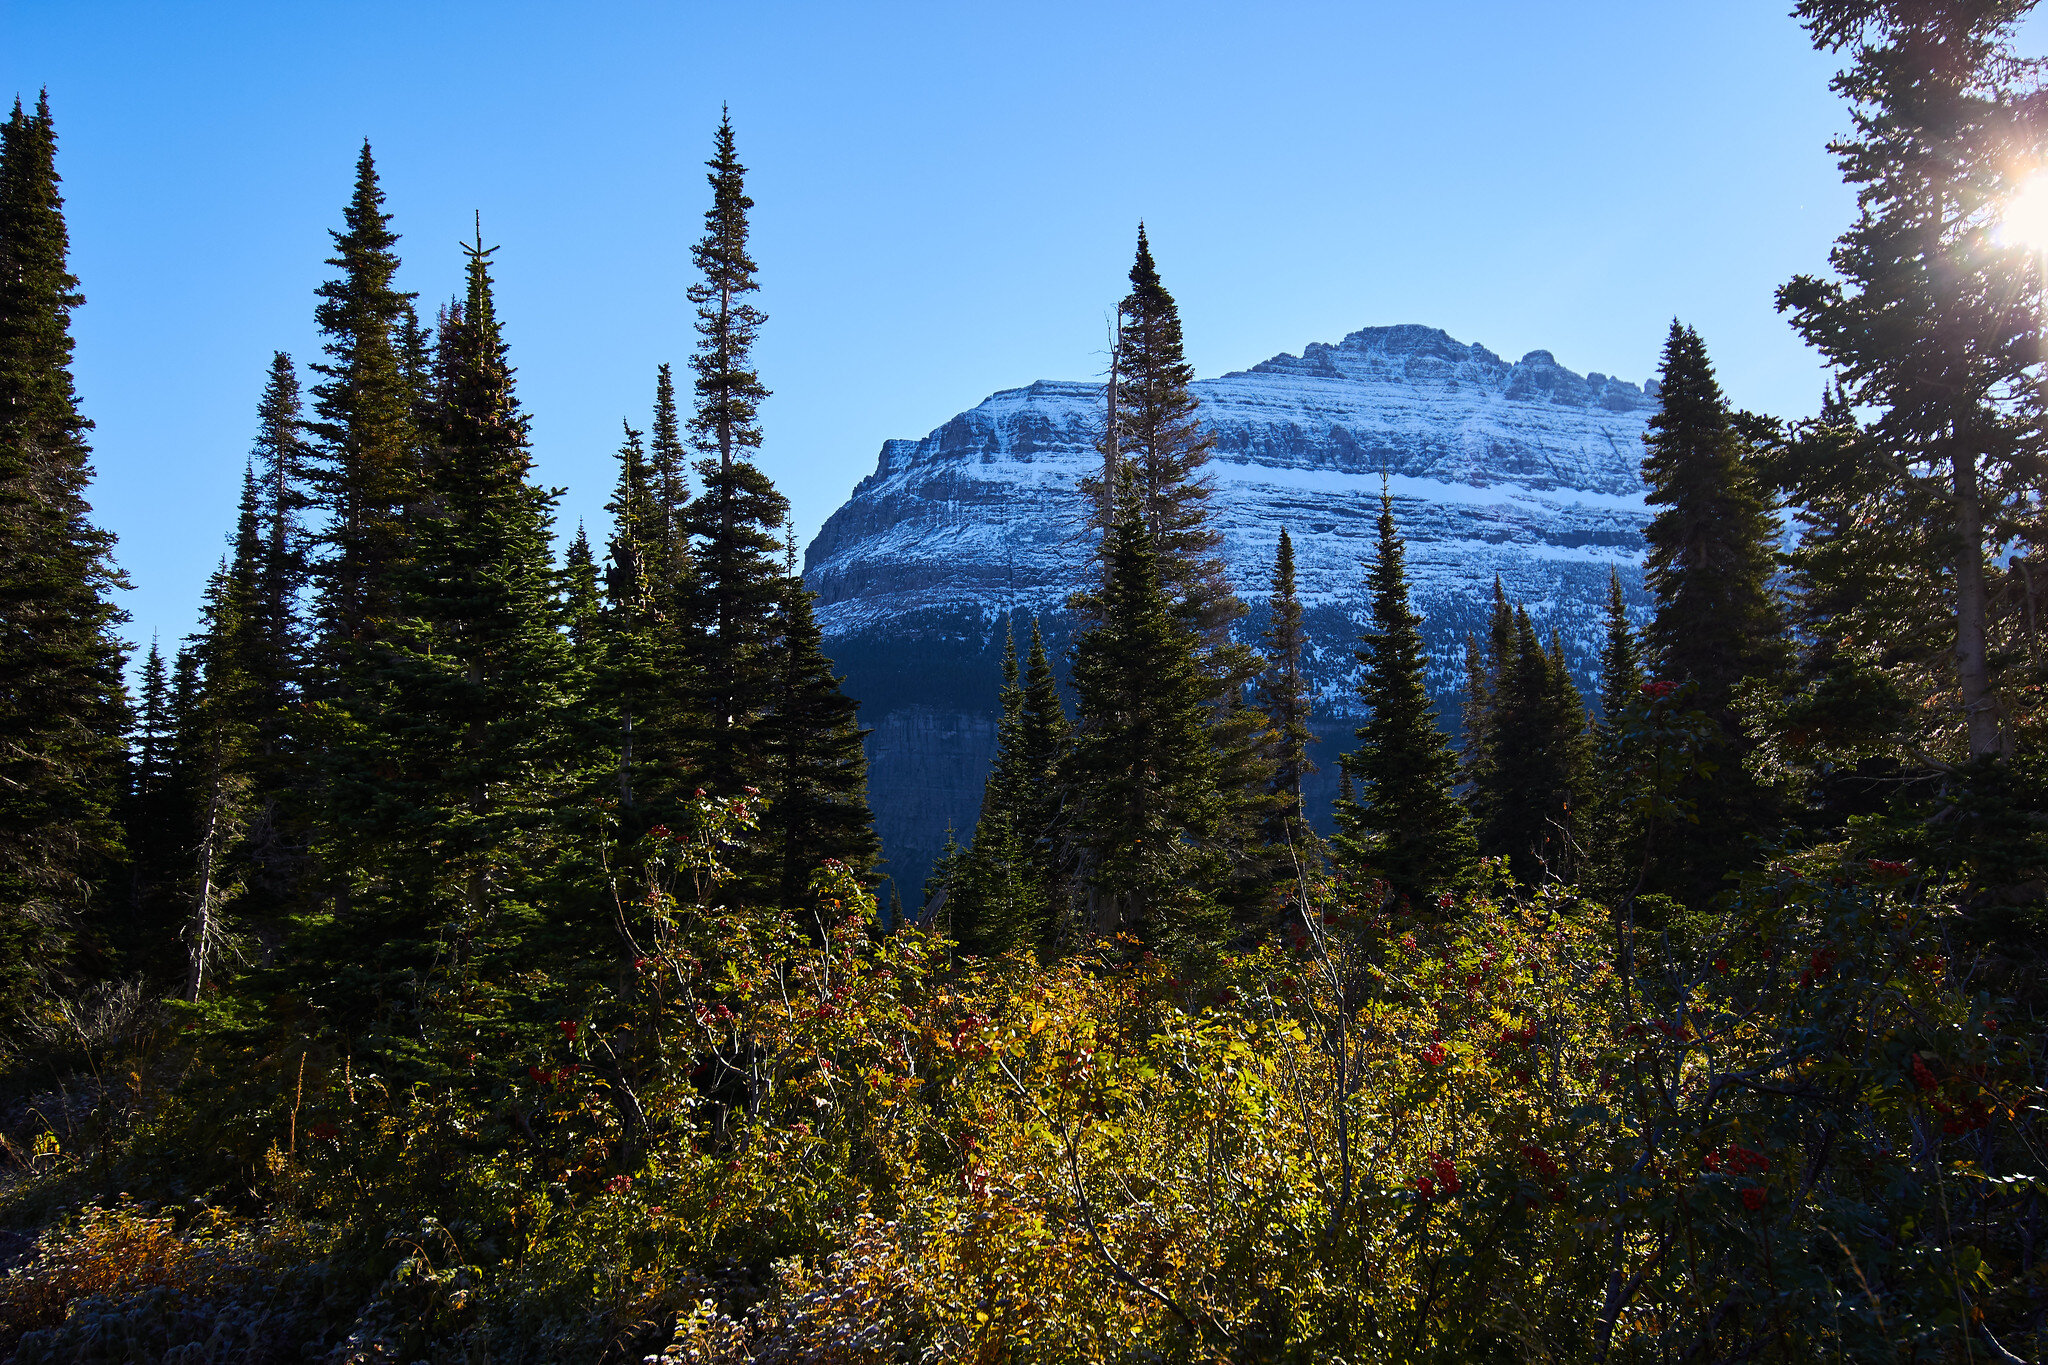
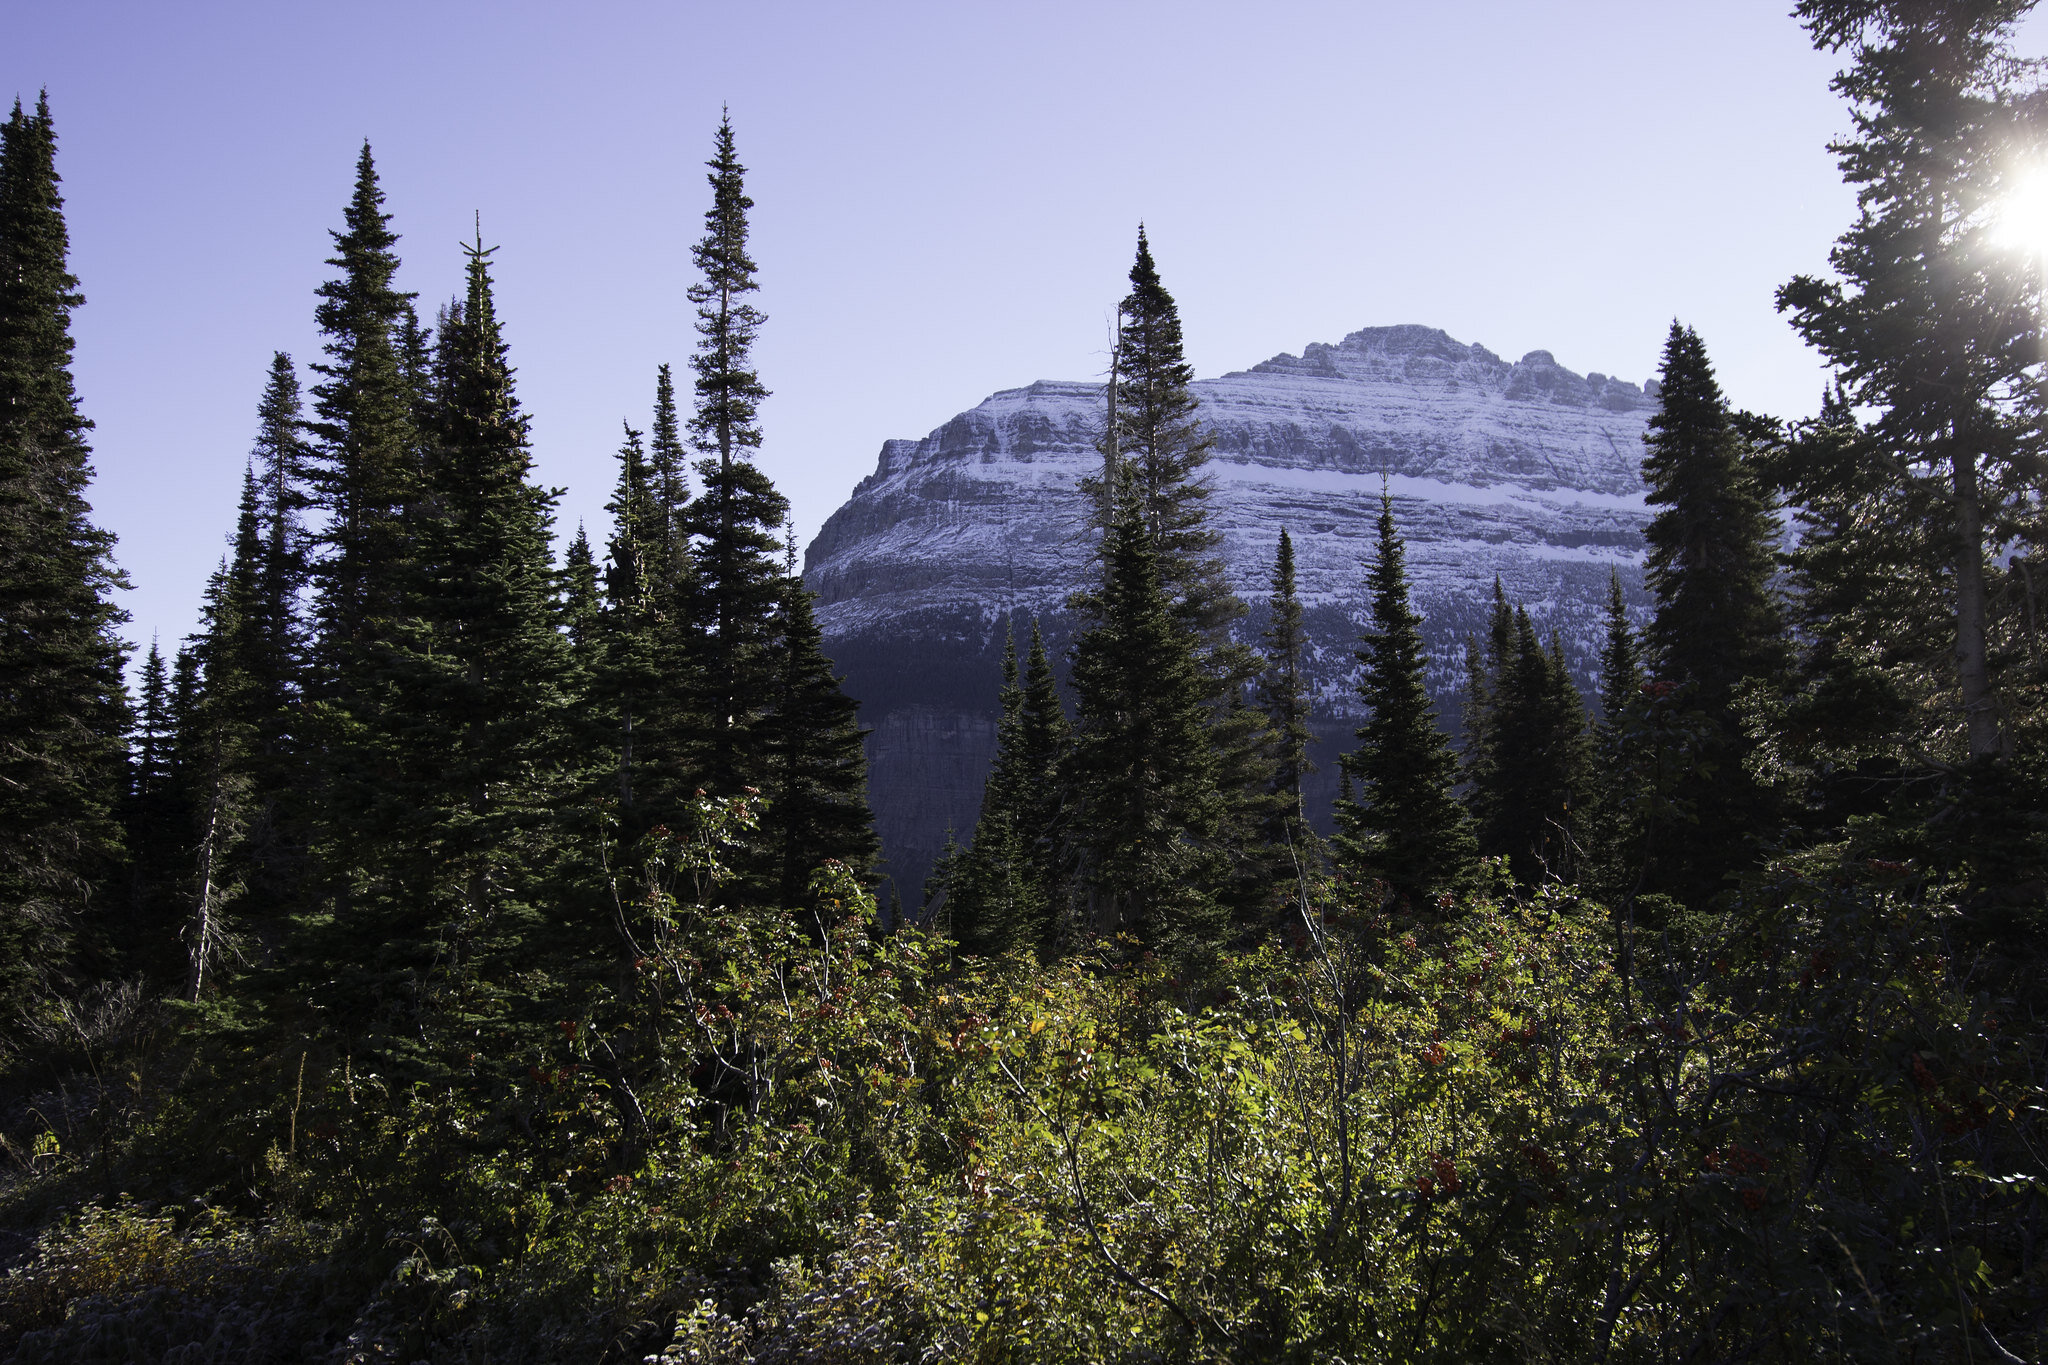
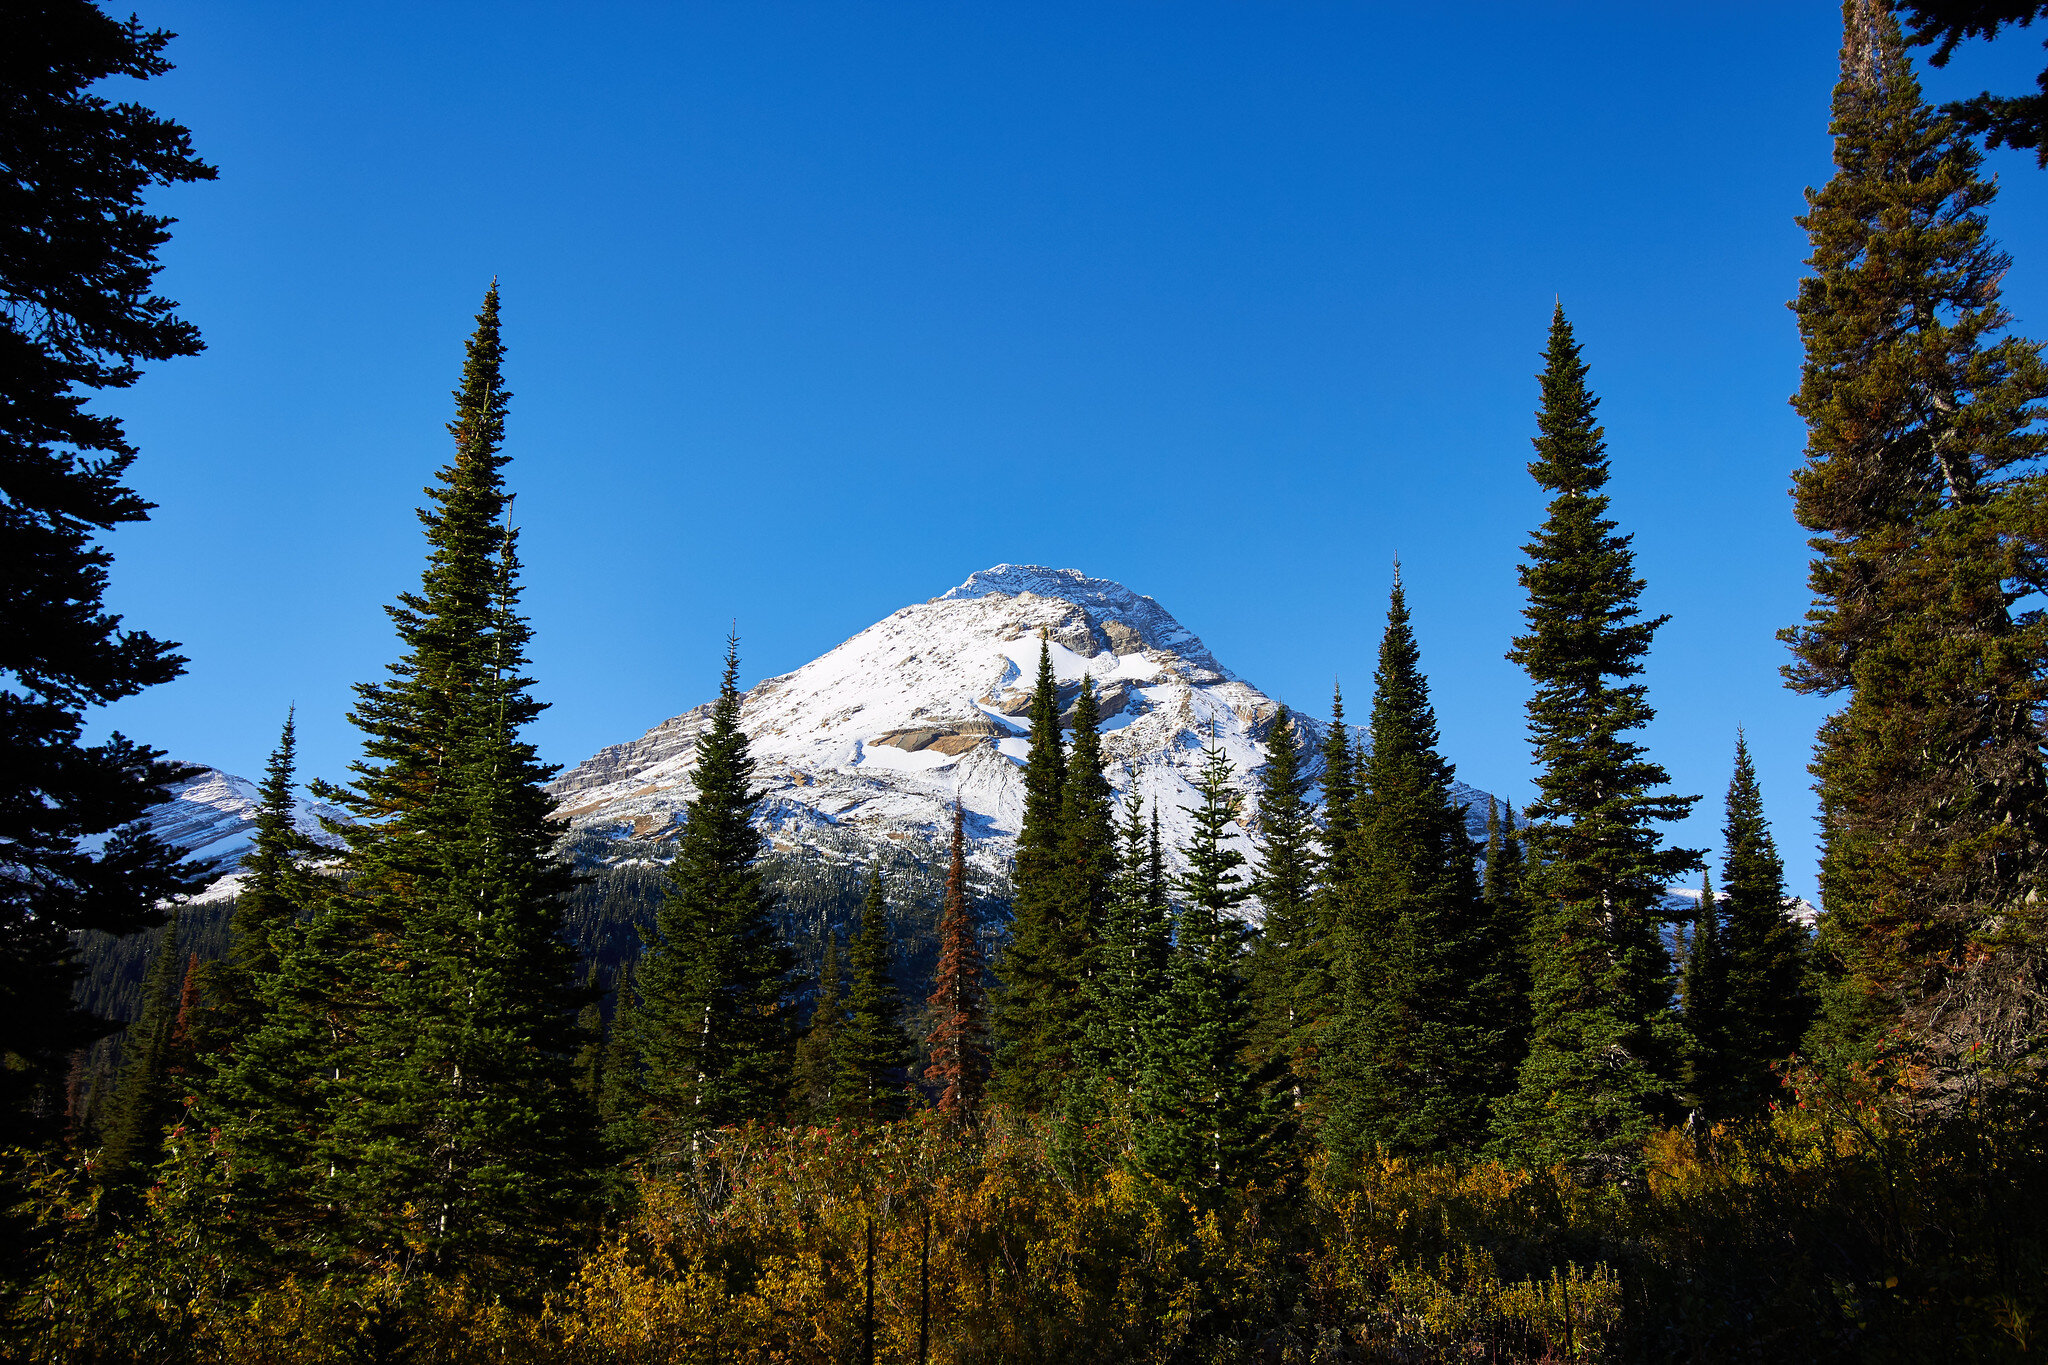
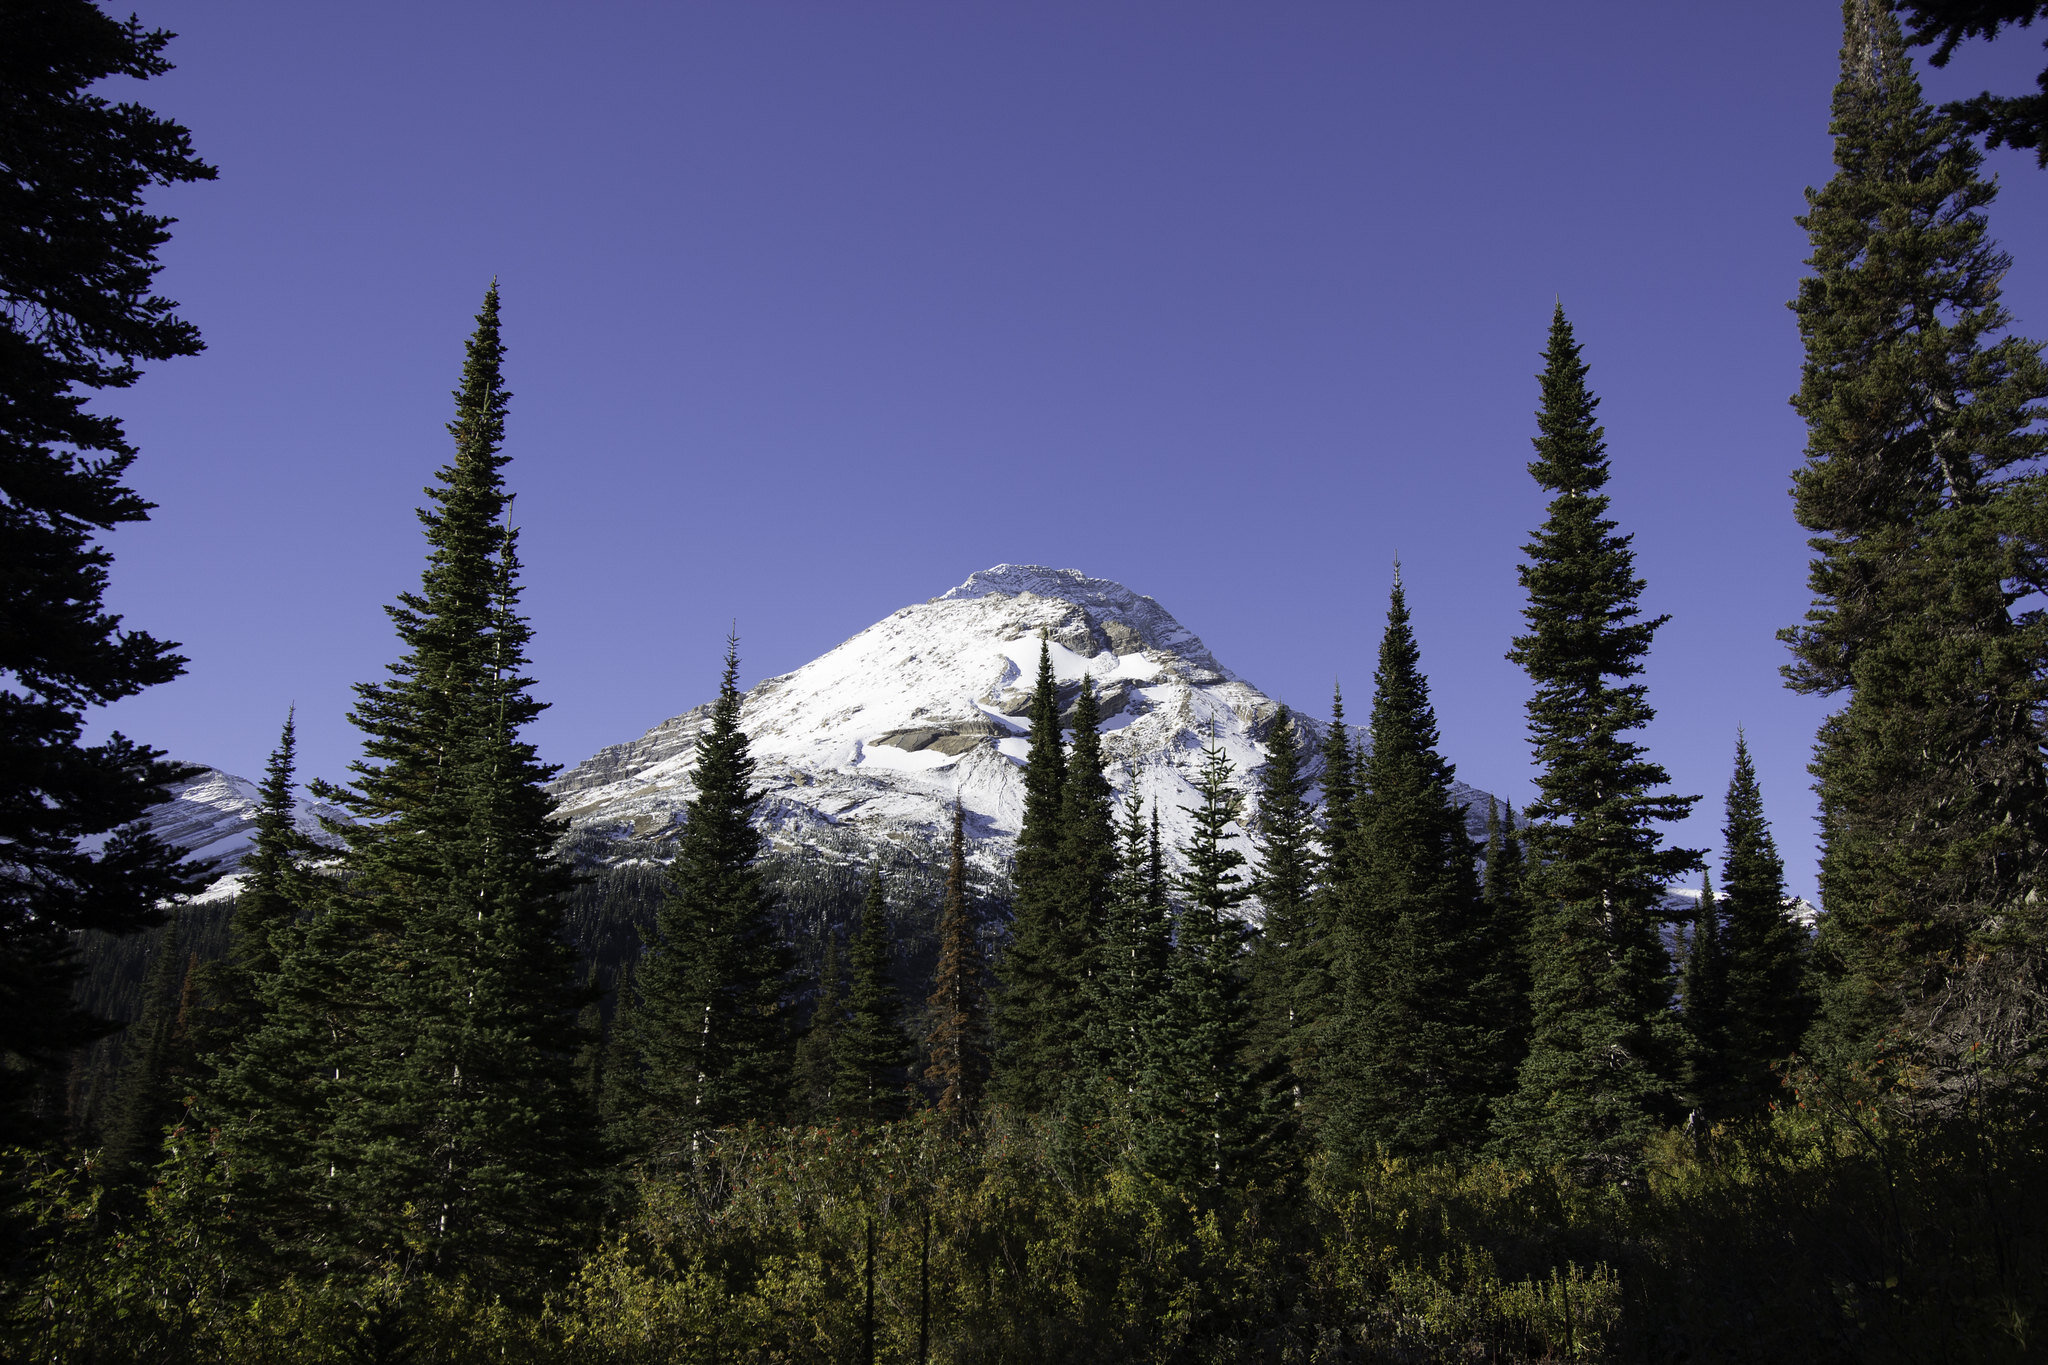
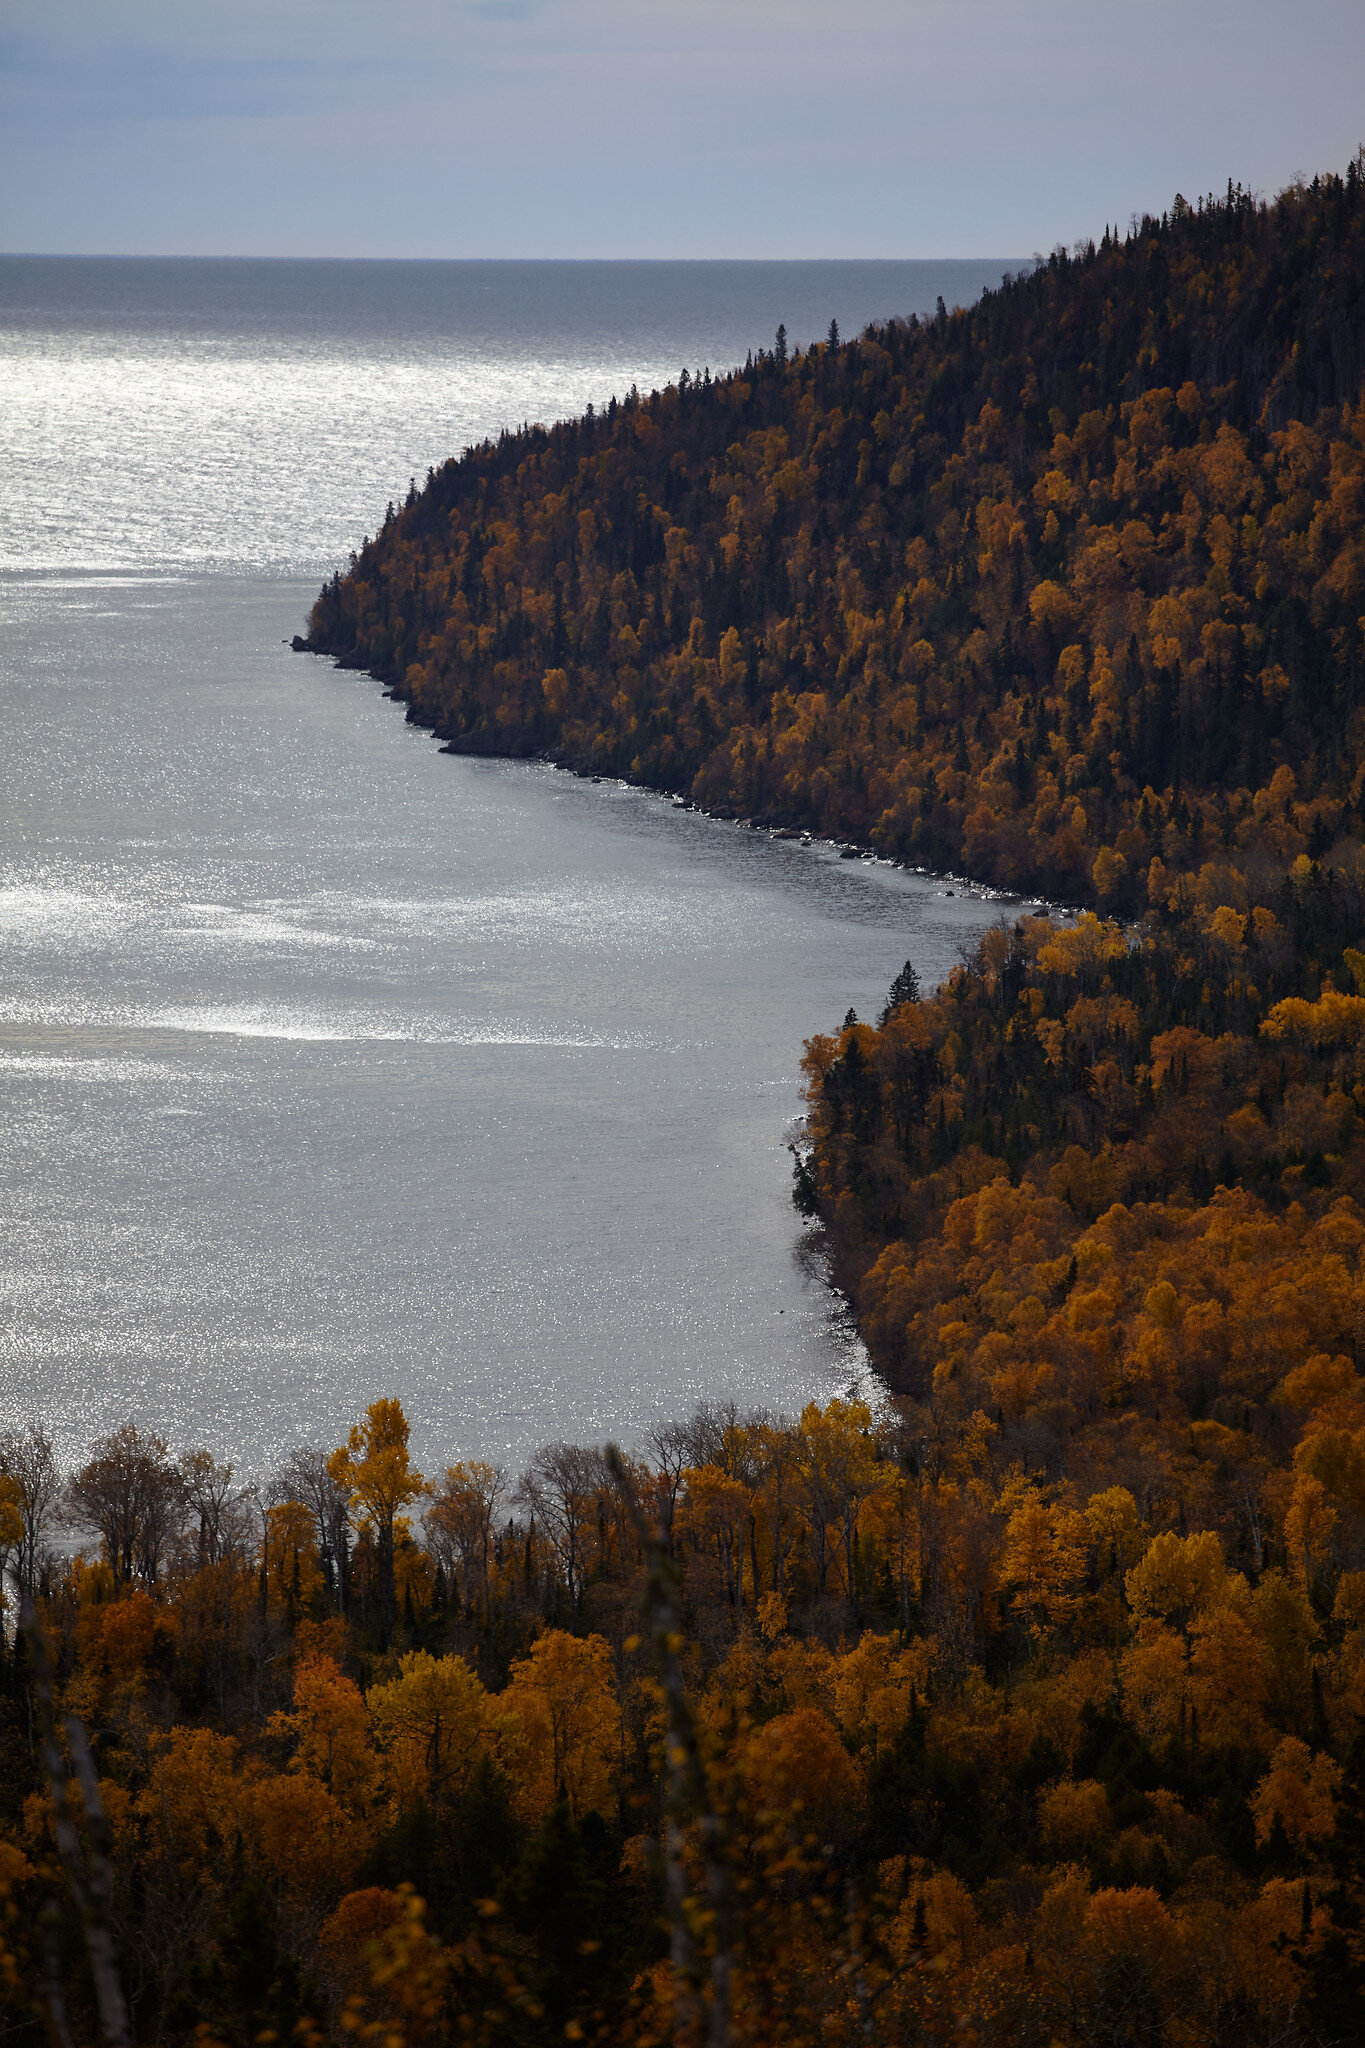
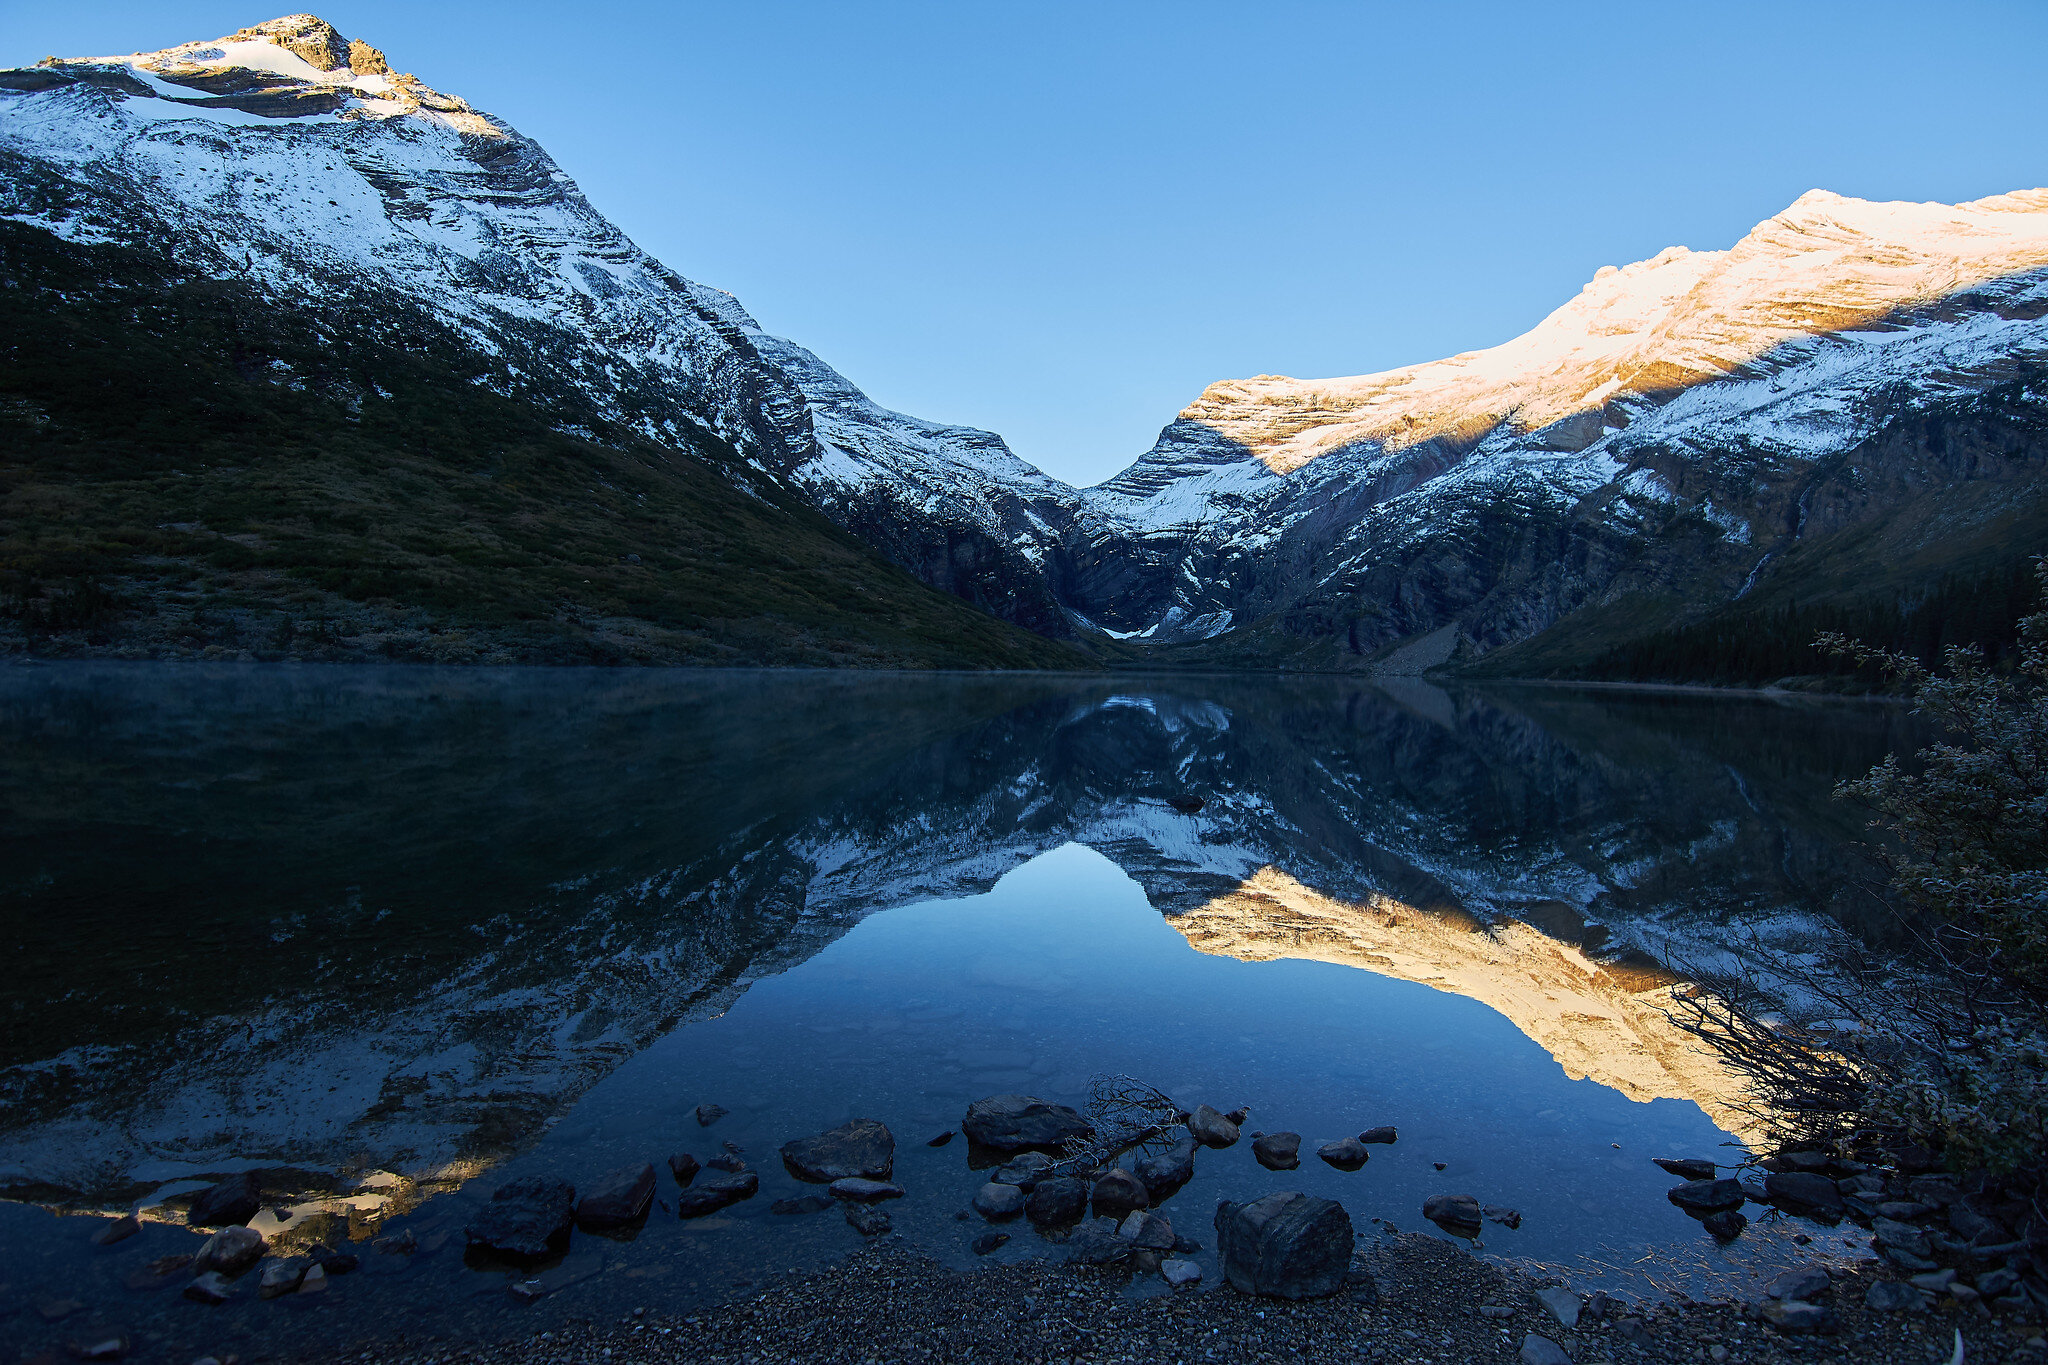
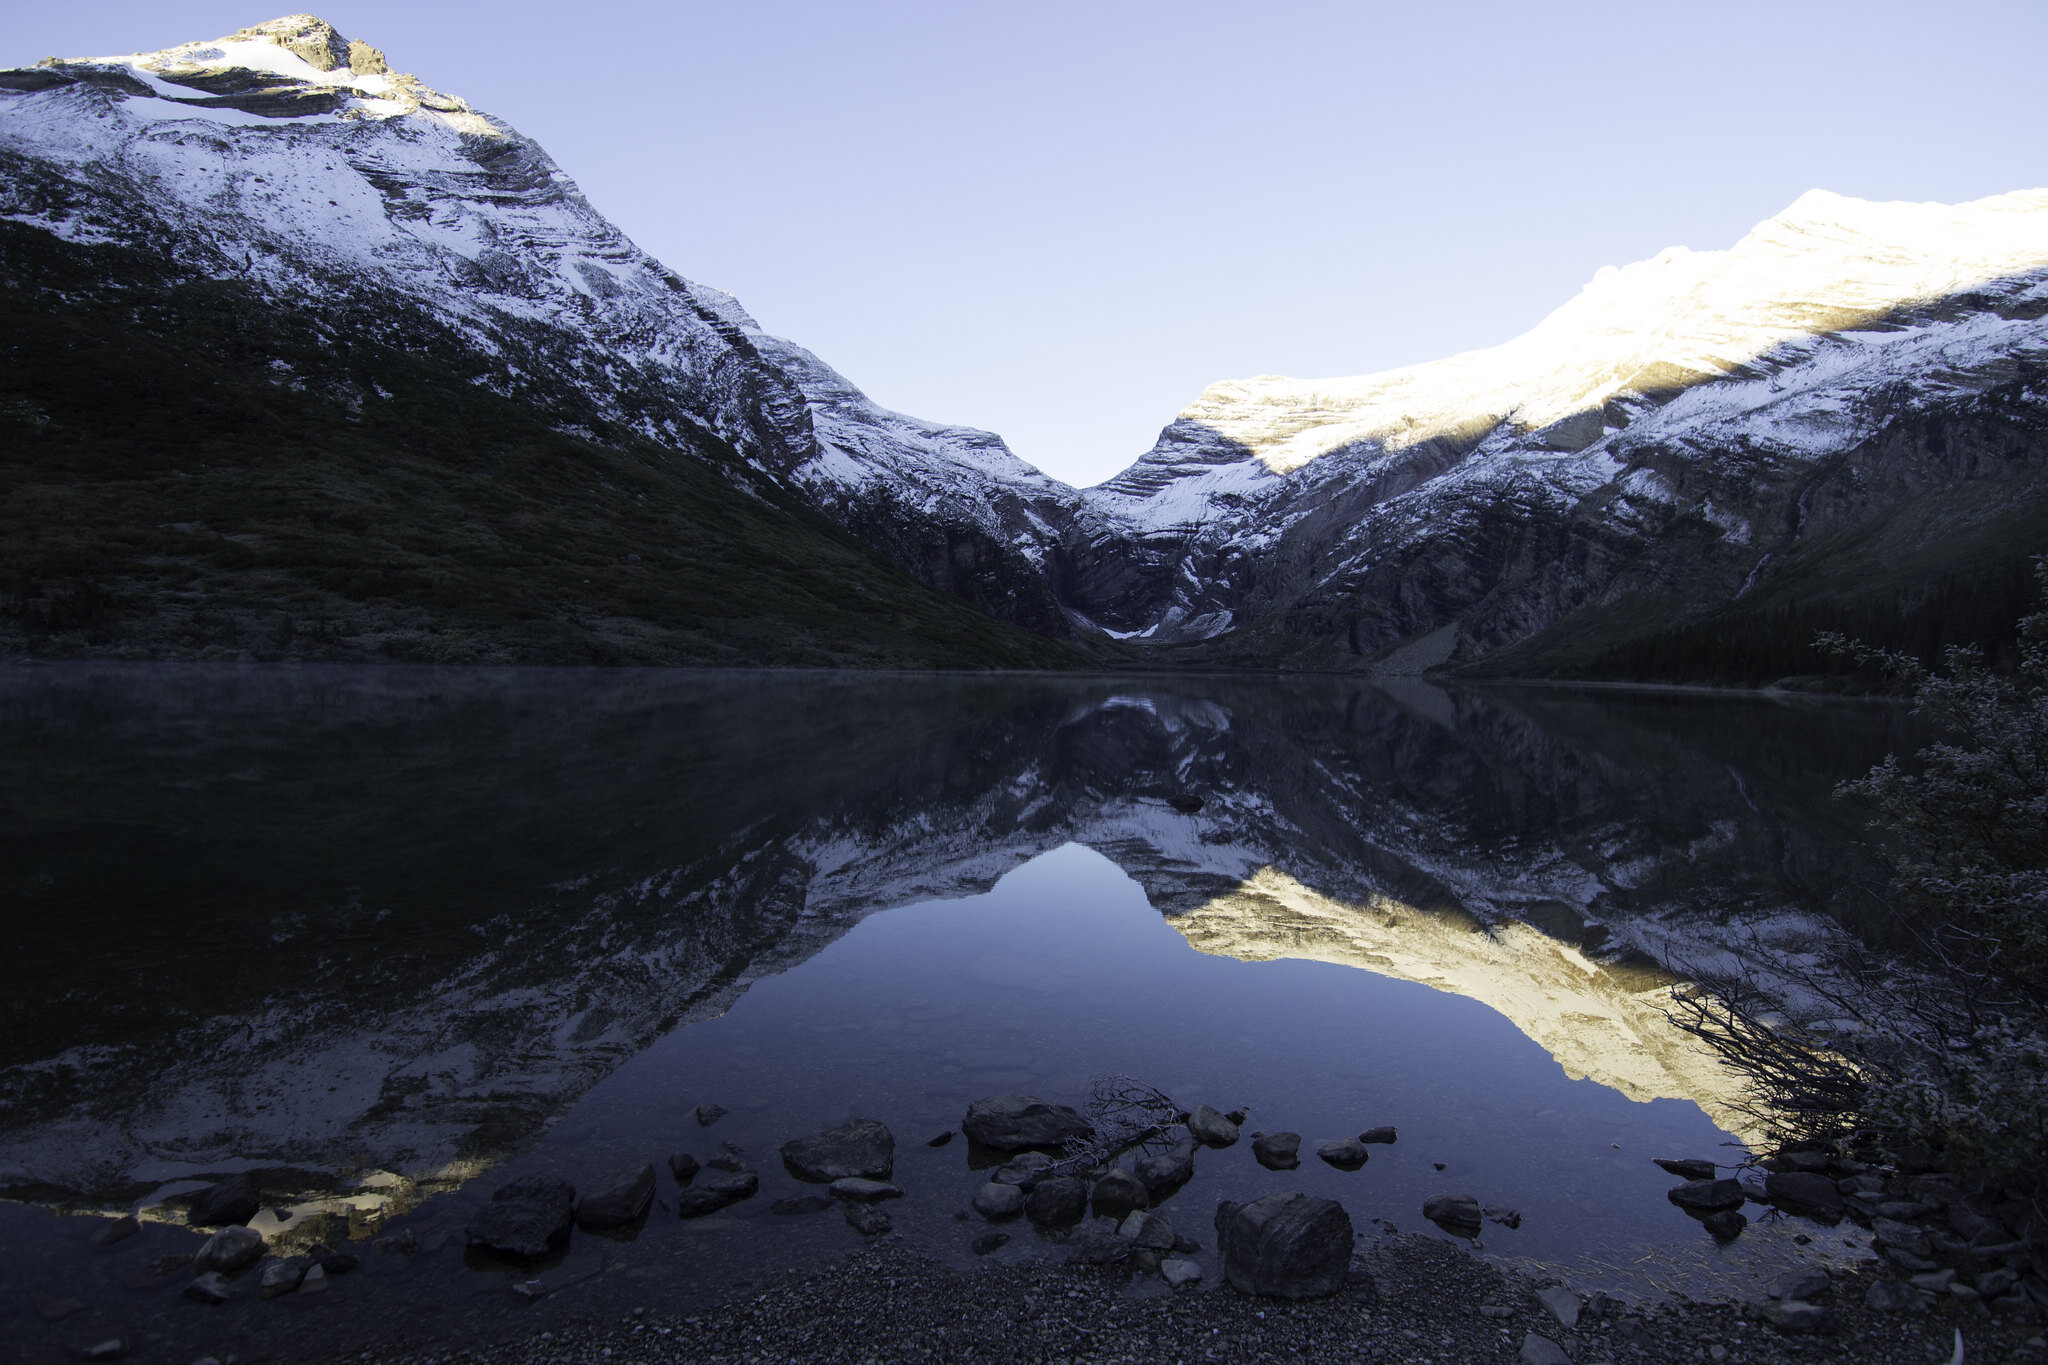
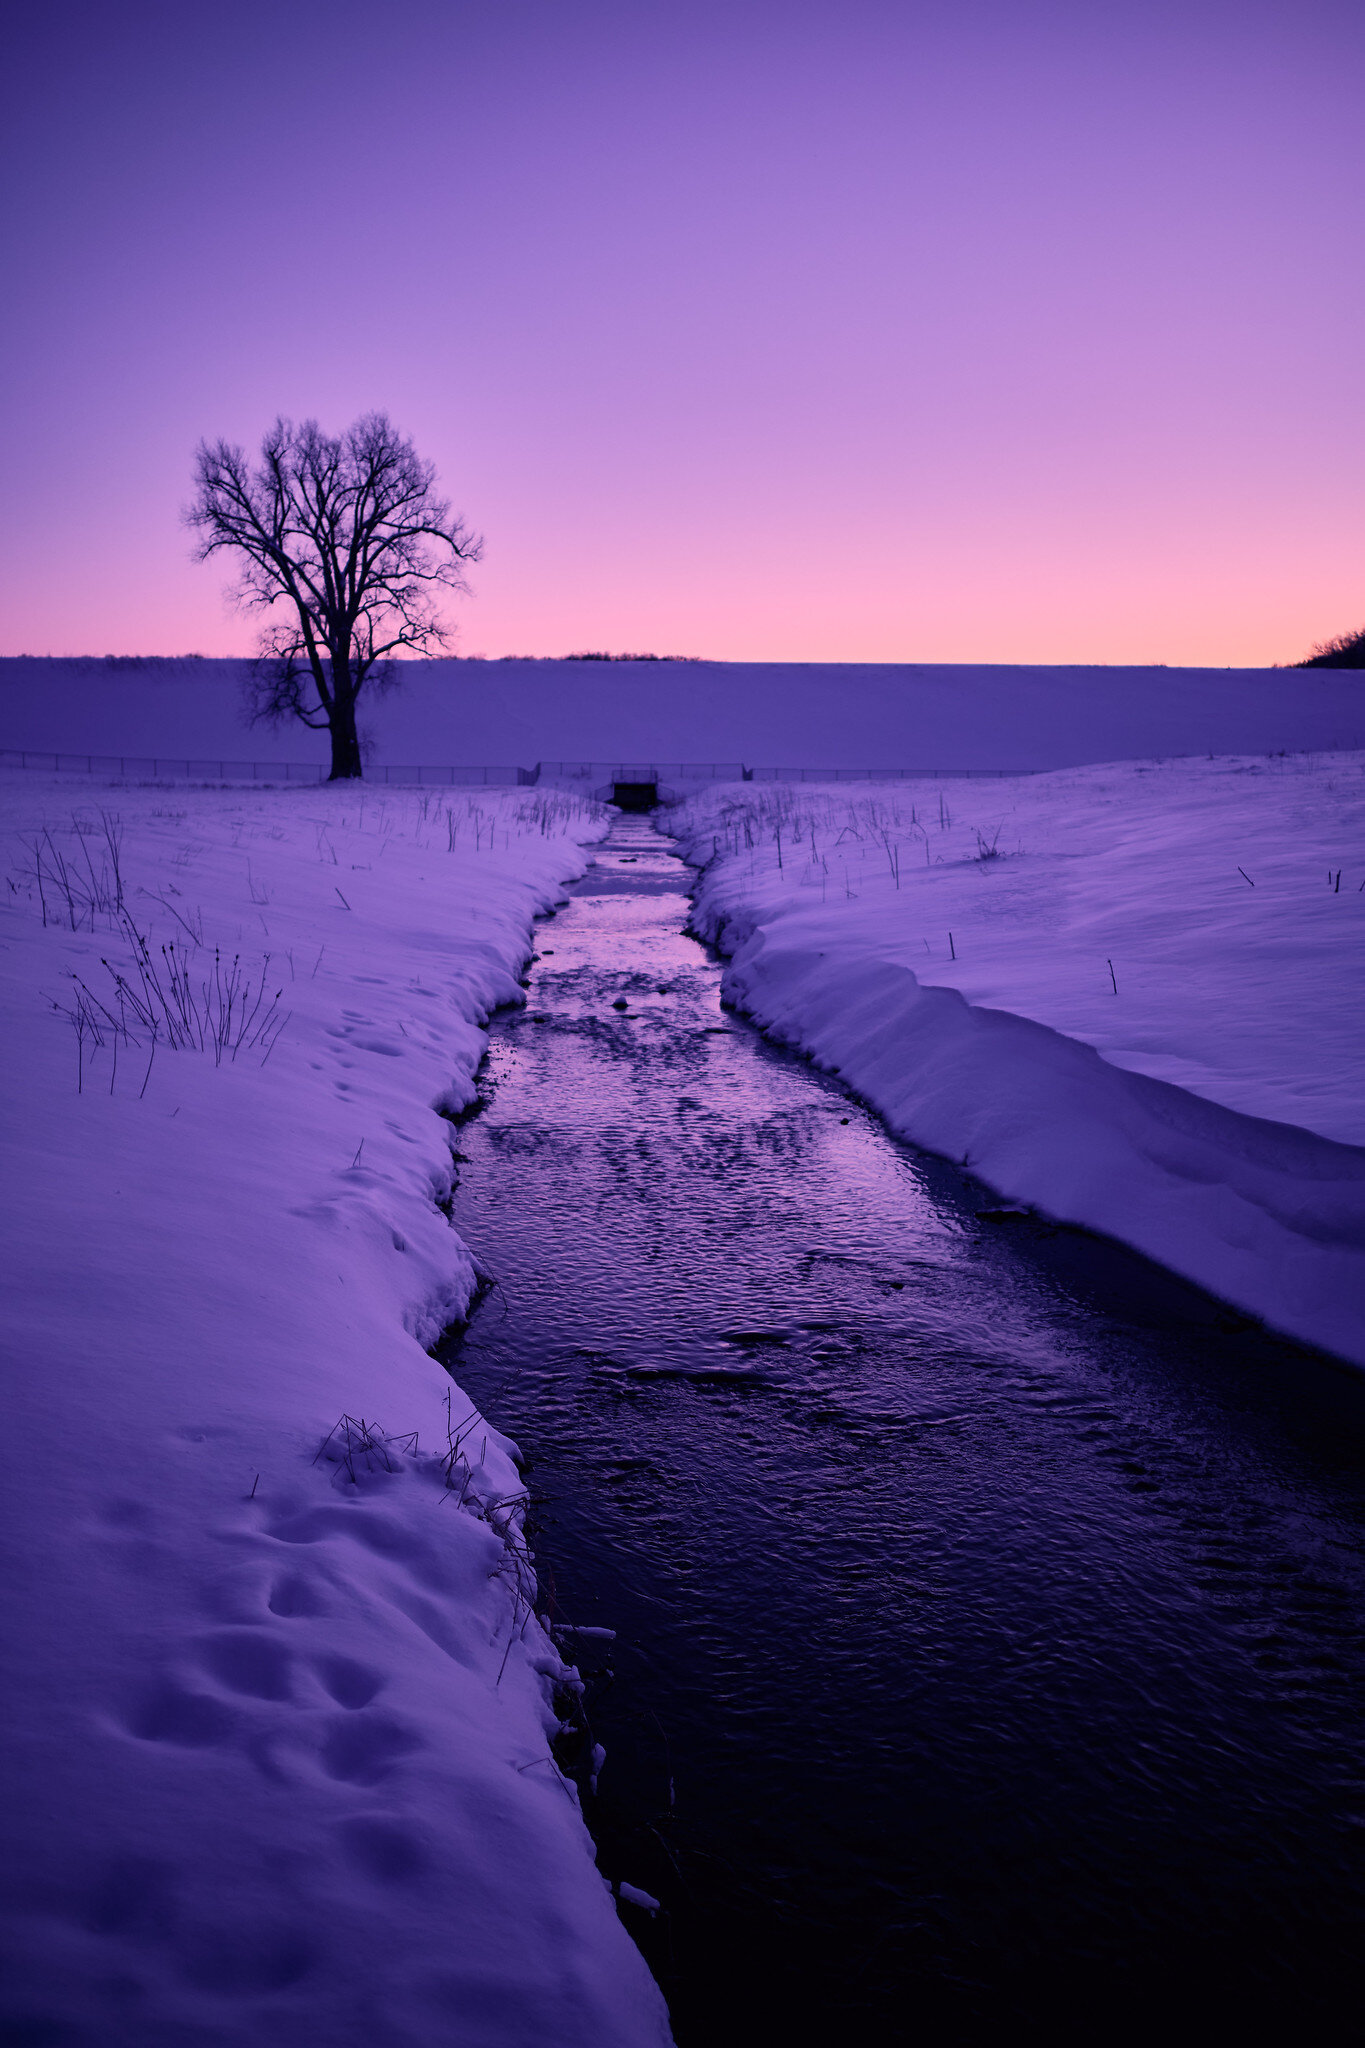
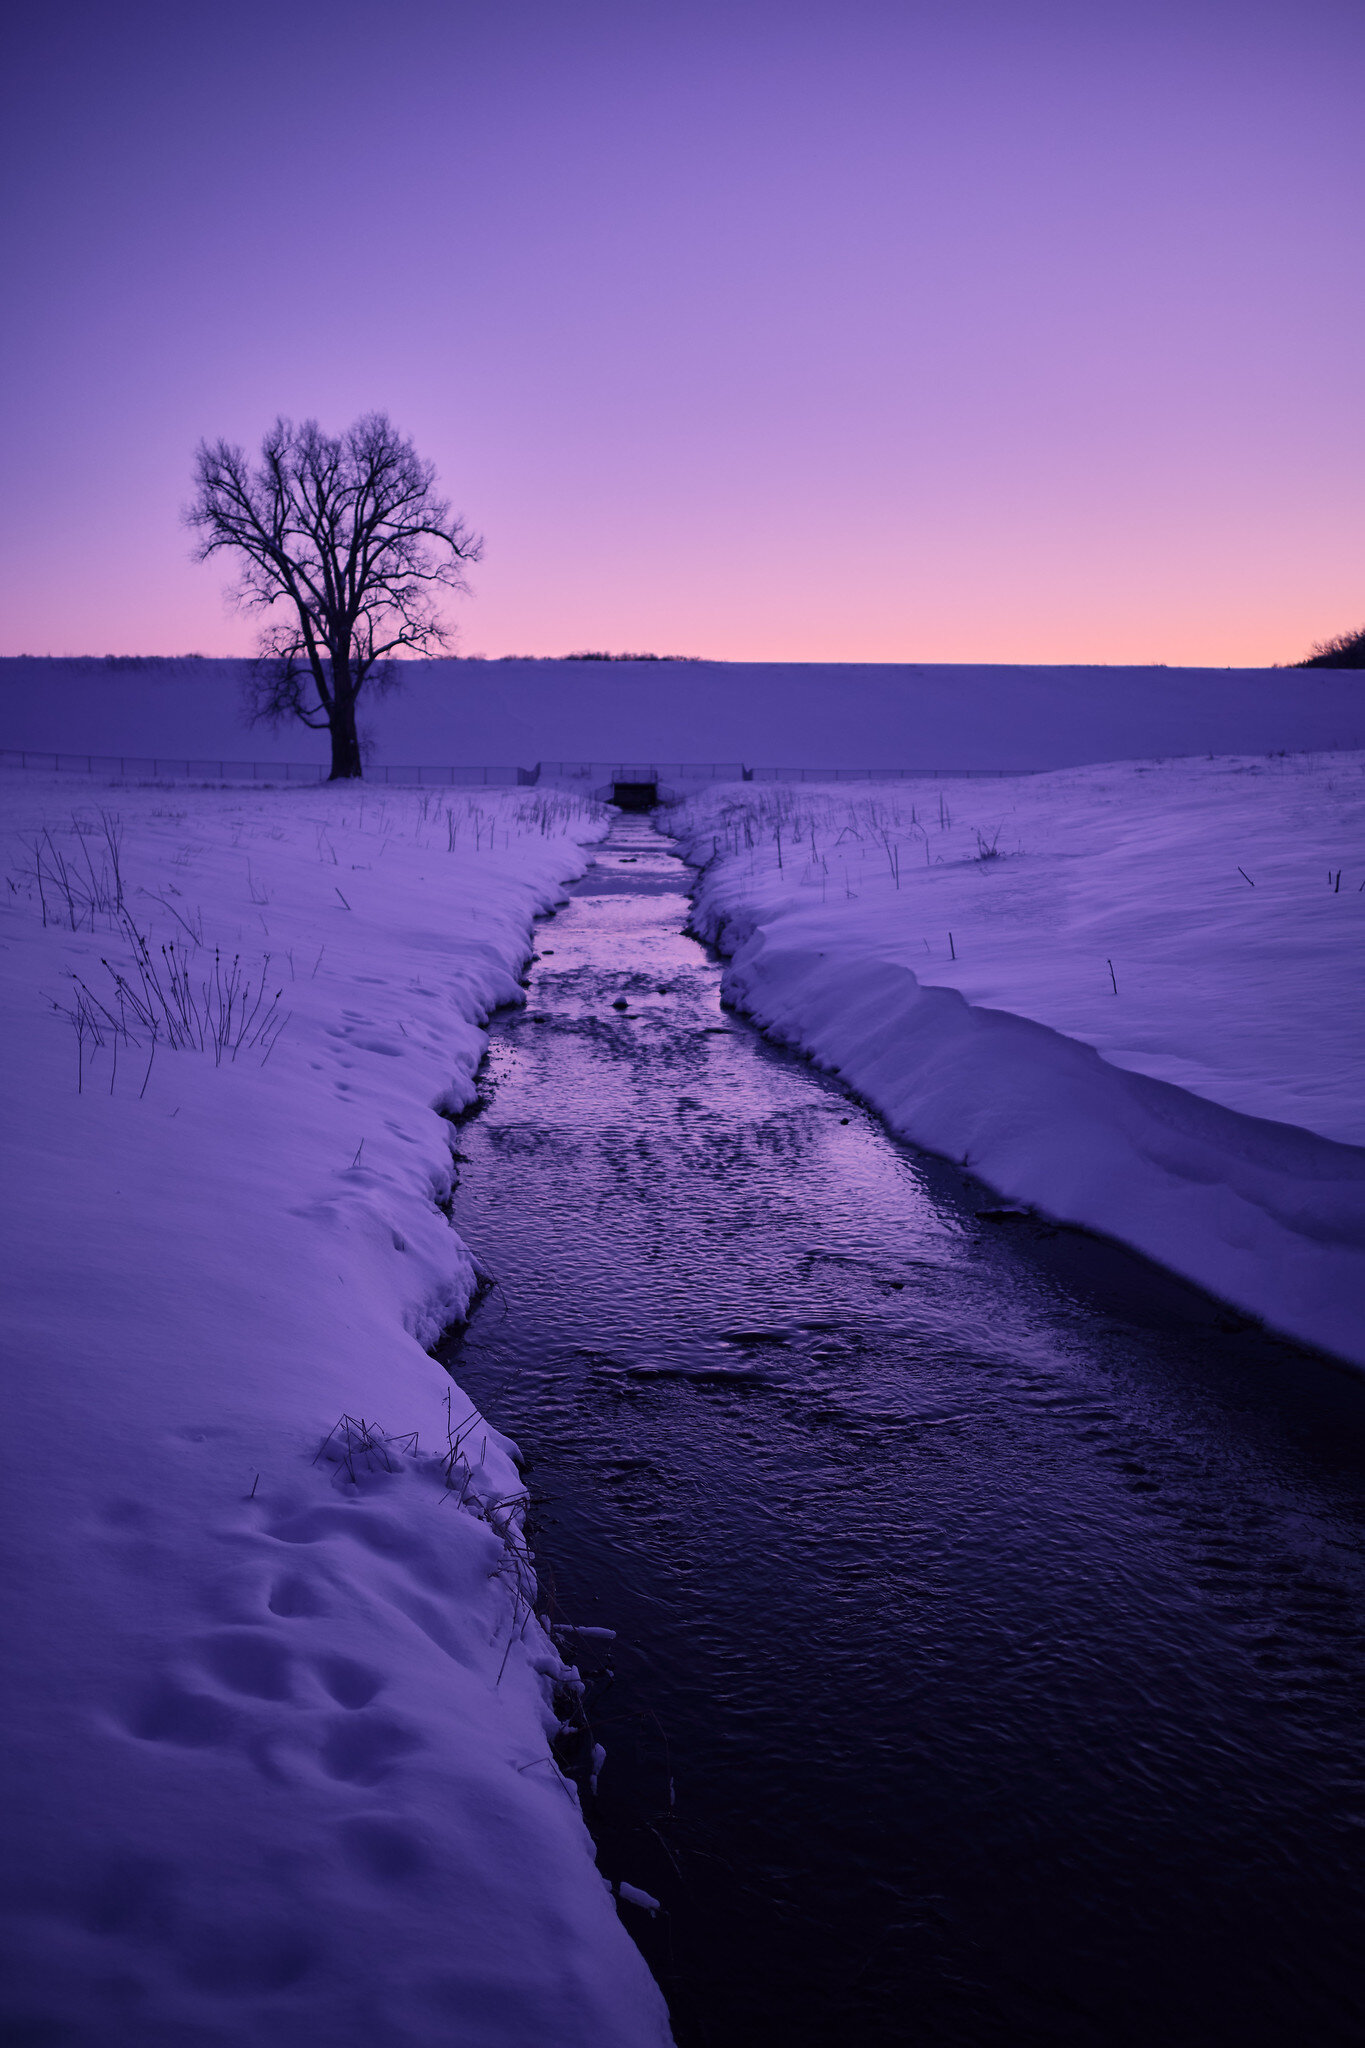
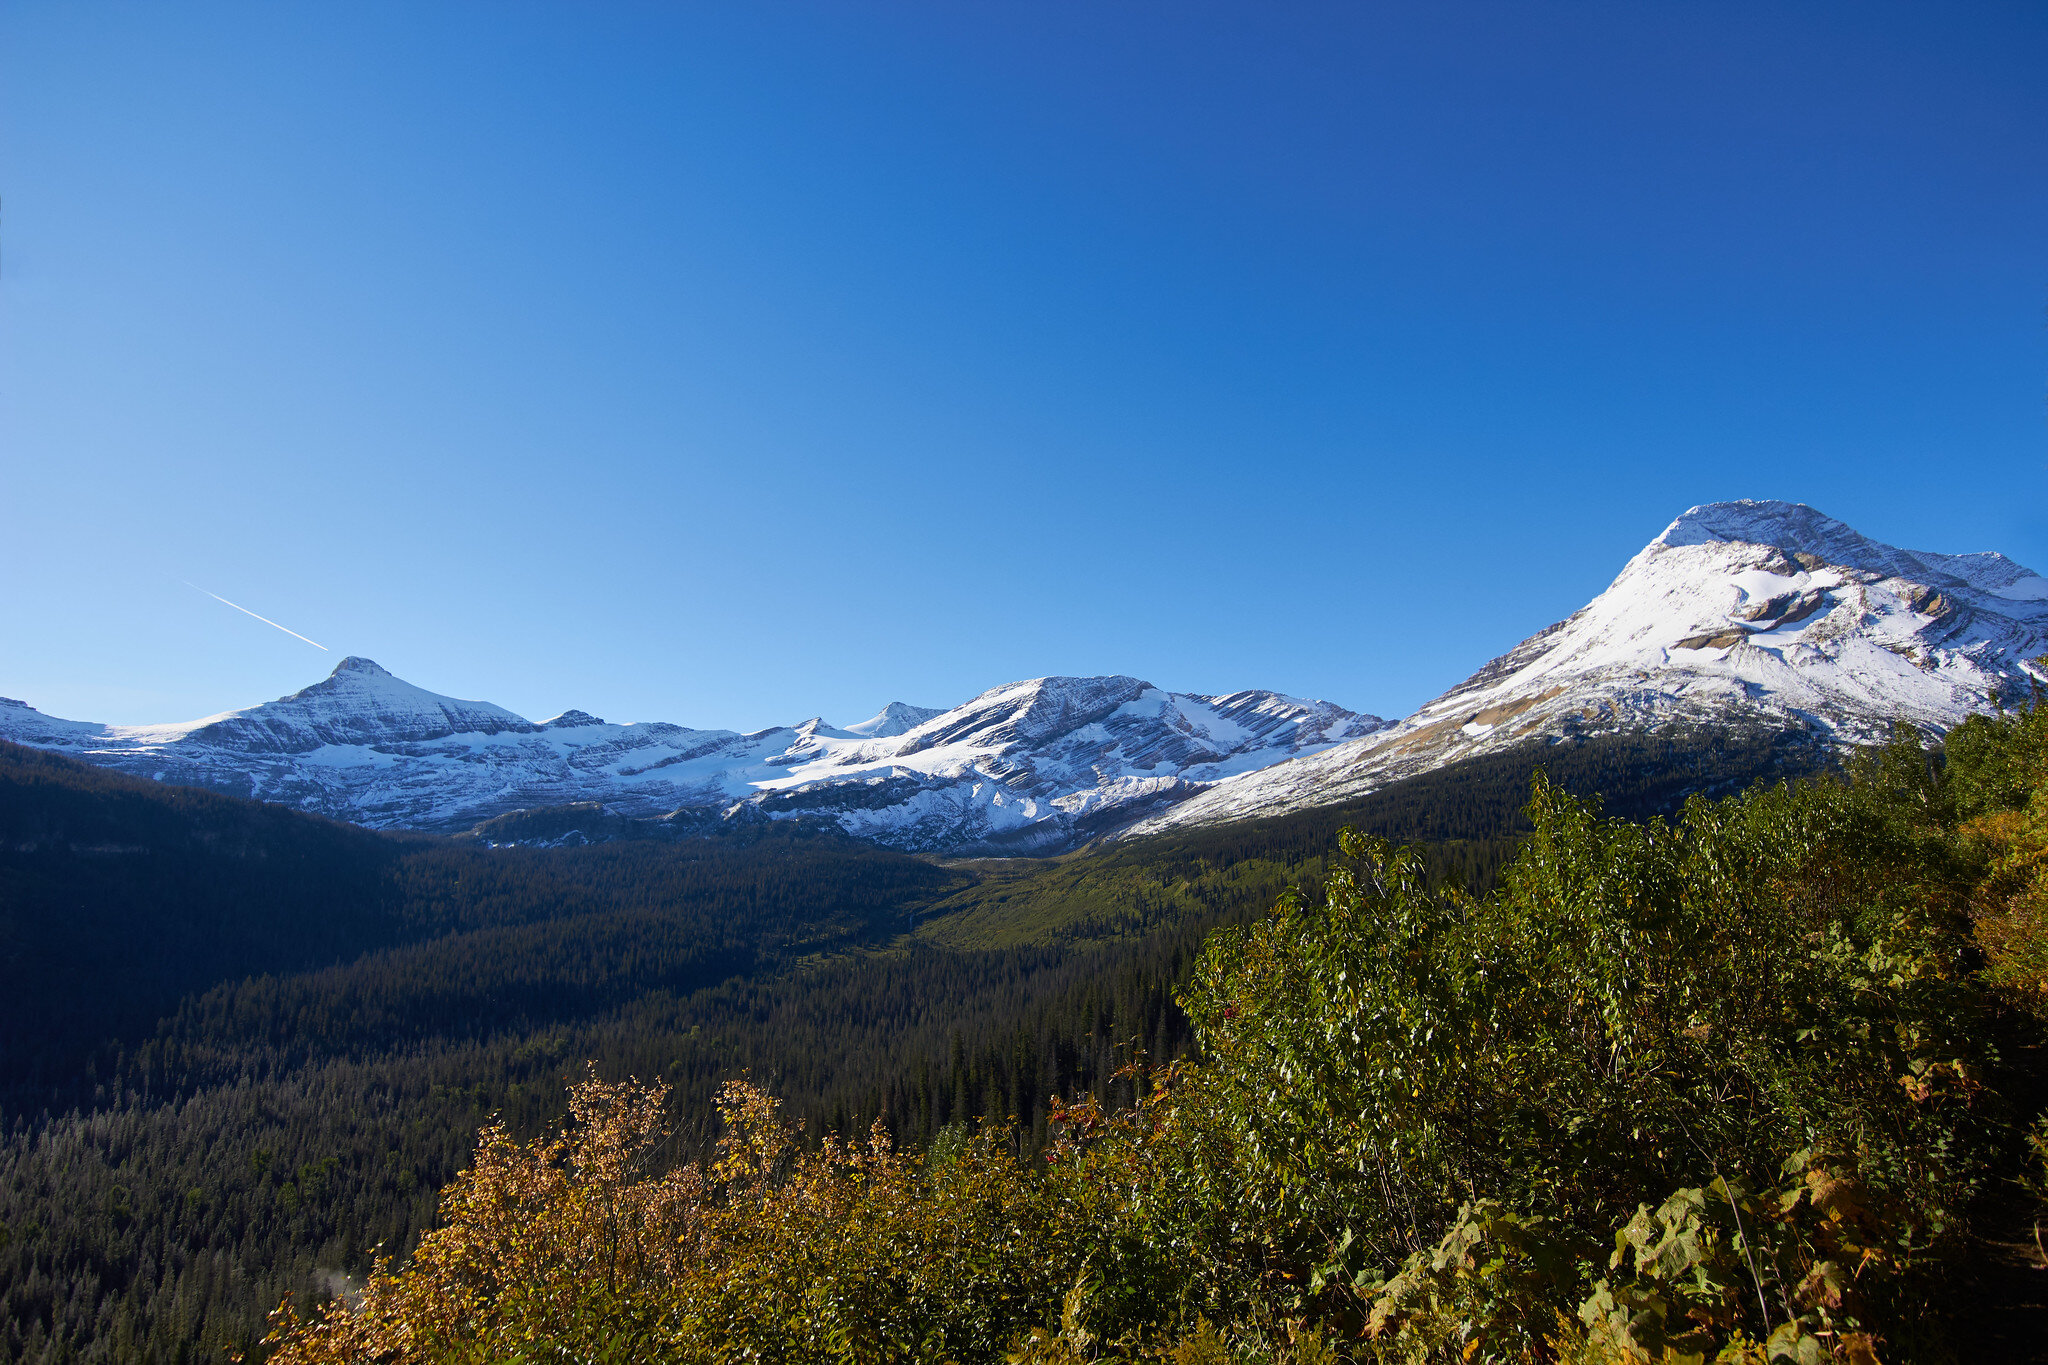
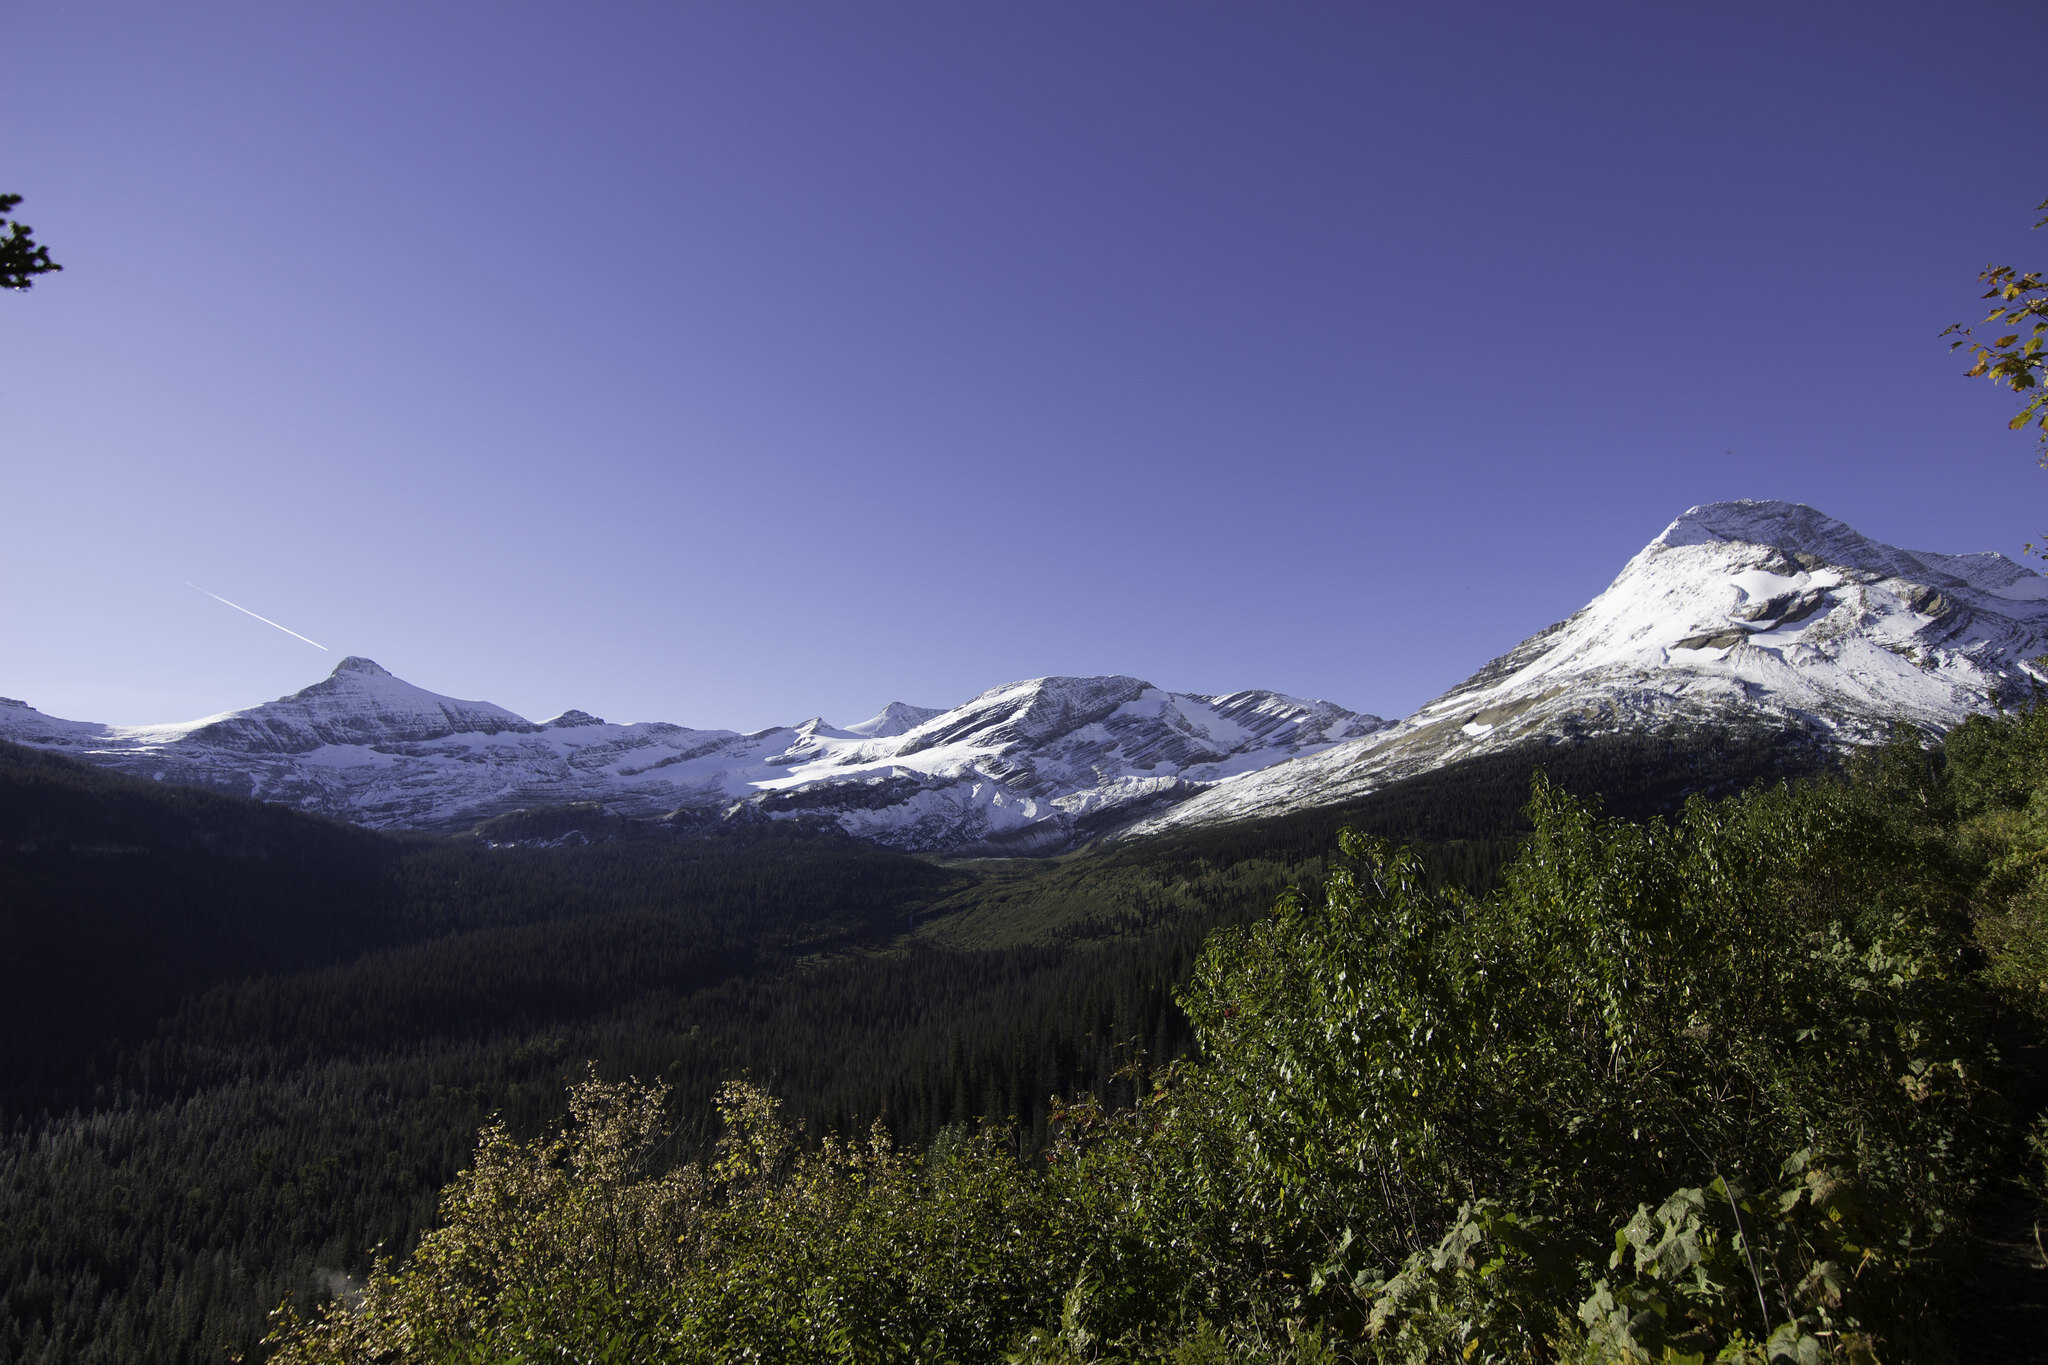
P.S.A - There will be a much larger difference between photos if you look at them on a mobile device compared to a computer. sRGB photos will be on the left/top, and ProPhoto/AdobeRGB with be on the right/bottom.
Now, not to go too much into it, but the world, for the most part, uses sRGB; it’s the standard. Tablets, phones, laptops, and any other mobile device, is able to see the sRGB color spectrum, with computers typically showing a bit more into the other color spectrums.
There are many different color spectrums you can physically work in, but there are three main ones; ProPhoto RGB, AdobeRGB, and sRGB. ProPhoto gives you the widest range of colors, sRGB gives you the least, and AdobeRGB is smack dab in the middle.

Because I was editing and exporting photos in ProPhoto RGB, most of my photos ended up looking washed out on mobile devices, but fine on my laptop at the time. For nearly two years, I dealt with whatever strange phenomenon was happening to my photos. I’d bring the photo into Instagram to post it, and all of a sudden the colors were absolute trash. I’d have to re-saturate the colors, boost the contrast, and hope I was close to what I had edited it like beforehand.


Now that I’m on one of my infamous social media breaks, I’ve actually had the mental energy and time to go through and find those old photos, and edit them like I would today. And more importantly, export them in the right fucking color space. I dug out my old hard drives, plugged them into my computer, and got incredibly lucky when they still worked. All good, photos weren’t gone, but I did have to go through and find the damn things.
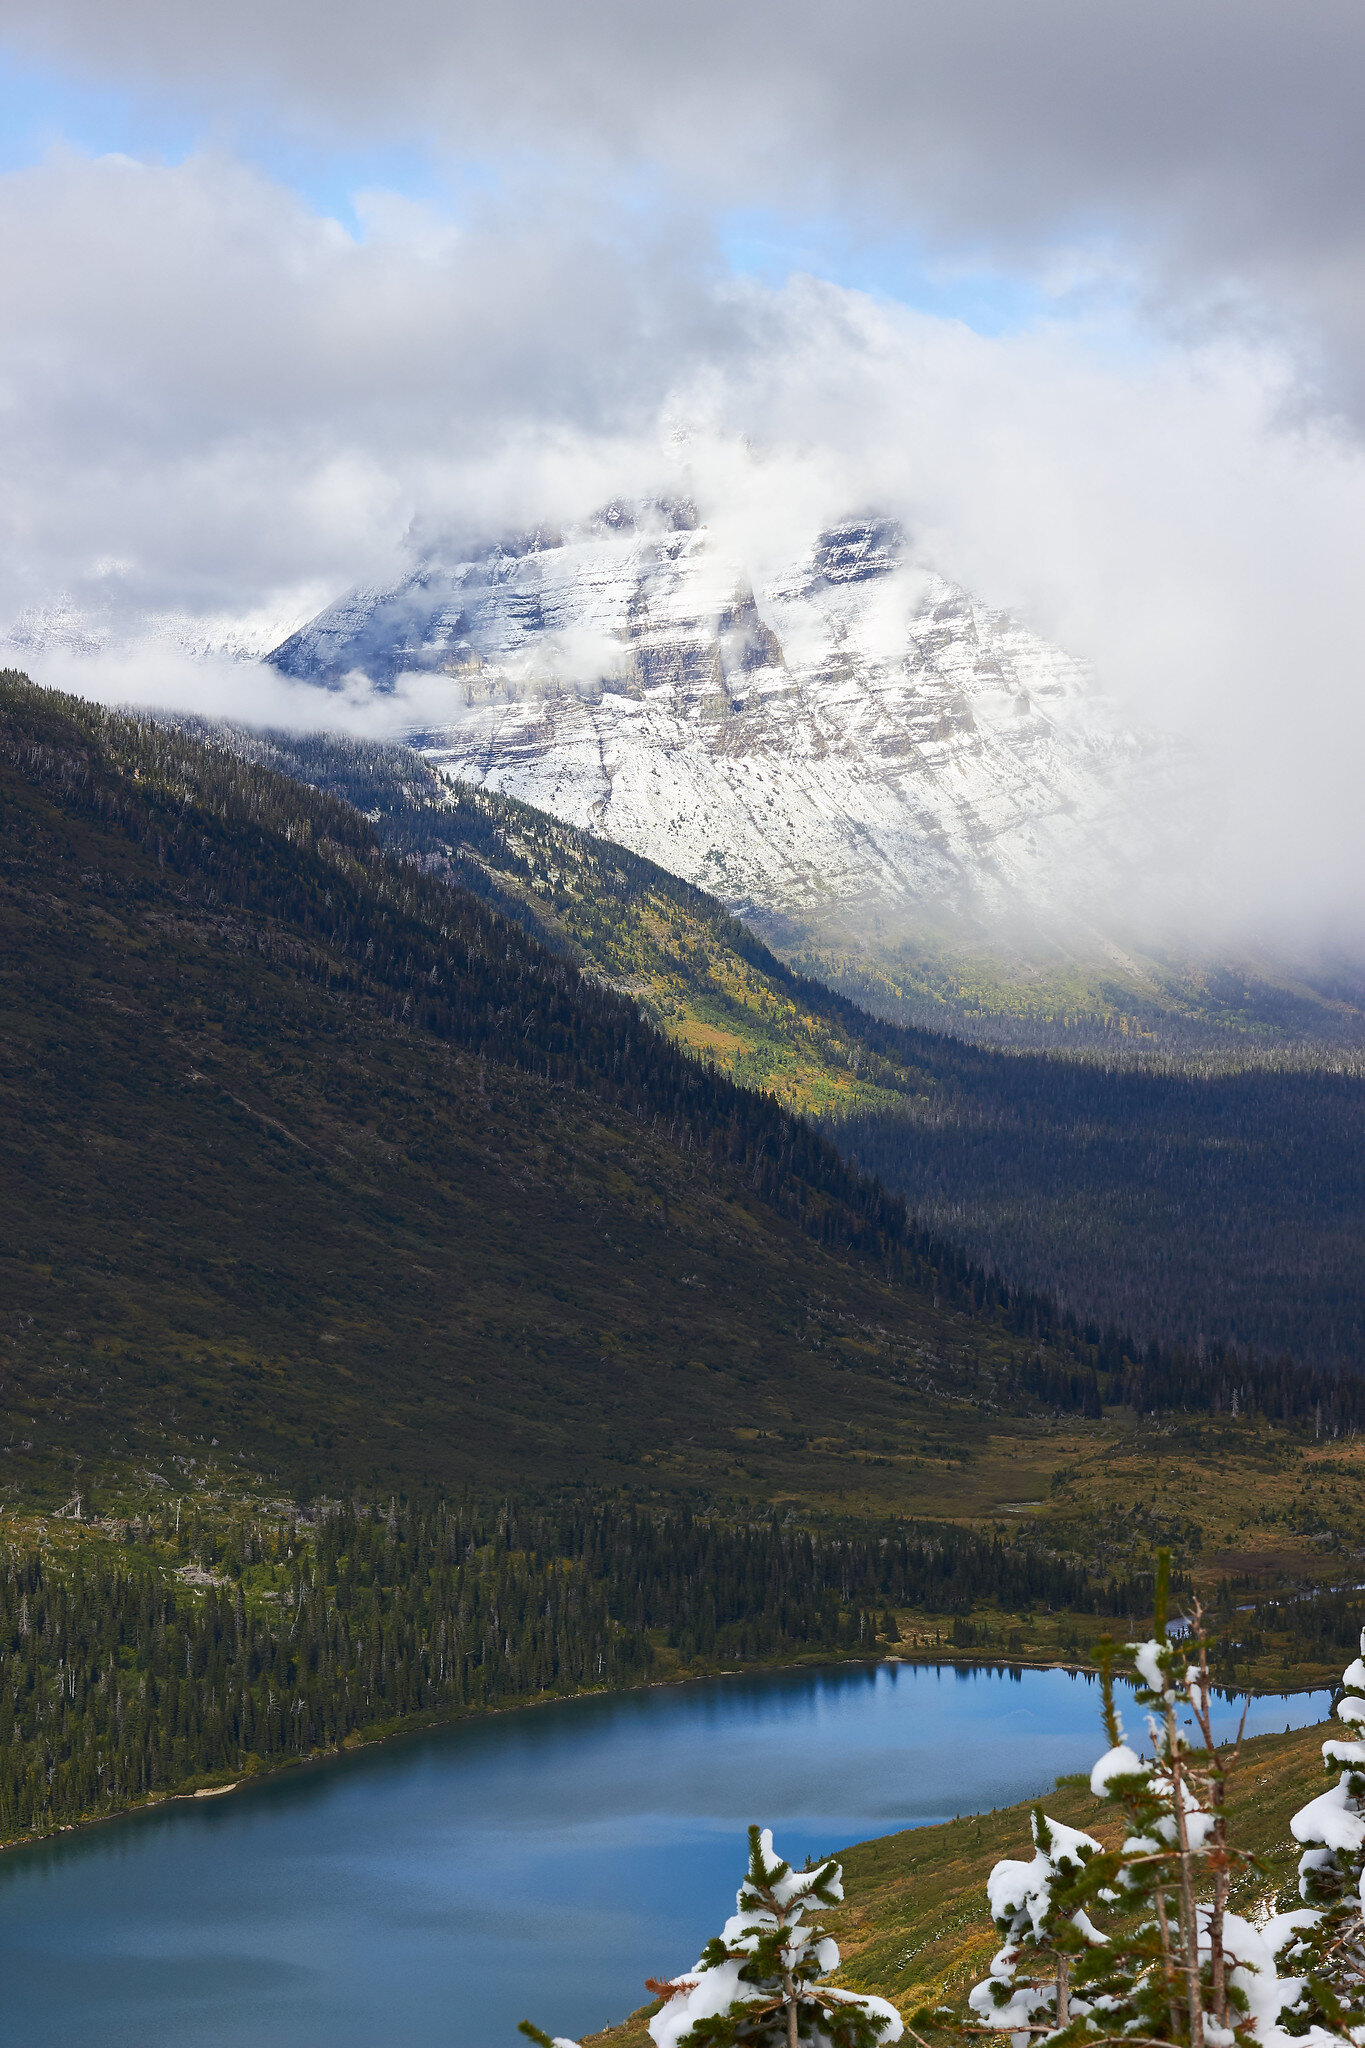

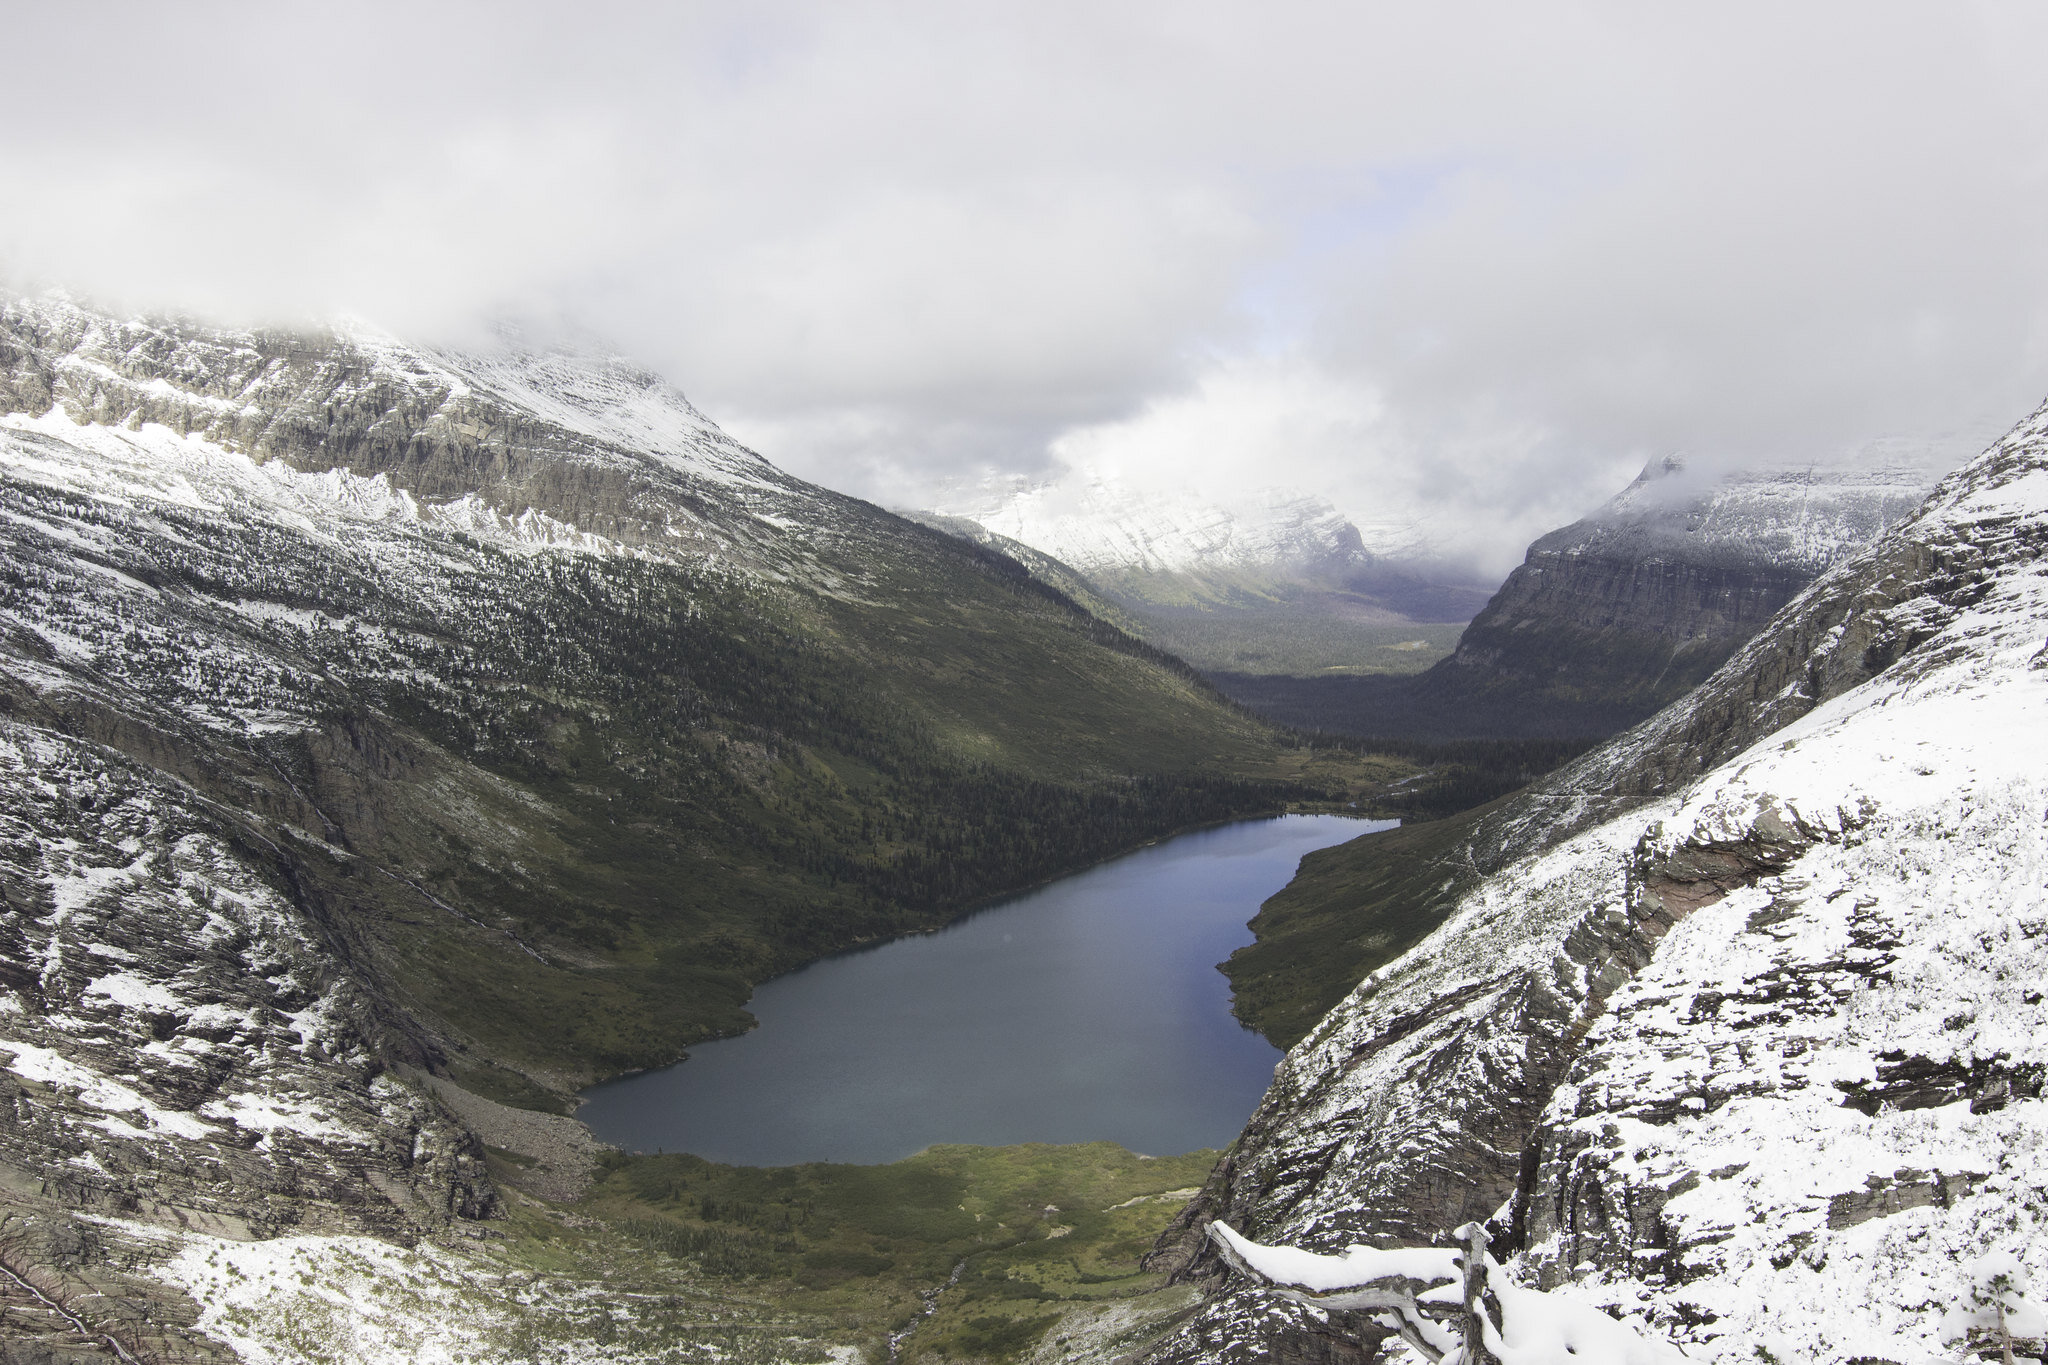
I sucked at color back then, but I was abysmal at sorting my photos. It took me about 30 minutes to actually find the photos I wanted to go through. I knew the month and the year of taking the photos, but ended up combing through every single folder on the drives to find them. I had two specific trips I wanted to re-edit; my trip to Glacier National Park, and the trip we took to Canada for Miah’s first birthday.
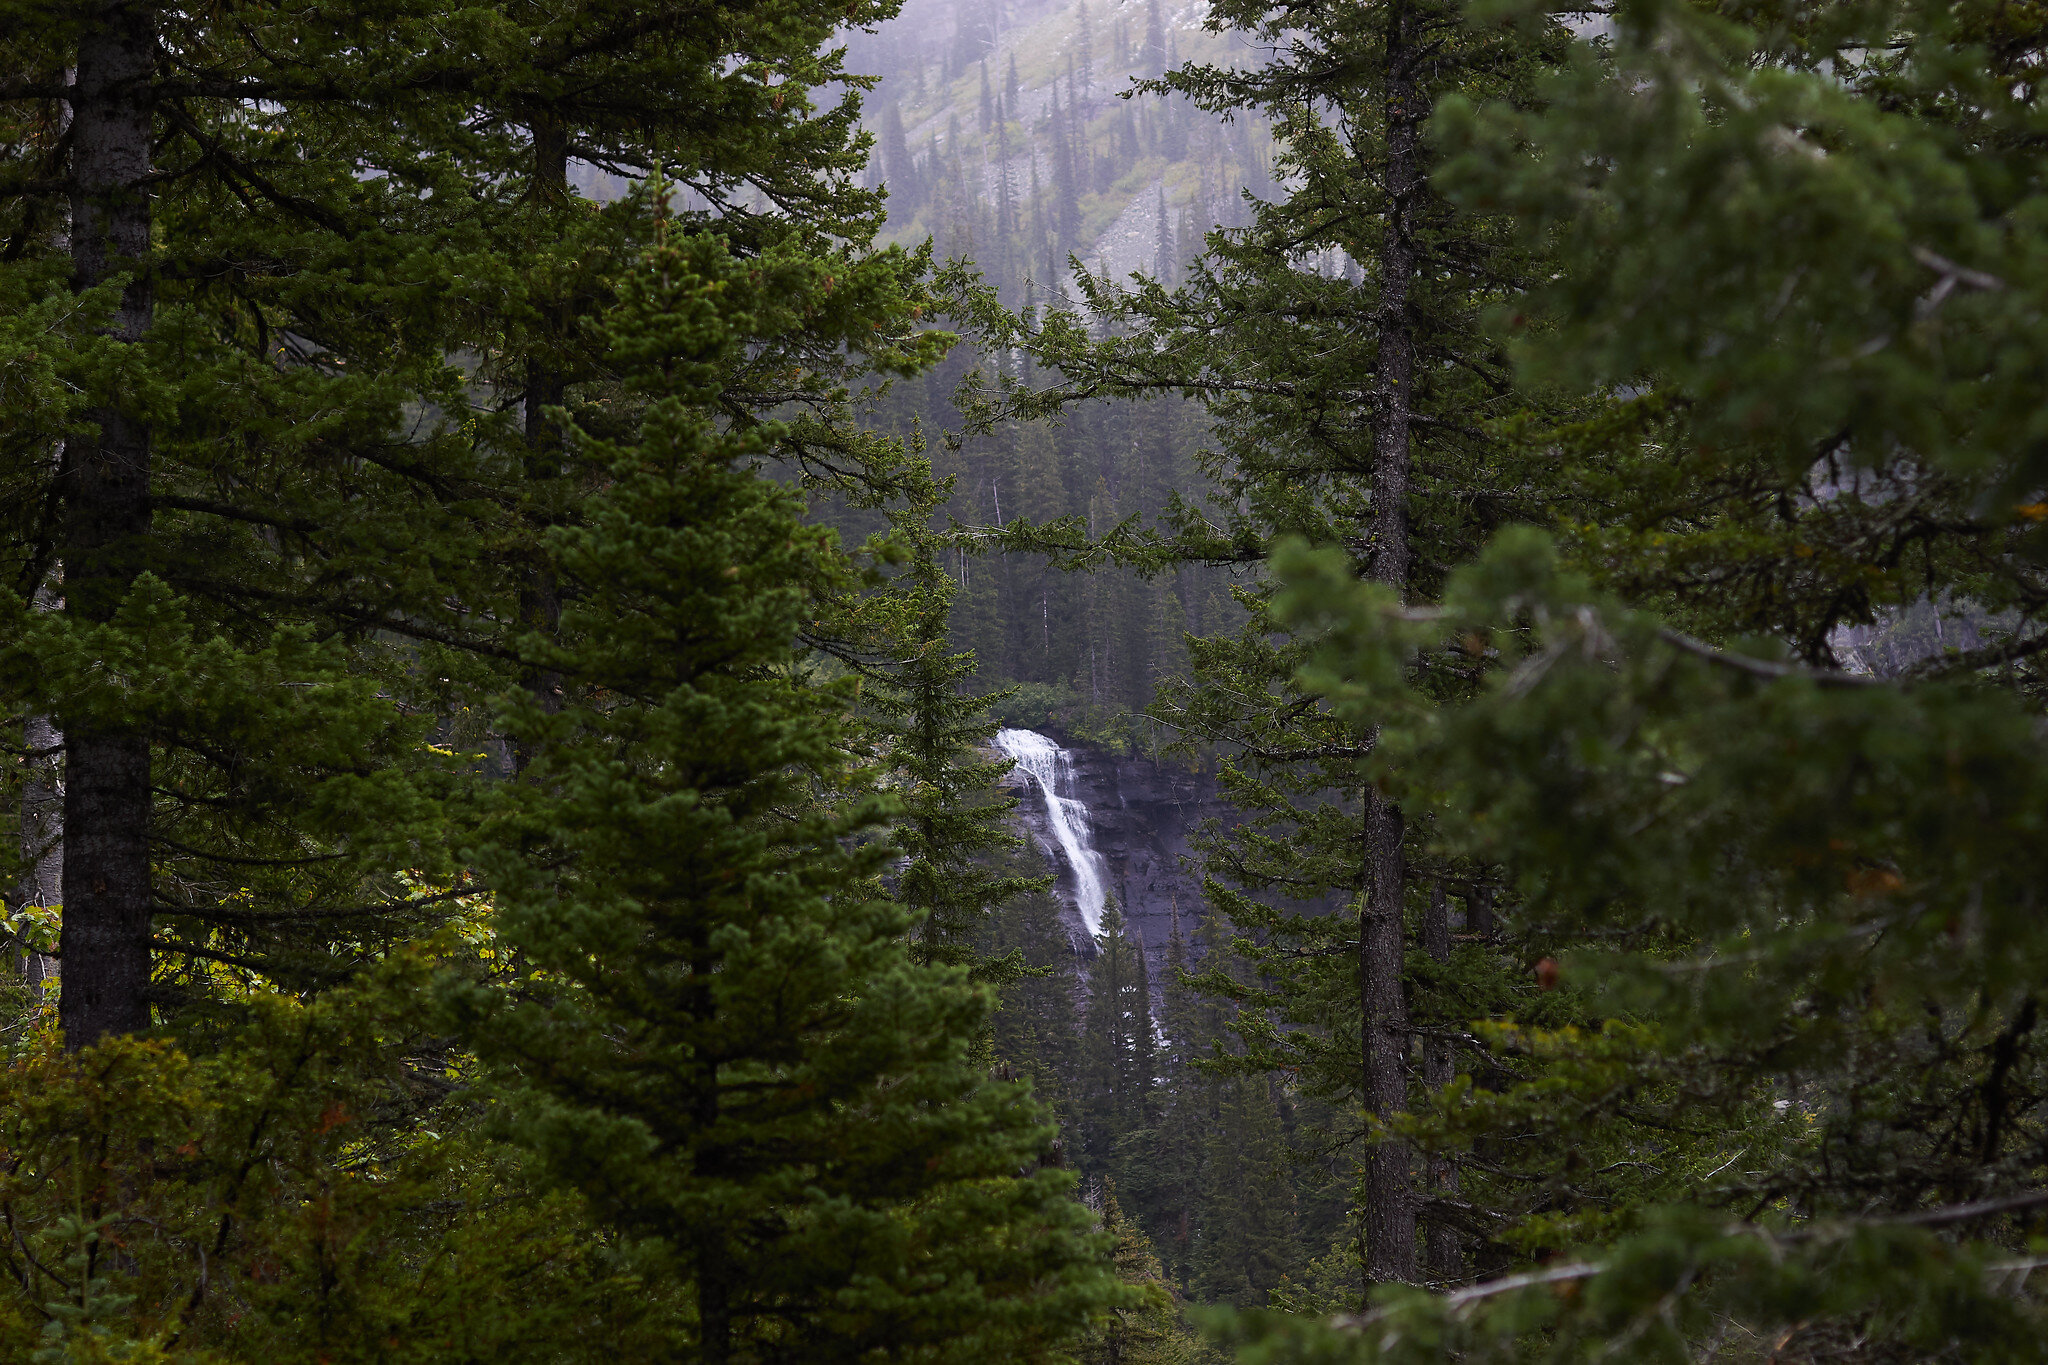
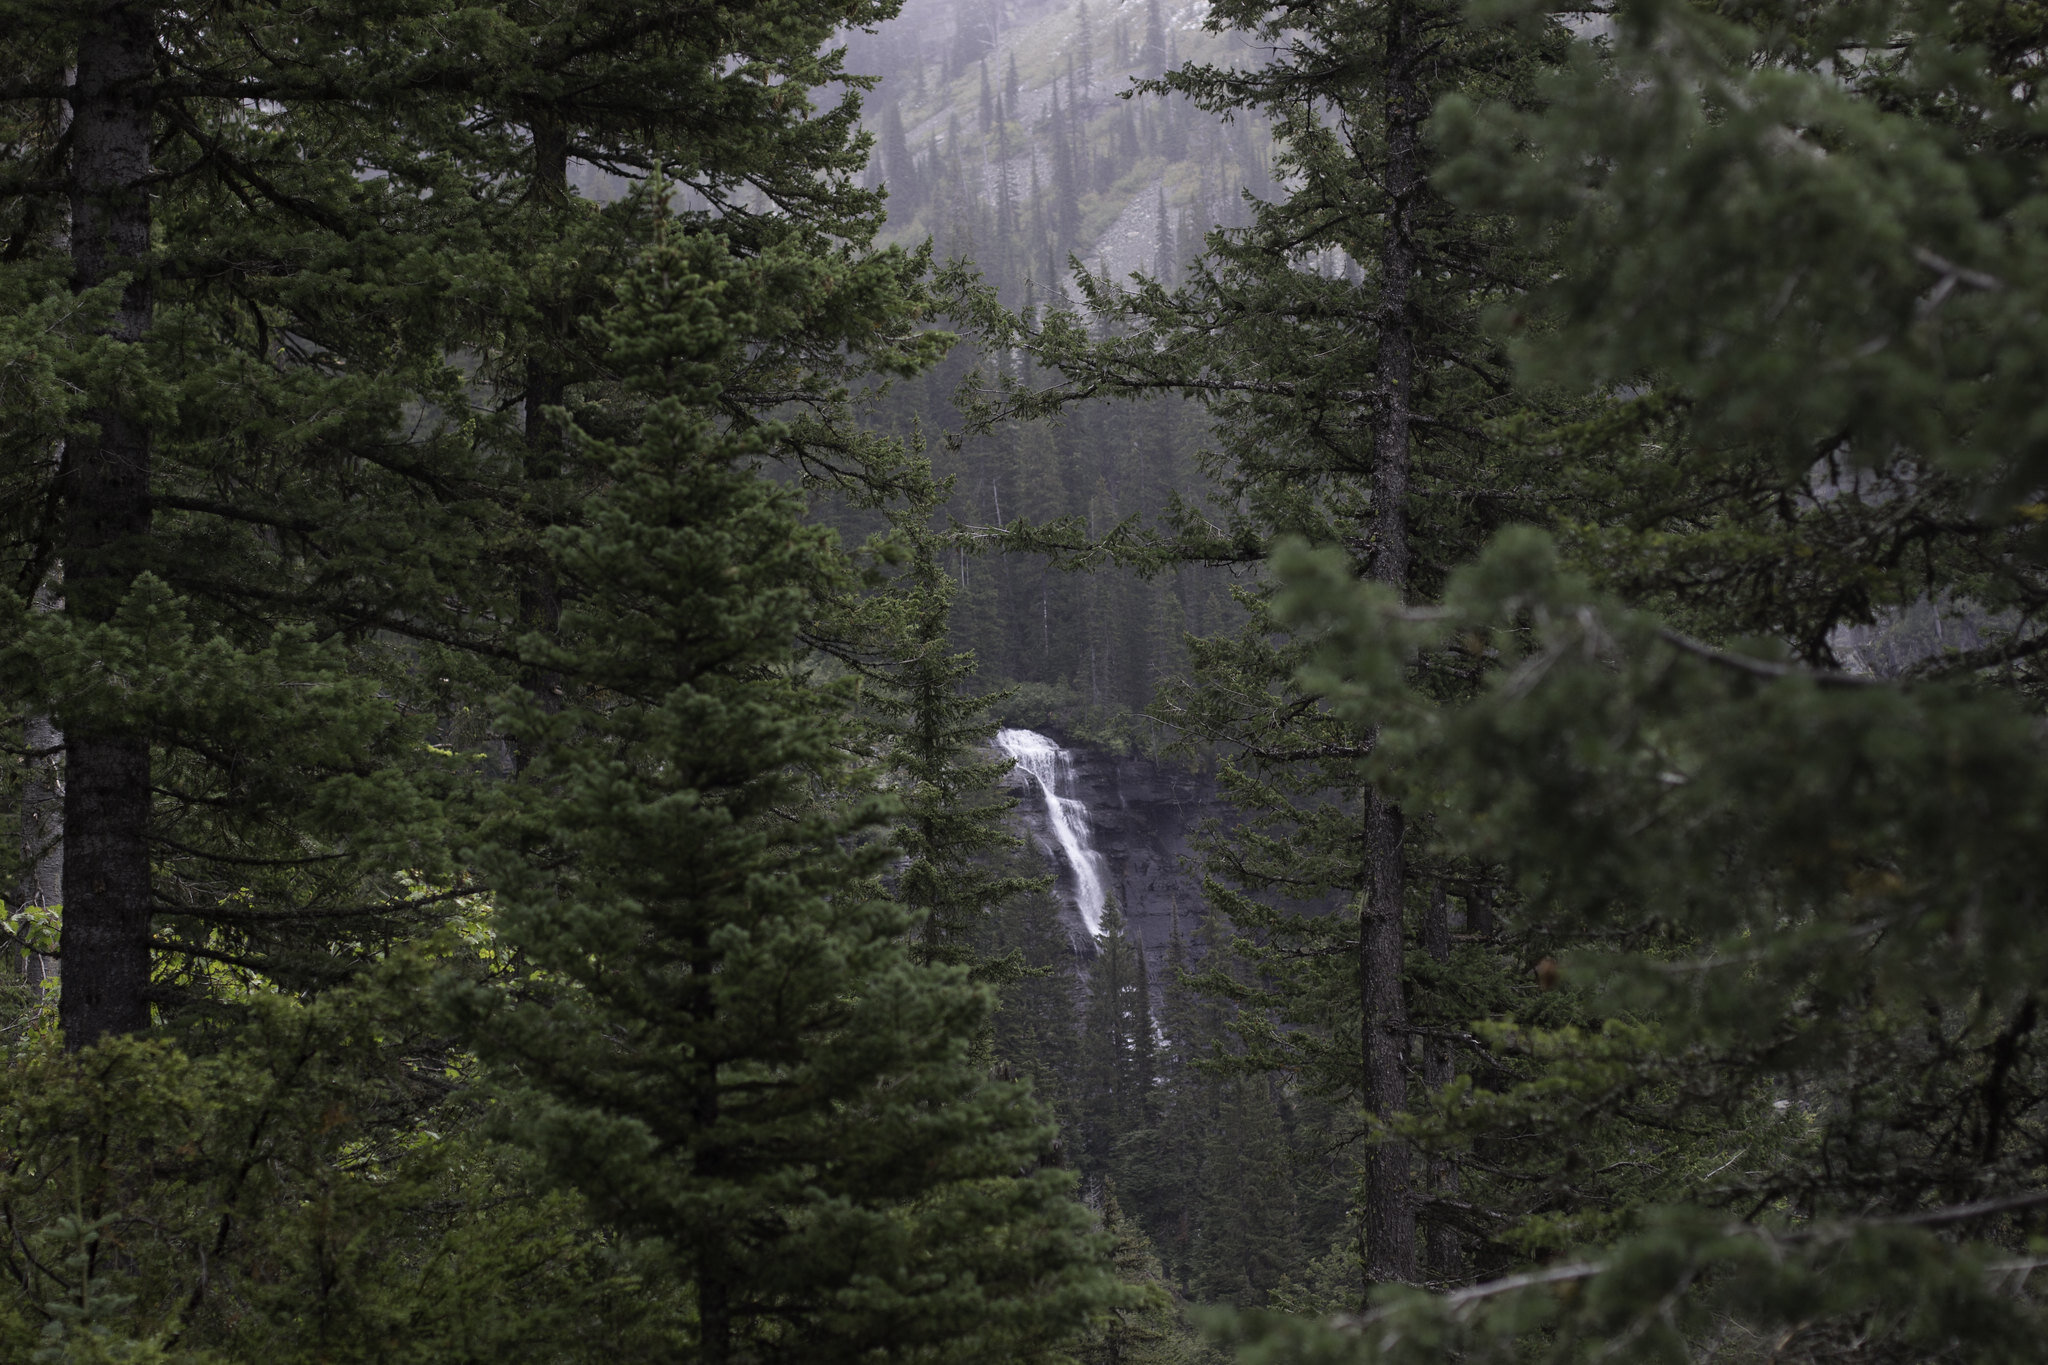
Each of those trips had hundreds of photos, so I restarted the culling process (think picking and choosing photos to work on) and found some keepers I had for some reason ignored back then. I went through the Montana pictures, and honestly, I have no idea how I walked away with any keepers at all from that trip. I had absolutely no idea what I was doing, and missed focus on multiple shots that would have been amazing. How do you miss focus on a mountain? I have no clue how, but I somehow did on at least a quarter of my shots. That was disappointing, but I’ll just chalk that down to being young and ignorant. It doesn’t happen that much anymore.
So, even after missing focus on a ton of shots, I then ruined the good ones by exporting them incorrectly. I have known for years, what kind of potential the photos had, but was either too busy or too lazy to really try and tackle the issue. I’ll admit, it did take a lot of work. I spent a good 10 hours over the weekend editing the photos again, but I’m glad I did. I no longer cringe at photos whenever I see them.
This whole process has taught me a couple different things:
I’ve come a long way in what I know, and what I’m capable of doing with a camera,
Proper storage and organization of photos can be incredibly helpful if and when you need to go back to find them,
And lastly, editing photos with a fresh eye can help find those photos that you once glanced over.

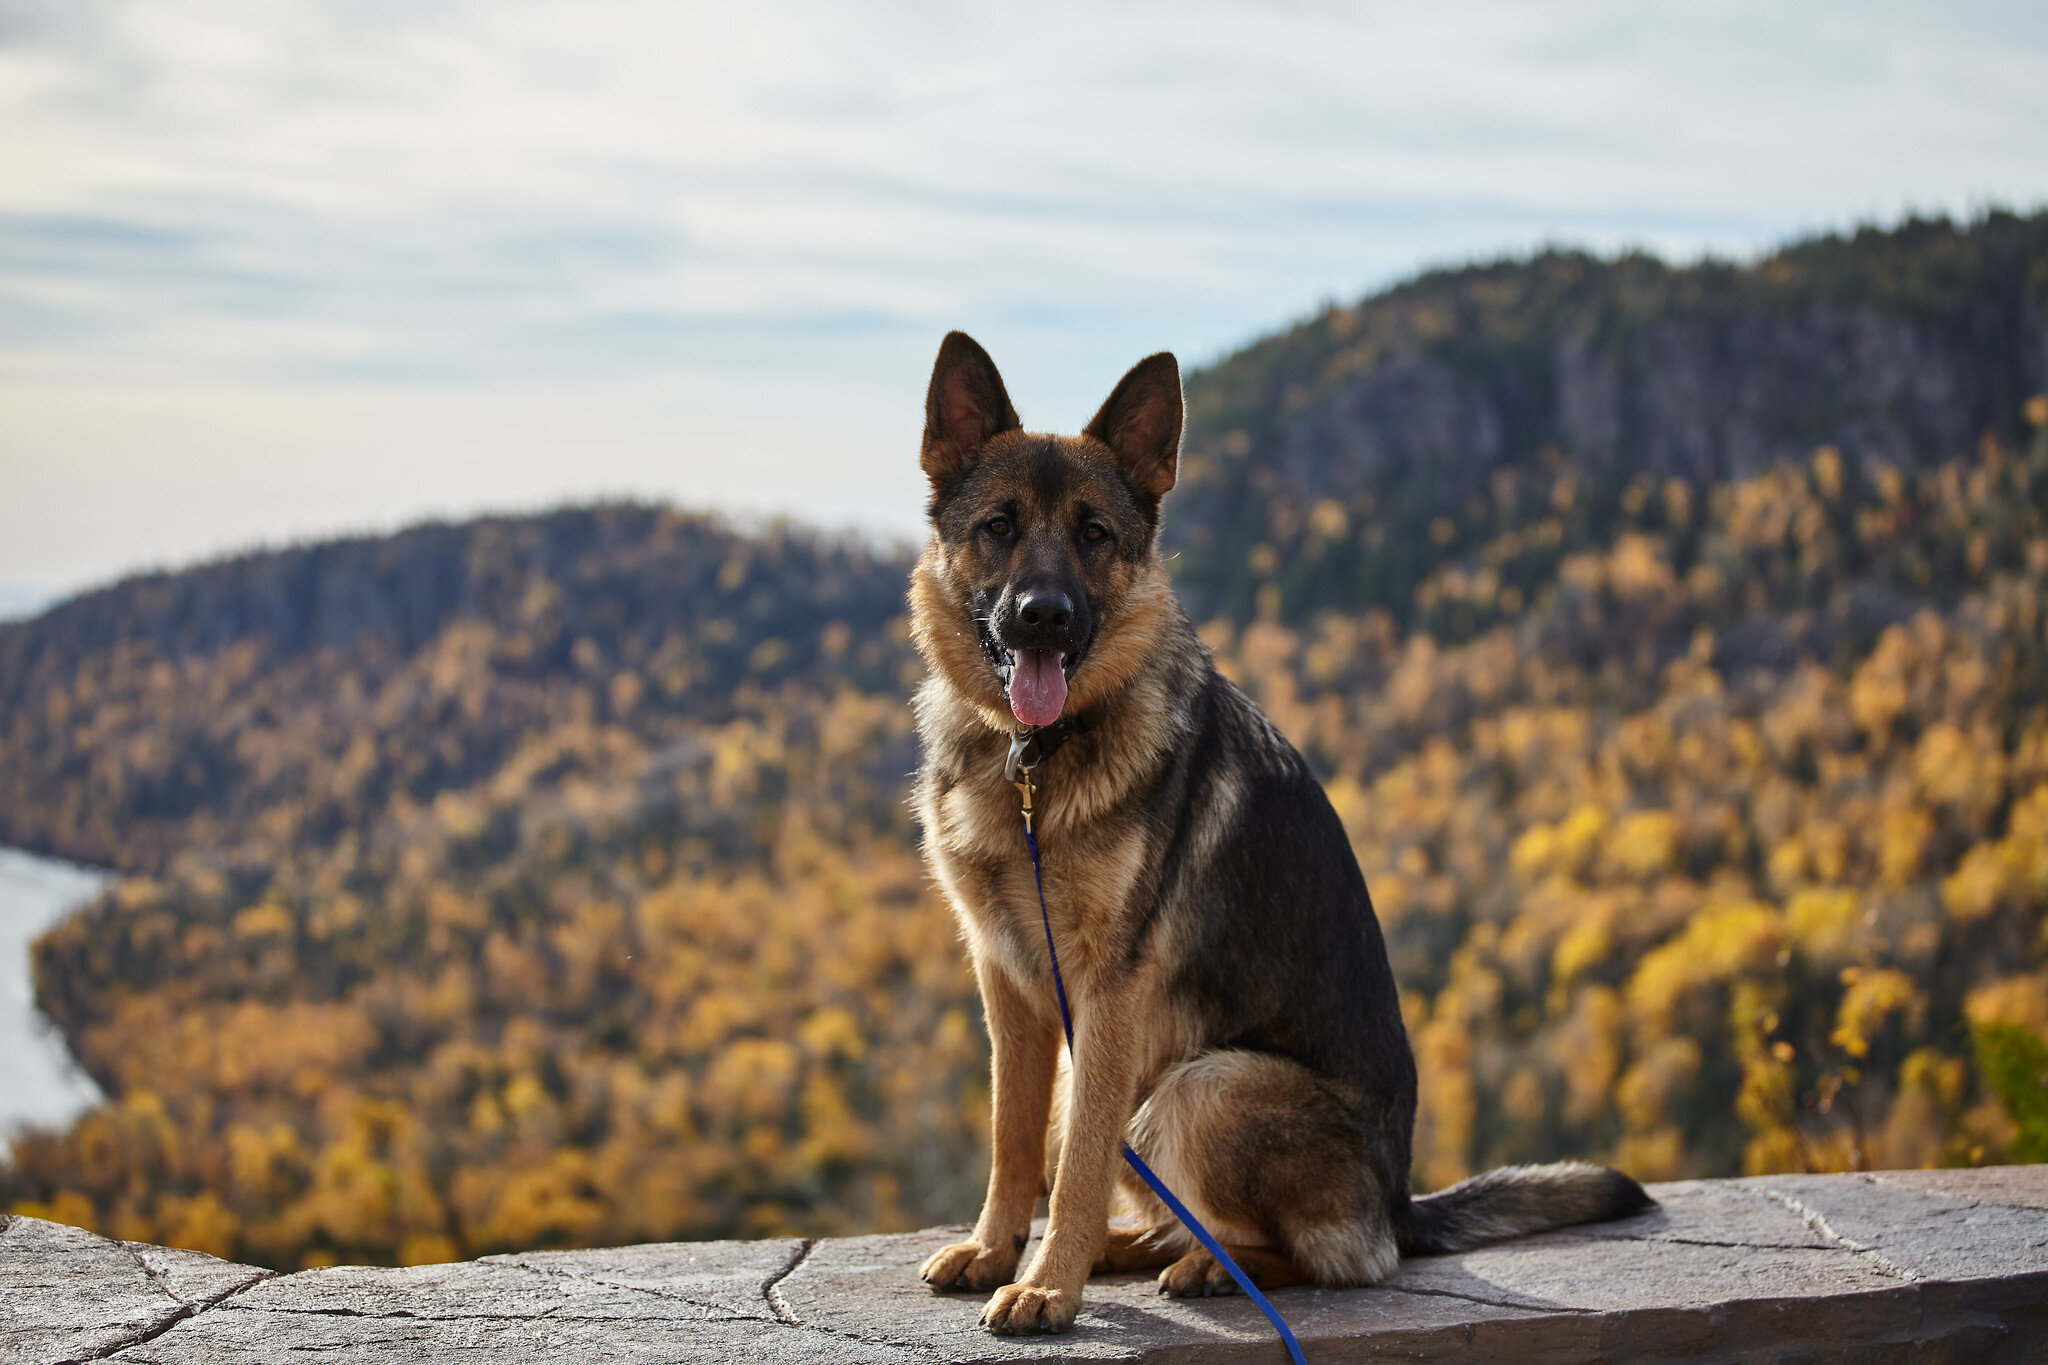
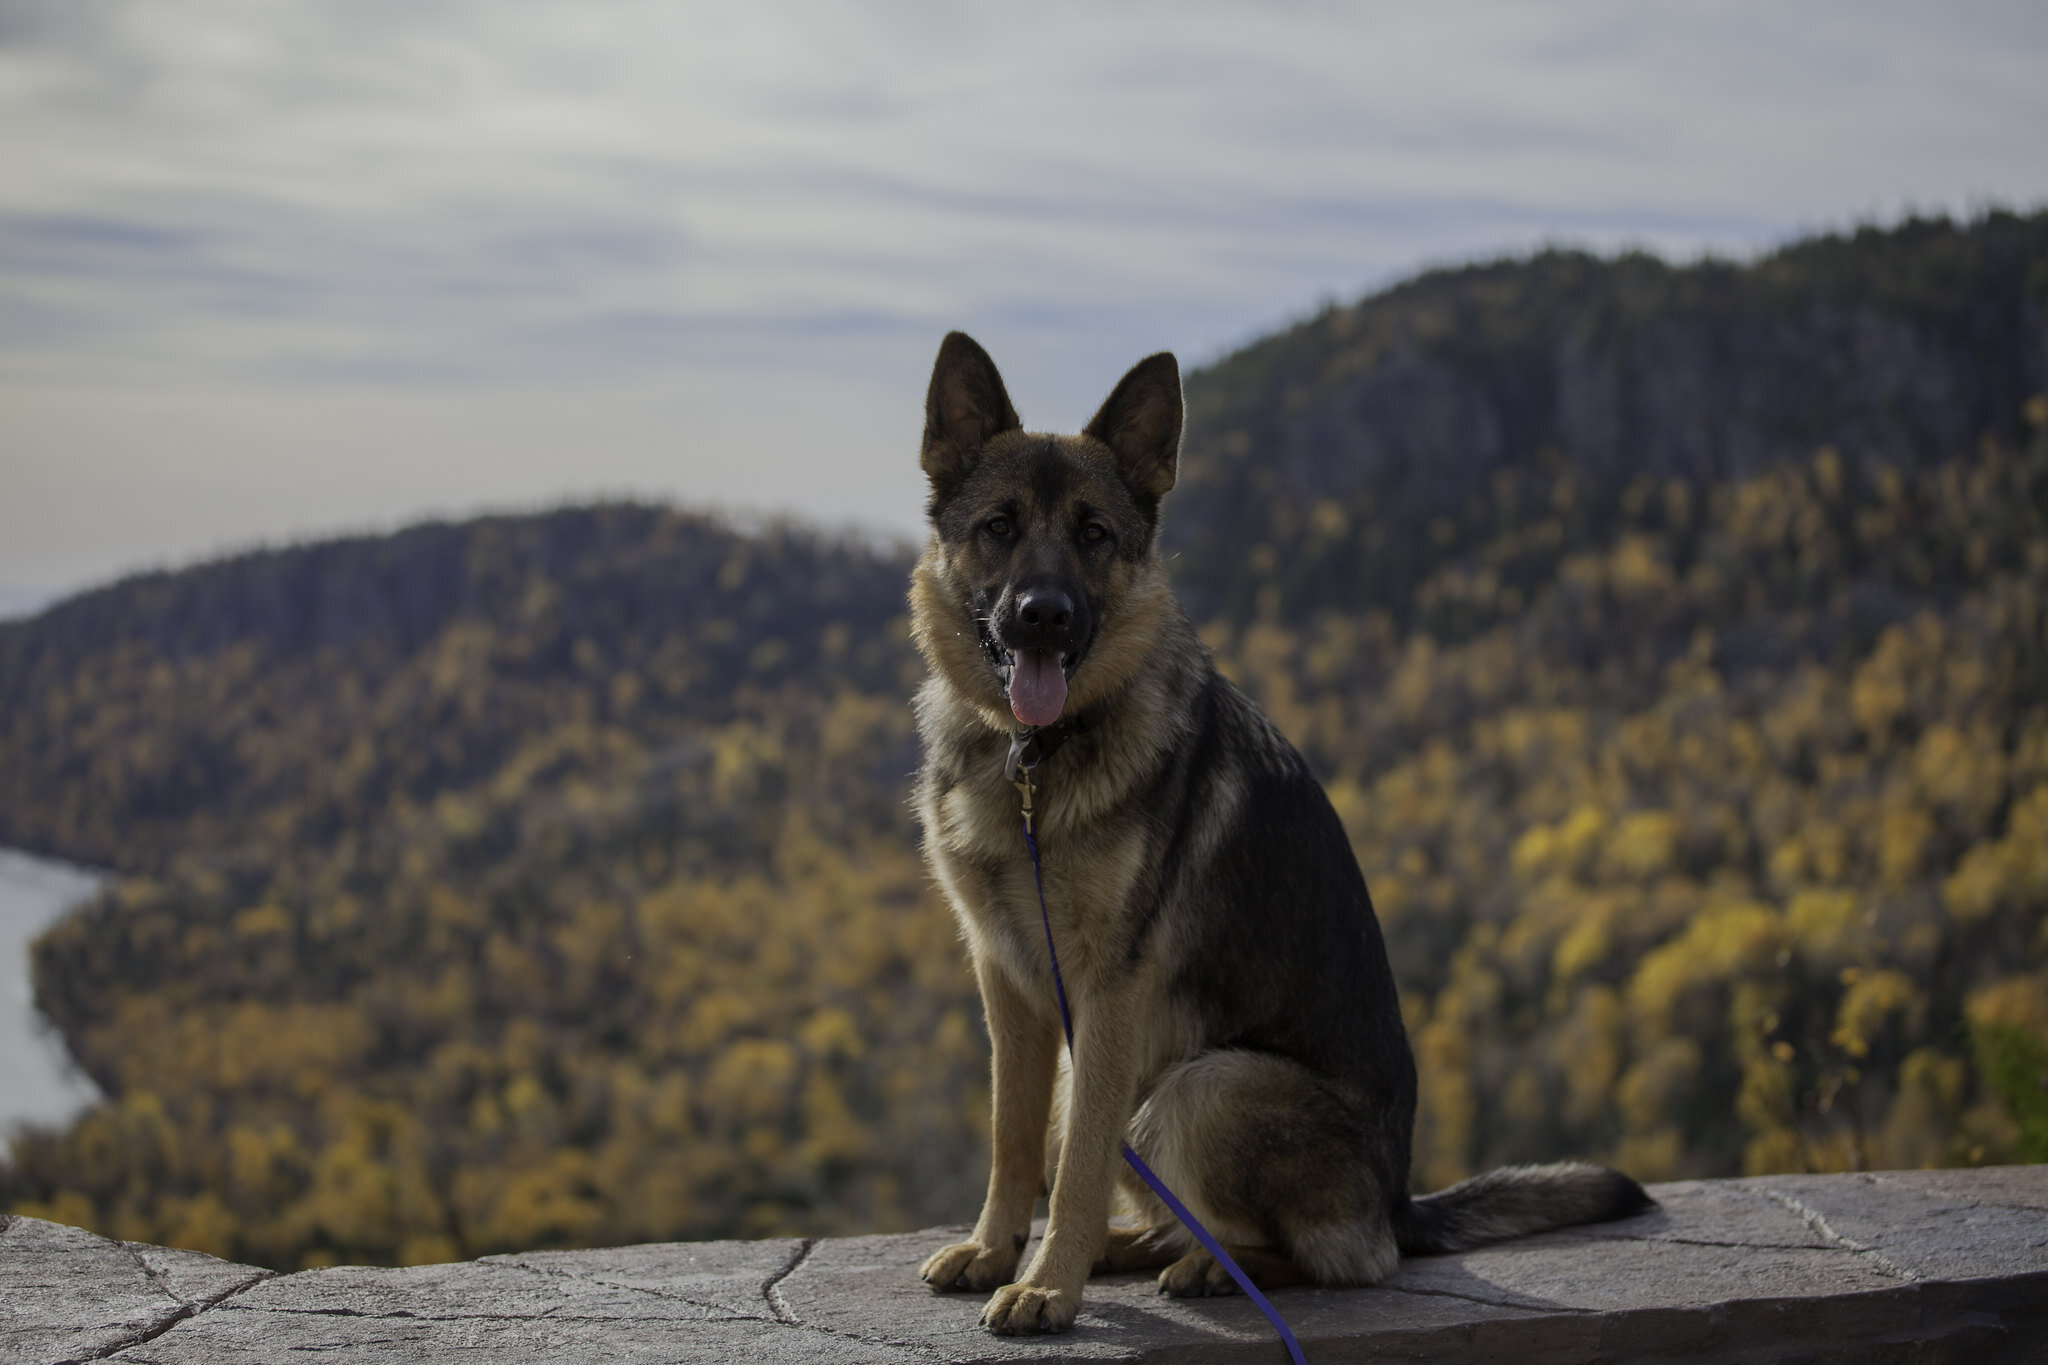
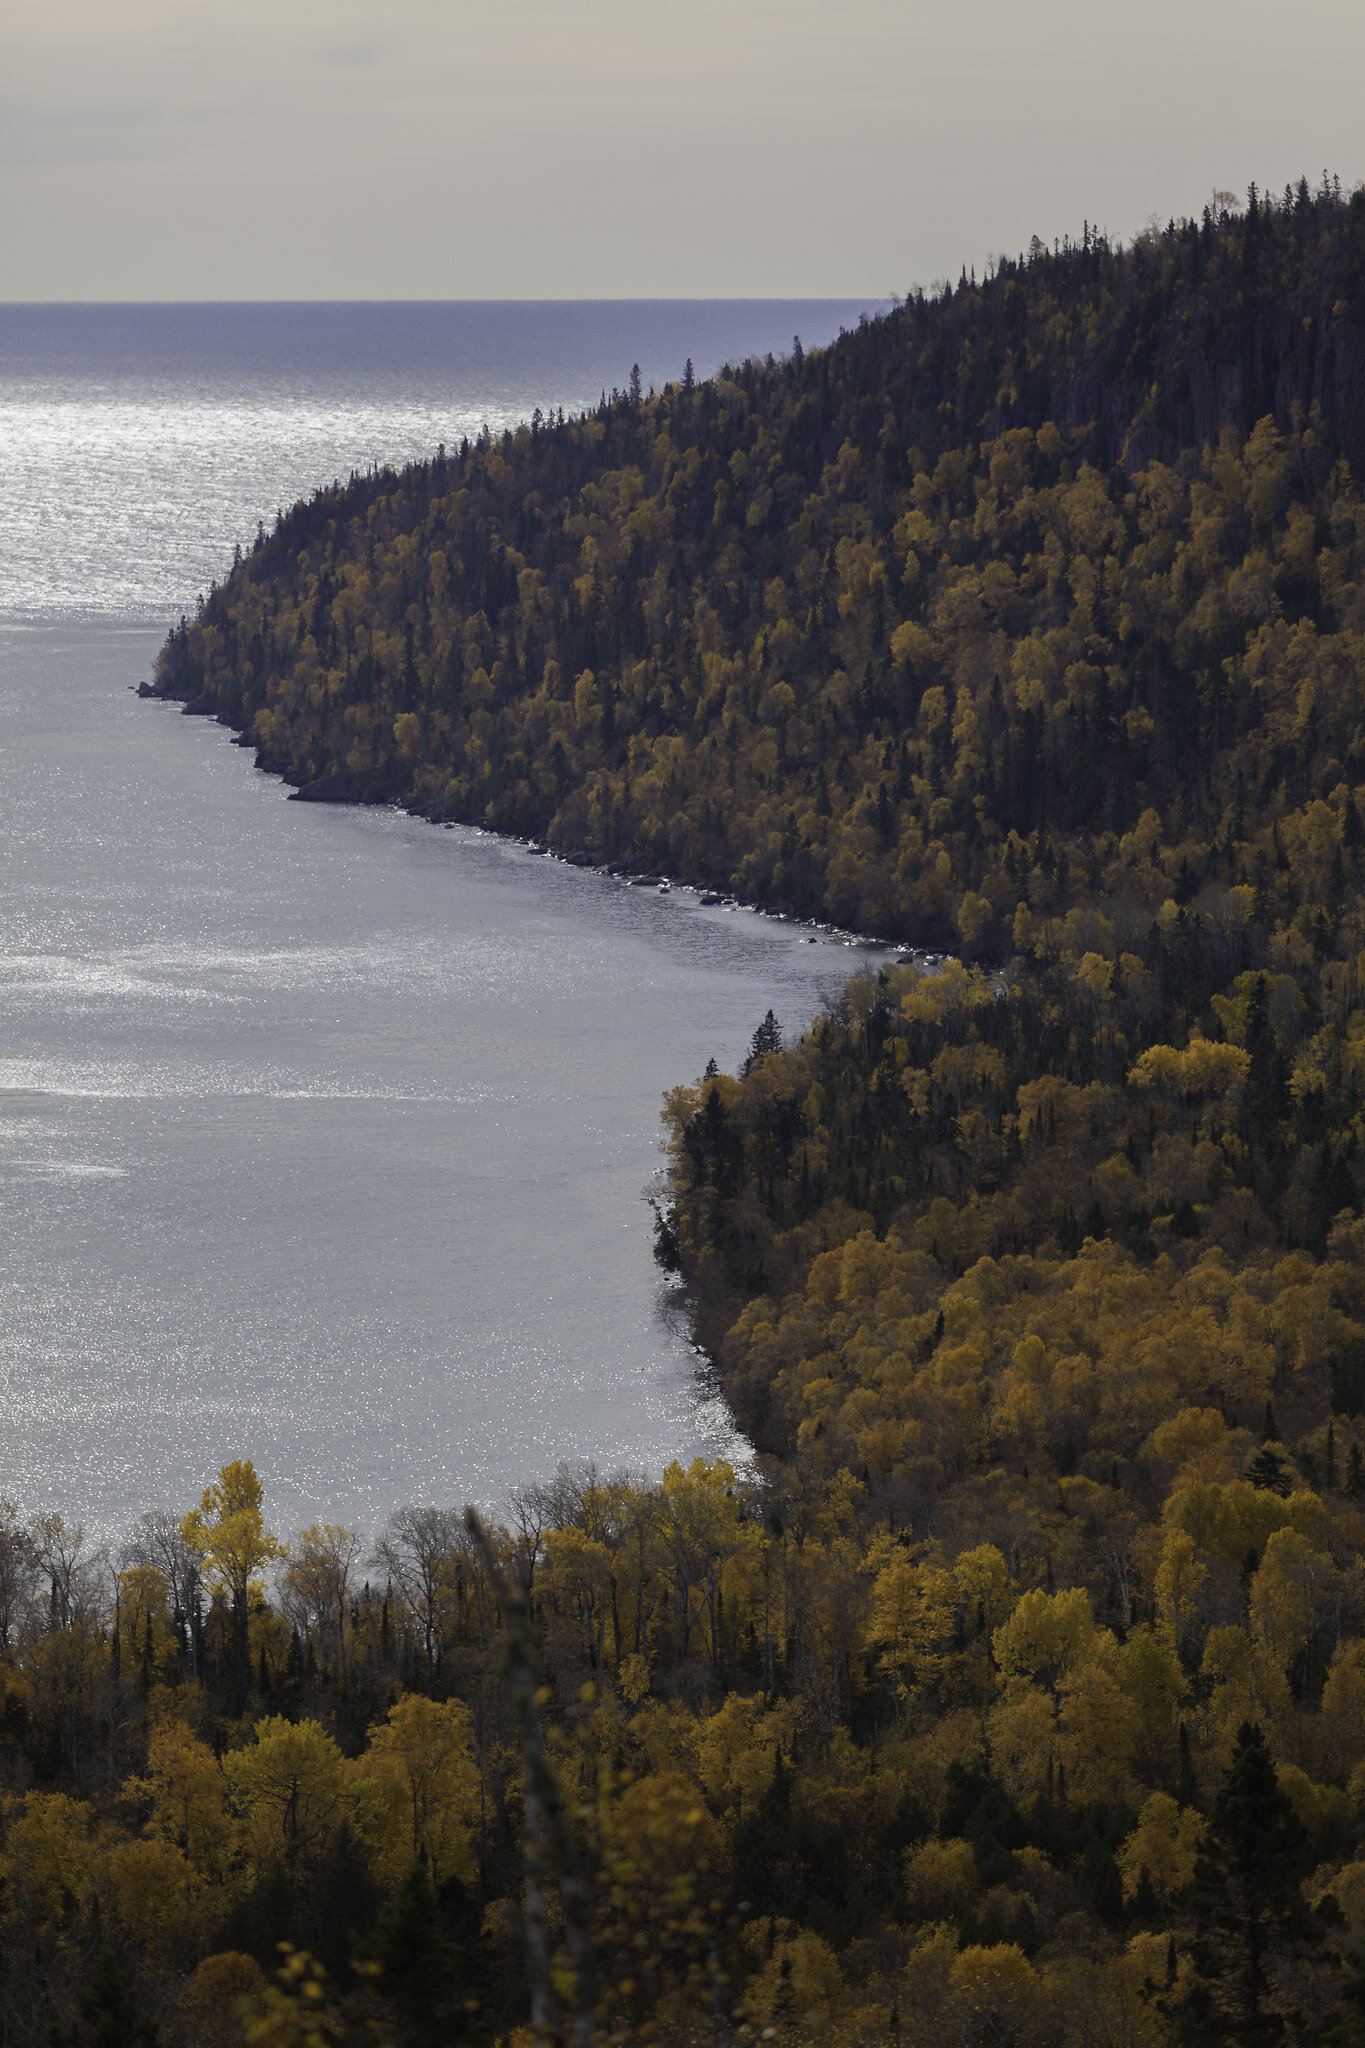
A photo I glossed over from Miah’s birthday trip to Canada.

A photo I edited with newly learned skills to improve the original, which I had cropped significantly to get rid of unwanted things in the frame.
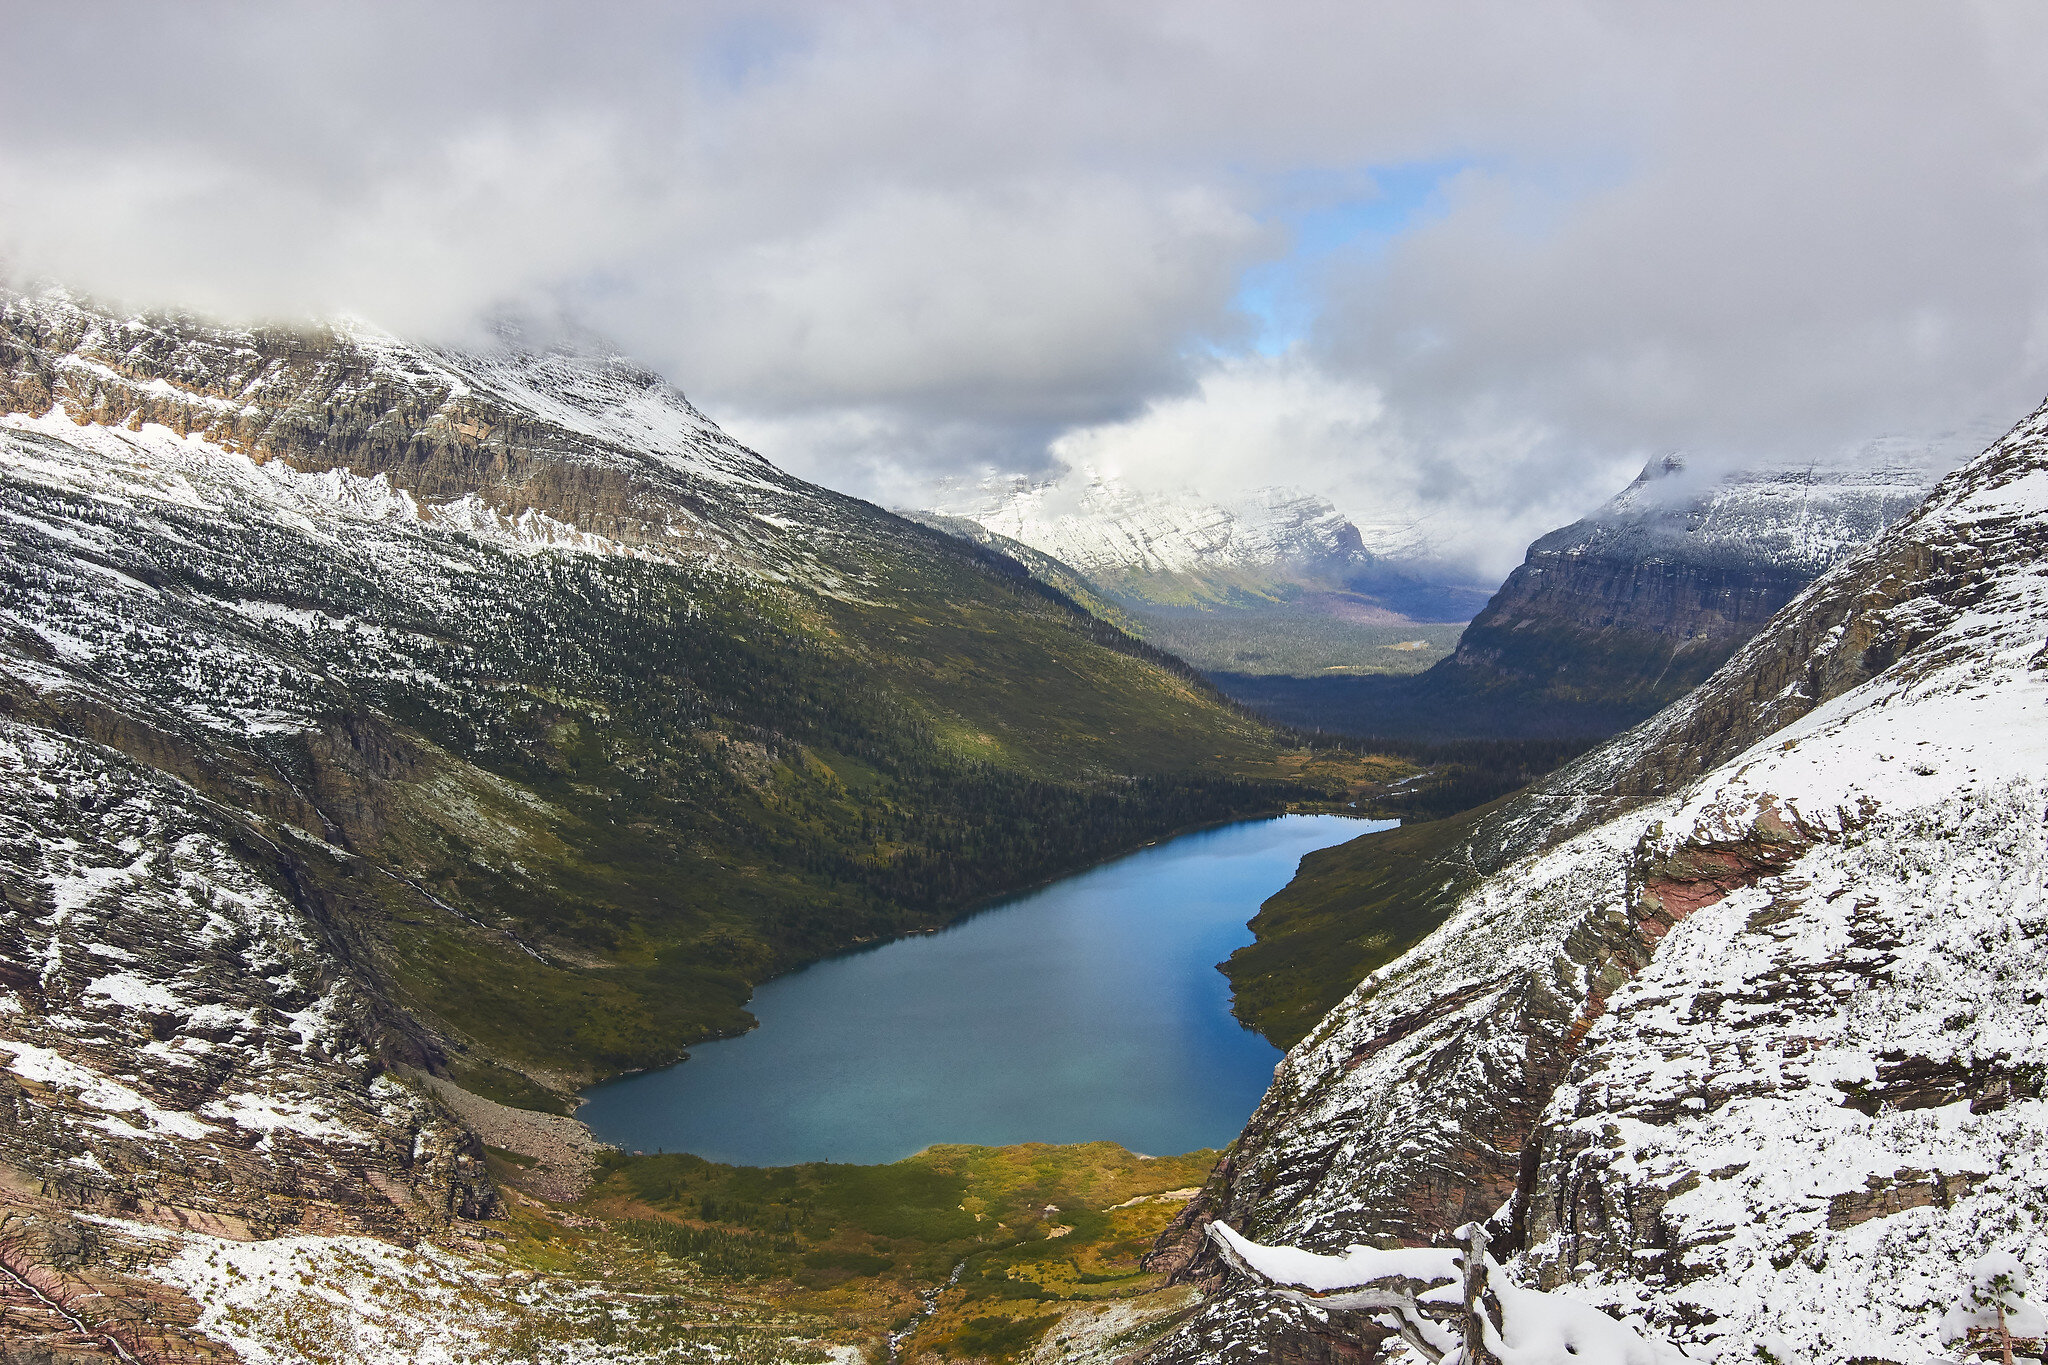
That’s pretty much all I’ve got to say about this whole matter, so I’ll just throw a bunch of other comparison photos for the rest of this and hope whoever is reading this can learn from my mistakes.

A Year (almost) With the Fujifilm X-Pro 2
This is going to be my first foray into reviewing a digital camera, as I’ve mostly shot film for the last two years. Specs will come first, because anybody can simply look them up their own, so I’ll keep it quick and easy.

This is going to be my first foray into reviewing a digital camera, as I’ve mostly shot film for the last two years. Specs will come first, because anybody can simply look them up their own, so I’ll keep it quick and easy.
I will be drawing comparisons between the Fuji and my old Canon 5D Mark II throughout the review since it’s the only other digital camera I have used.

Fujifilm X-Pro 2 + 23mm f/2 WR.
Specs
24 Megapixel X-Trans III ASP-C Sensor (1.5x Crop)
Weather Sealed
Mirrorless
Hybrid Optical Viewfinder + Electronic View Finder (OVF/EVF)
Dual Card Slots - One UHS II compatible
Well, that’s enough of that nonsense.

Canon 5D Mark II + Fujifilm X-Pro 2
Handling & Useability
Coming from a Canon DSLR was a weird transition. Canon is renowned for their phenomenal grips, something Fuji has only addressed in the X-H1, GFX 50S, and GFX 100S. Most of their cameras come with grips that are seriously lacking security while in the hand. I love the feeling of a solid grip, so I ended up buying a used grip from Fuji (pictured).
The grips on Fujis aren’t great by any means, but the feel of the camera in your hand is very reassuring to the build quality. It eeks quality the moment you pick it up, and people are always surprised how heavy it is.

Fuji has done a phenomenal job of putting everything you could possibly need, right on top of the camera. Aperture is controlled on the lens. Shutter speed, ISO, and exposure compensation are all on the top plate.
I do with that the aperture ring on the lenses were a tiny bit sturdier, as I’ve accidentally bumped it onto something else on numerous occasions. The shutter speed dial is solid and out of the way while taking photos, and locks when in A.

Colorado Springs, Colorado. My Harry Potter glasses are on the side of the road if anyone wants to go look for them.
The exposure compensation dial definitely needs to be more stiff, as I’m constantly bumping it and changing it. Fuji really needs to make it a locking dial, as it’s something I tend not to change while I’m shooting. It would also be advantageous for it to be recessed more into the body like the shutter speed dial. It’s a pain in the ass, but nowhere near as bad as the ISO dial.
Now, onto the infamous ISO dial. It’s supposed to be a throwback to the film cameras with a similar method of setting the ISO, though I’ve never personally had one like that. To change the ISO, you lift up on the collar around the shutter speed dial, and twist it. I shoot with my left eye in the viewfinder, so this is basically impossible to do with the camera up to my eye. I was hoping they would get rid of it on the X-Pro 3, but alas, it’s a no go.

Other than those gripes with the dials, the camera feels great in the hand, and it’s light and small enough that I can take it just about anywhere without a second thought.
The hybrid OVF/EVF is what most people are looking for when they purchase the X-Pro series. Both the OVF and EVF have their benefits and negatives, and I’ll cover the most blatantly obvious ones to me.
The Optical Viewfinder is nice and clear, provides frame lines for the associated lens, and shows whatever information (you pick it out in the menu) you want along the sides of the frame. That information is displayed pretty small, and not always the easiest to see in brighter conditions. You are able to see outside the frame lines, so capturing a moment should be easier since you can see things lining up. Manual focus isn’t possible with the OVF, as it’s the first thing I tried to do when I held the camera in store, though it’s super easy with the EVF and the focus assist turned on.

The Electronic Viewfinder is of decent quality. EVF’s benefit from the fact that you’re seeing exactly what the photo is going to look like when you click the shutter. Change any setting on your camera, and your EVF will show you how that changes the photo. The EVF inside the X-Pro 2 tends to have a lot of trouble with high contrast scenes, and doesn’t always show you the most true representation of what the sensor is capturing. I tend to either use the OVF or live view on the back of the camera. Newer mirrorless cameras apparently have phenomenal EVF’s, showing better contrast, detail, and with faster refresh rates.

Fujifilm X-Pro 2 + 7artisans 55mm f/1.4
Switching between the EVF and OVF is simple enough, just flick the switch on the front of the camera with your right trigger finger. A huge issue I have with the X-Pro 2 in general concerning the EVF/OVF, is the mode button next to it. It gets accidentally pressed, changing how the viewfinder works. Sometimes it blacks out the LCD screen. Sometimes it blocks off usage of the viewfinders. It would be a million times better to have that buried in the settings (which they did on the X-Pro 3) instead of having it’s own button. If you ever turn your camera on and the LCD doesn’t pop up, try cycling through the modes and it’ll probably come up.
Image Quality
It’s good. It’s super good. The Fuji files in combination with Capture One blow me away every time. Bringing up the shadows reveals good detail, with little noise at most ISO’s. Images are easily useable up to 6,400, something that can’t be said for the Canon. The Canon’s limit is right around 1,600, and anything higher than that starts to degrade quickly.

Winona, Minnesota. ISO 1600.
Unprocessed files have a lot of potential if needed, but I’ve found the colors and contrast just need a tiny boost to be at a level I like. Reds seem to pop the most, but the sensor gives a really good baseline for editing. This next photo, I barely had to change anything, partially do to the fact that the light was damn near perfect.

I like contrasty images, so I left the road darker. I could have pulled up the shadows a bit and therefore showed more details in the road, but I didn’t feel it added to the photo at all. Like I mentioned above, I typically just boost the contrast and saturation a bit, and leave everything else as is.
The more I shoot with this camera, the more comfortable I get shooting with the optical viewfinder. I typically shoot in Aperture Priority (set the aperture, let the camera choose shutter speed) and set the exposure compensation to -1 or -1.5 to preserve the highlights. I know I can draw the shadows up easily if need be while not blowing out the highlights. This next photo is a great example, as Miah was just a dark shadow before I started processing the file.

Miah, Whitewater State Park, Minnesota.
The shadows tend to have a lot of information in them even when underexposed by 2 to 3 stops, which I can’t say for the highlights. I’ve found that I can recover a bit of information in the highlights, up to 1 stop over exposed, but beyond that, you’ll blow them.

Early Fall. Root River Park outside of Rochester, Minnesota.
I was able to pull back the highlights in the sky to reveal more a bit more blue on the right side of the image. If I pulled them back too far, the sun stopped looking like a sun, and more like a random orb in the sky. Pulling back the highlights in the sky too much will give it a fake look (which some people like). If the sun is going to be in the photo, you should try and make it actually look like the sun.

Pahrump, Nevada. Martin the Old Man Manual Mazda. Death Valley off in the distance.
Overall, I really do love using this camera, though I still much prefer my film cameras for more serious work. It is great for everything from snapshots to more serious work, though I don’t think you’ll see anybody shooting with it in a professional studio environment. I actually bought a flash and some studio equipment to learn more about lighting, taking some interesting self portraits in the process.

Godox Flash + X-Pro 2 + 23mm f/2
Now about four years old, it’s definitely still a very capable camera. Though I have my issues with it (like anyone will with any camera) I do enjoy using it and I’m glad I picked it up to become my new main digital camera. I’ll probably trade it for a Fuji X-H1 eventually, as that camera has a much larger grip, which is something I would prefer over the measly grip of the X-Pro 2. Until then, I’ll keep shooting with it and enjoying it while I can.
NOW, onto more photos.

Monterey, California. Just north of Big Sur.

Lanesboro, Minnesota.

Sequoia National Forest, California.

Perrot State Park, Wisconsin.

Sequoia National Forest, California.

Chloe, Eye Autofocus - On. Twin Cities, Minnesota.

Cedar Cultural Center, Minneapolis, Minnesota.

Somewhere in the middle of California.

Also somewhere in the middle of California.

Perrot State Park, Wisconsin.

Miah’s Birthday, Interstate State Park, Minnesota.

Pahrump, Nevada.

Pahrump, Nevada.

One of my three favorite cameras!!!
Canon Sure Shot/Autoboy Review
The Canon Sure Shot is notorious in the film community, with multiple different models being made from 1979 to 1988. The one I had is the Sure Shot 2, which was produced in 1983 until 1986 when the 3 came out. Design and features changed drastically over the 9 years of production, and each model had their own little niche target groups.
DISCLAIMER: This post contains affiliate links. If you make a purchase through these links, I may earn a small commission at no extra cost to you. I only recommend products I personally use and trust.
The Canon Sure Shot is notorious in the film community, with multiple different models being made from 1979 to 1988. The one I had is the Sure Shot 2, which was produced in 1983 until 1986 when the 3 came out. Design and features changed drastically over the 9 years of production, and each model had their own little niche target groups.
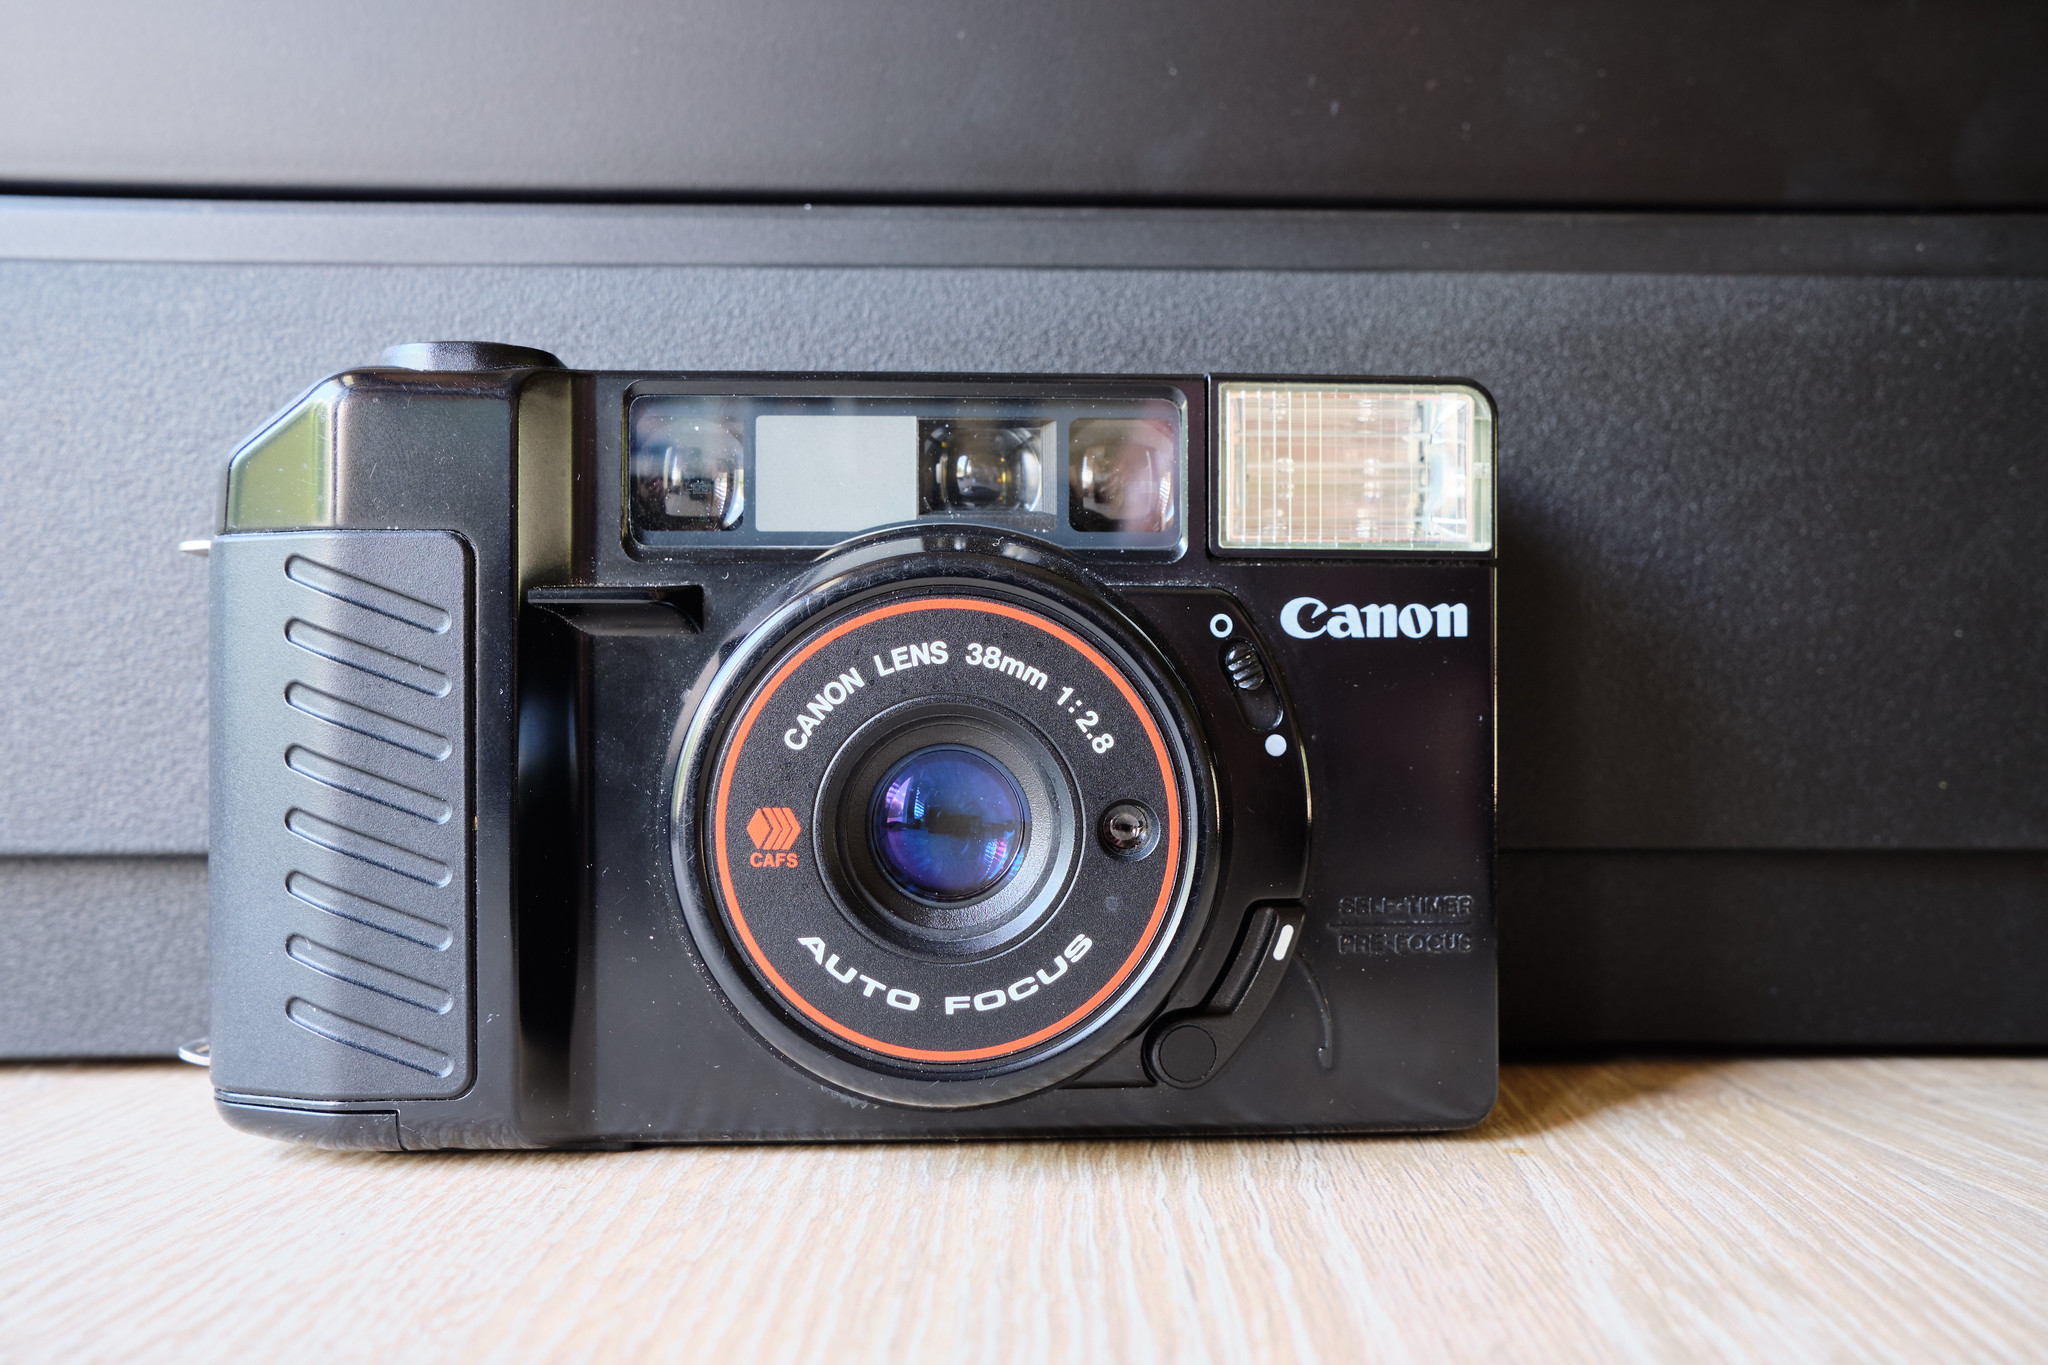
The Sure Shot/Autoboy series are the only point and shoot cameras by Canon that featured a 38mm f/2.8 lens. They used an older type of infrared beam to achieve correct autofocus, and from the many rolls I shot, it seems to work very well.
I’ll drop a couple facts about this camera before diving into the pros and cons of the camera in use:
Brand: Canon
Model: Sure Shot/Autoboy 2
Lens: 38mm f/2.8 (4 elements in 4 groups)
Features: Pre-focus, self-timer (no idea how to use the self-timer), and a FLASH!
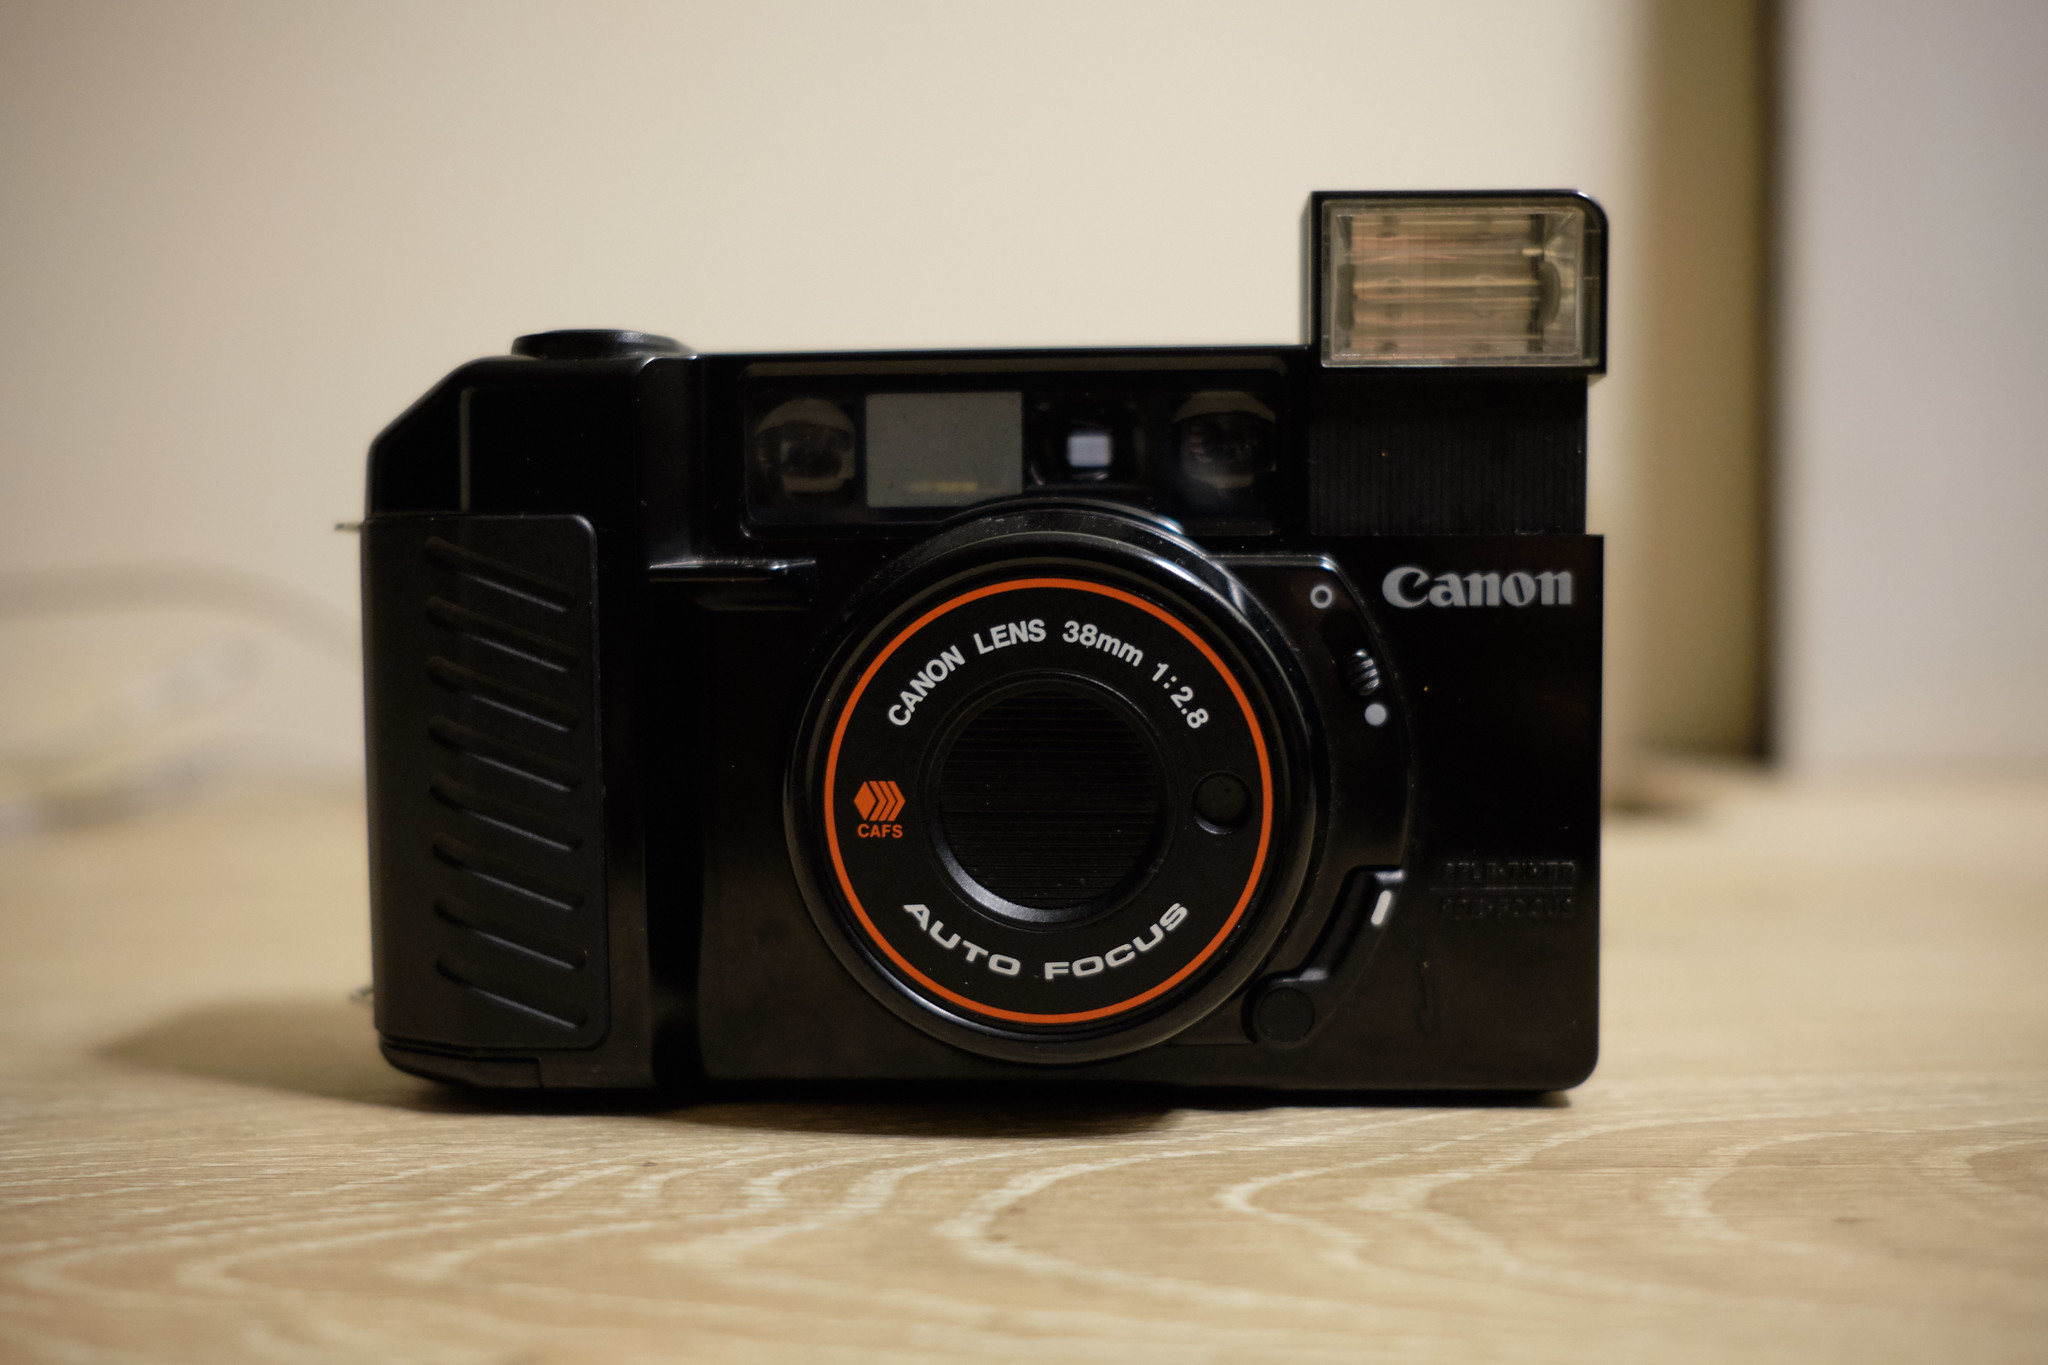
It’s a simple camera, hence the type, point and shoot. I found mine at an estate sale for $10, and quickly nabbed it up. Besides some corroded battery terminals, the camera was in great condition for being 36 years old. The viewfinder is nice and clear, though the frame lines do blend into the scene on very bright days. It also features a focus scale on the bottom portion showing you where it is focused, either before the shot (with pre-focus) or after taking the shot. It just shows a person’s head, and a mountain, so not very helpful.
The grip is substantial enough for the weight of the camera, though I’m a fan of deeper grips on my cameras so carrying for a long time is easier to do. The grip itself is made of a good material that your hand can easily hold, and I don’t see it deteriorating any time soon. The camera does fit easily in a pants pocket, though it is very much the shape of a brick and can be a tad awkward.

Portra 400. Madison, Wisconsin.
Besides being an odd shape, the camera functions pretty well! The autofocus pretty damn accurate, though it is very loud. There isn’t a single thing on this camera that doesn’t produce a noise. This camera would not be good for street photography, as everyone within a 20 foot radius would be aware of it. Focusing? Winding noise. Shot taken? Loud click. Frame advance? Grinding noise. End of the roll rewind? Probably the worst noise I’ve ever heard come out of a camera; grinding and winding, it sounds like it’s breaking.
BUT, it does have a pretty great feature that does make it slightly more conspicuous if needed. As you’re taking a shot, if you hold down the shutter button, it will refrain from winding on to the next frame until you release it. This cuts down on half the noise, though pre-focusing beforehand would cut down even more.

Portra 400. Madison, Wisconsin
If street photography isn’t your thing, I would highly suggest this camera. The lens is fantastically sharp, and it has the strangest and coolest flare I have ever seen. Depending on the angle of the sun, it will produce either a blue blob (below), or a curved blue wave of light (above).

Portra 400. Madison, Wisconsin.

Portra 400. Madison, Wisconsin.
If the shutter speed is going to be lower than 1/60th of a second like the photo above, a little red light will flash inside the viewfinder to serve as a warning. It will let you shoot still, but since it doesn’t tell you the shutter speed, you’ll have to guess if the shot is worth it or not.
The only manual feature of this camera is the ISO, which is found underneath the lens with the window on top. I believe the range is from 50 to 800, but someone please correct me if I’m wrong. I typically shoot ISO 400 films at 320 or 200, to allow for slightly more details in the shadows. I did shoot a roll of E100 through it recently, but have yet to get it developed, so I’ll find out eventually how accurate the meter in the camera truly is.

Portra 400. 4th of July Party.

Portra 400. 4th of July Party.

Portra 400. 4th of July Party.

Portra 400. 4th of July Party.
Overall, this is a great little camera. It’s easy to take with you anywhere, and it’s very sharp for being a point and shoot. I certainly wouldn’t have bought it for the prices it goes for now, but to each their own. I would highly recommend it for someone looking to get into film photography, because it’s not too expensive compared to other cameras, and the results are fantastic.
If it was a little quieter, I would have kept it. For now, I’ll continue playing with my Canonet QL17iii and Olympus XA2 (Affiliate link to eBay). If you’re interested in the XA2 review I have posted, you can find that here! If you’re looking to shoot something that is fully manual, I have reviewed the Leica M3 here.
EDit - 4/4/2024
I purchased an untested Canon Sure Shot/Autoboy 2 (Affiliate link to eBay) for less than $30 total after looking at the battery terminal and overall condition, and that gamble turned out perfectly. I’ve been using it for over a year now with next to no issues, so be on the look out for those!
And now, more photos!

Portra 400. 4th of July Party.

Portra 400. Madison, Wisconsin.

Portra 400. Madison, Wisconsin.
Portra 400. Madison, Wisconsin.

Portra 400. Madison, Wisconsin.

Portra 400. Madison, Wisconsin.
Comfort Zone
Over the past few months, I’ve begun to realize how much I really love taking photos of people. Taking a photo of someone I know well makes the whole process incredibly easy, as they’re already relaxed. I’ve also realized that street photography (think candid moments of total strangers) terrifies the hell out of me.
Over the past few months, I’ve begun to realize how much I really love taking photos of people. Taking a photo of someone I know well makes the whole process incredibly easy, as they’re already relaxed. I’ve also realized that street photography (think candid moments of total strangers) terrifies the hell out of me. I’ve been working on it with some of my smaller point and shoots, and occasionally my medium format cameras, but the whole thing is a little nerve wracking.

Shot with the Bronica ETRsi, Sunny 16, self developed and scanned. Fuji PRO400H
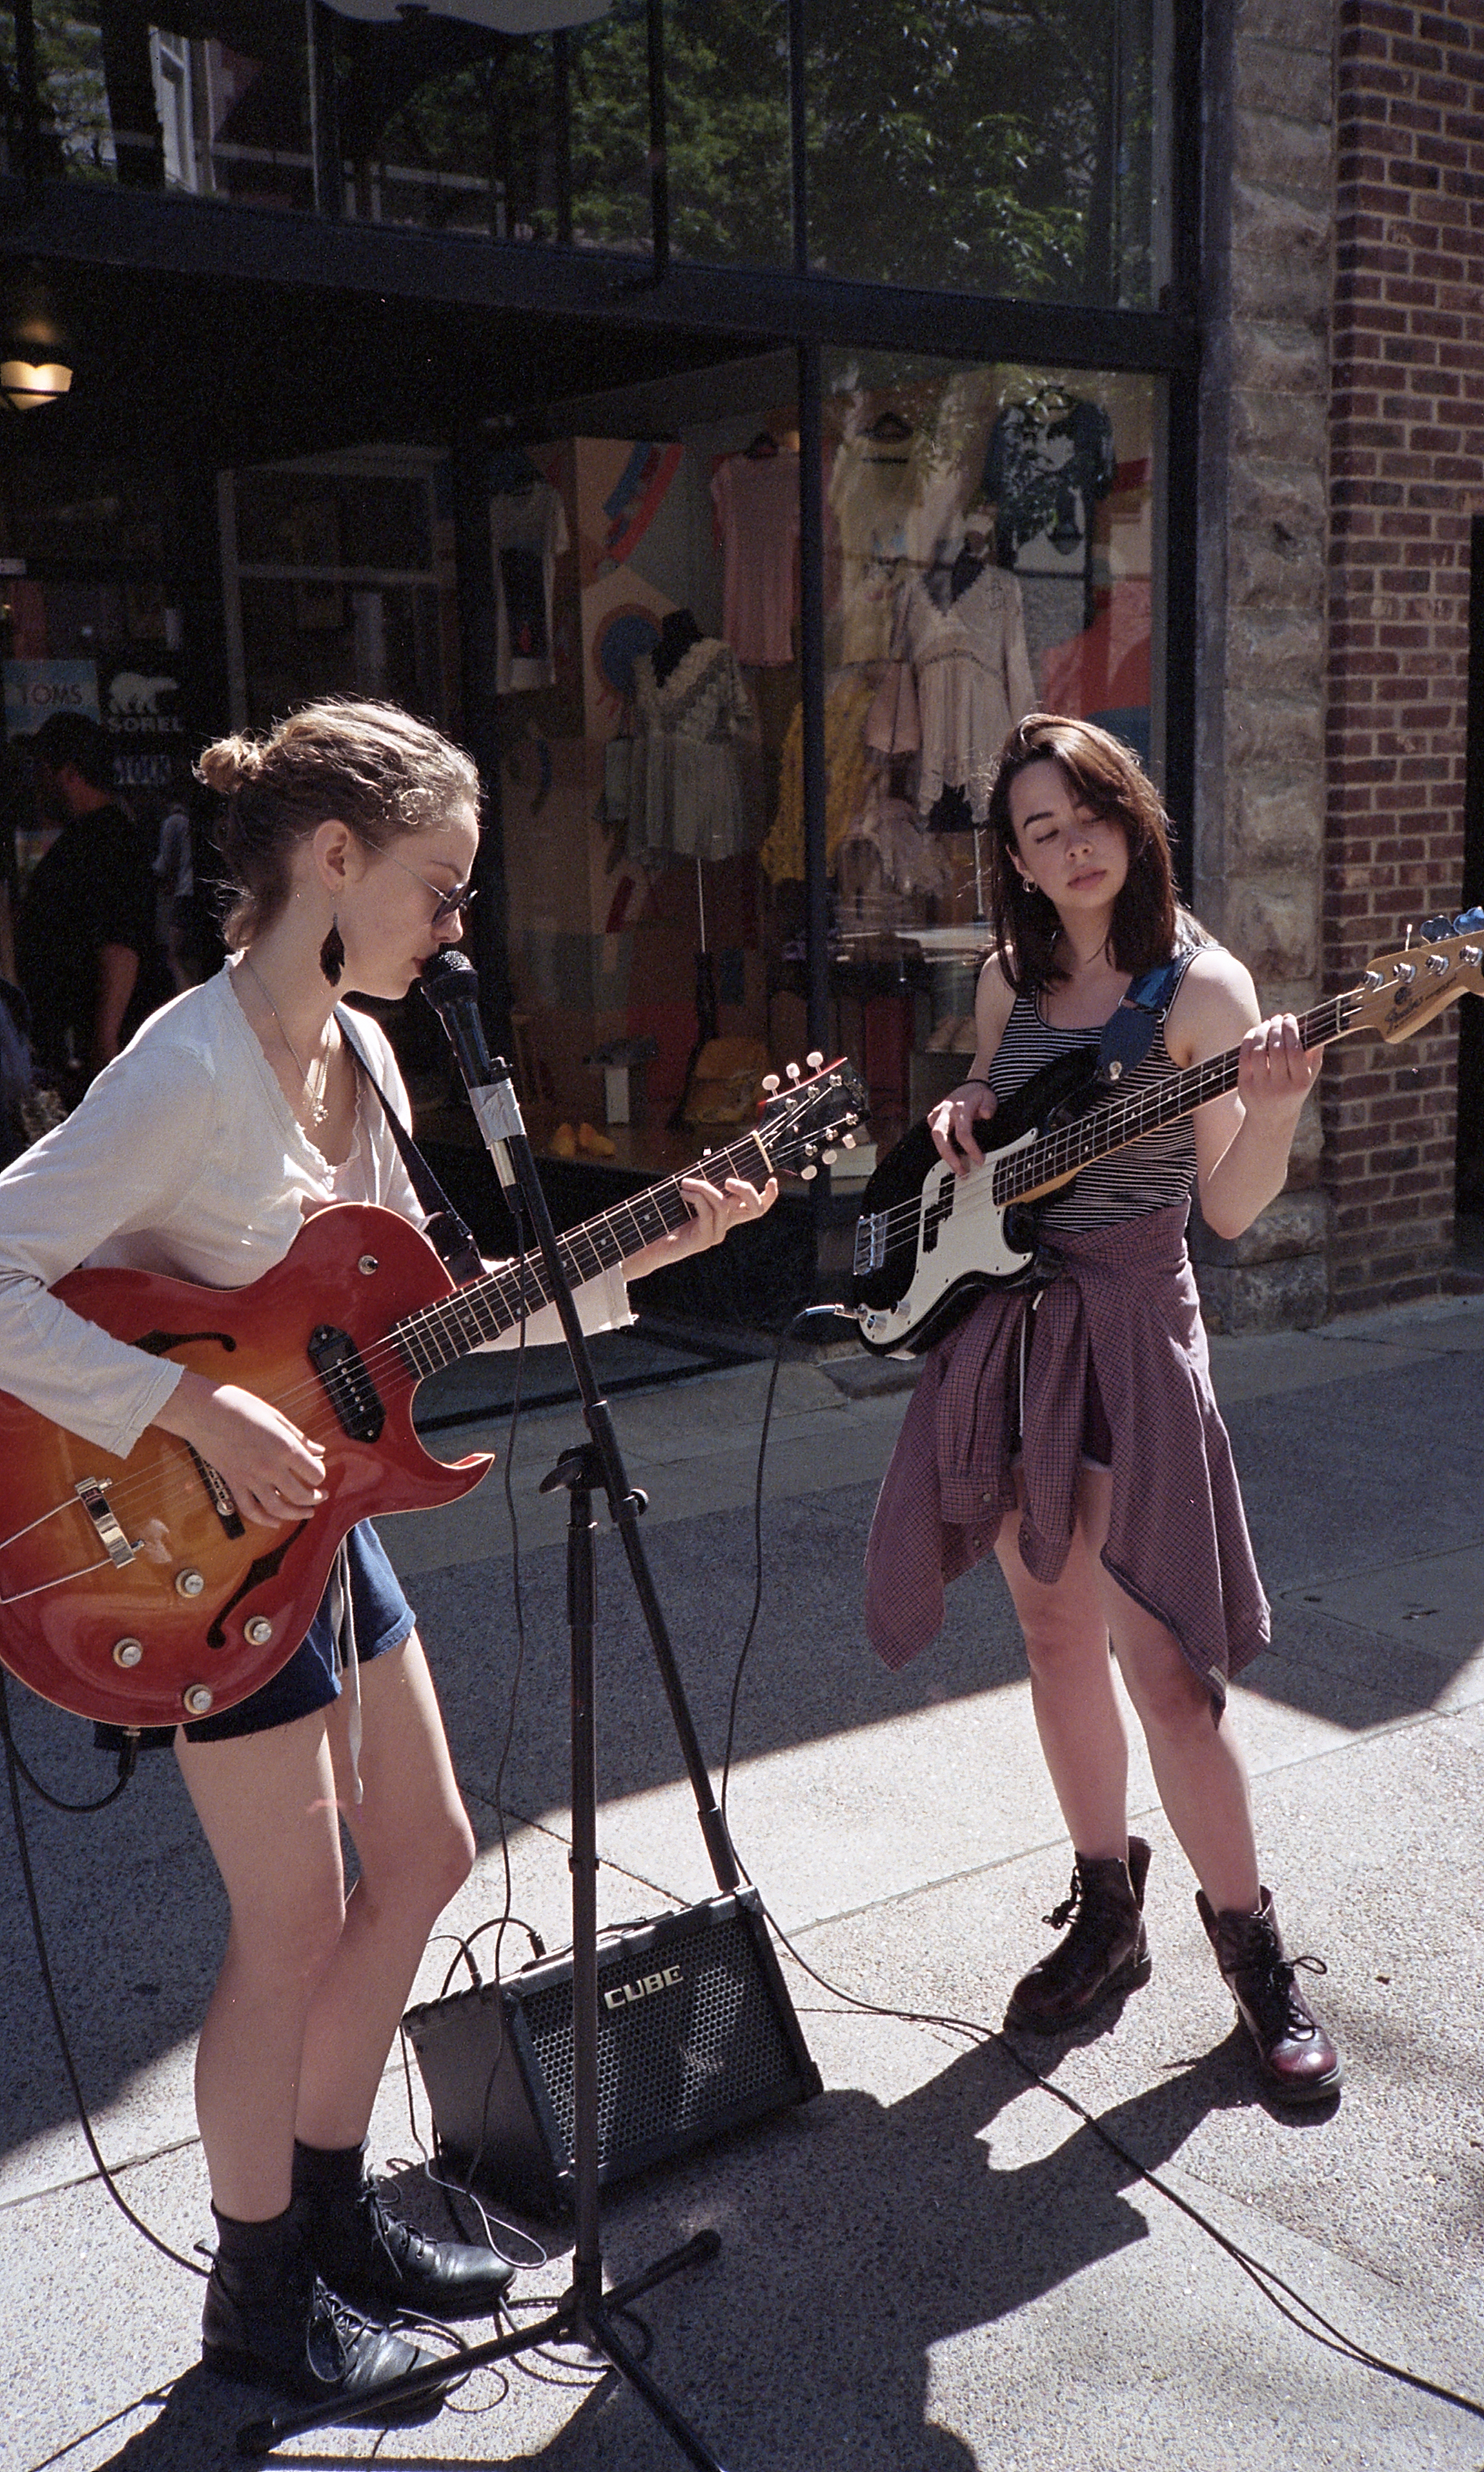
Street photography requires quick actions to capture the moment, and typically the image becomes more powerful when the subject of the photograph is in some way interacting with you.
But, I’m an introvert, so interacting with total strangers is an absolute no-no for me. I’d much rather just sit back and wait for something to unfold in front of me. As I think shows in the photo below, it works sometimes.

Just sat and waited. Canon Sure Shot. Kodak Portra 400.
Another personality trait that I so graciously acquired, perfectionism. I hate failure, so if I don’t think I’ll succeed fully at something, I might quit at it halfway through just to avoid that failure. I’ve written about failure before, and also the benefits of recognizing those failures.
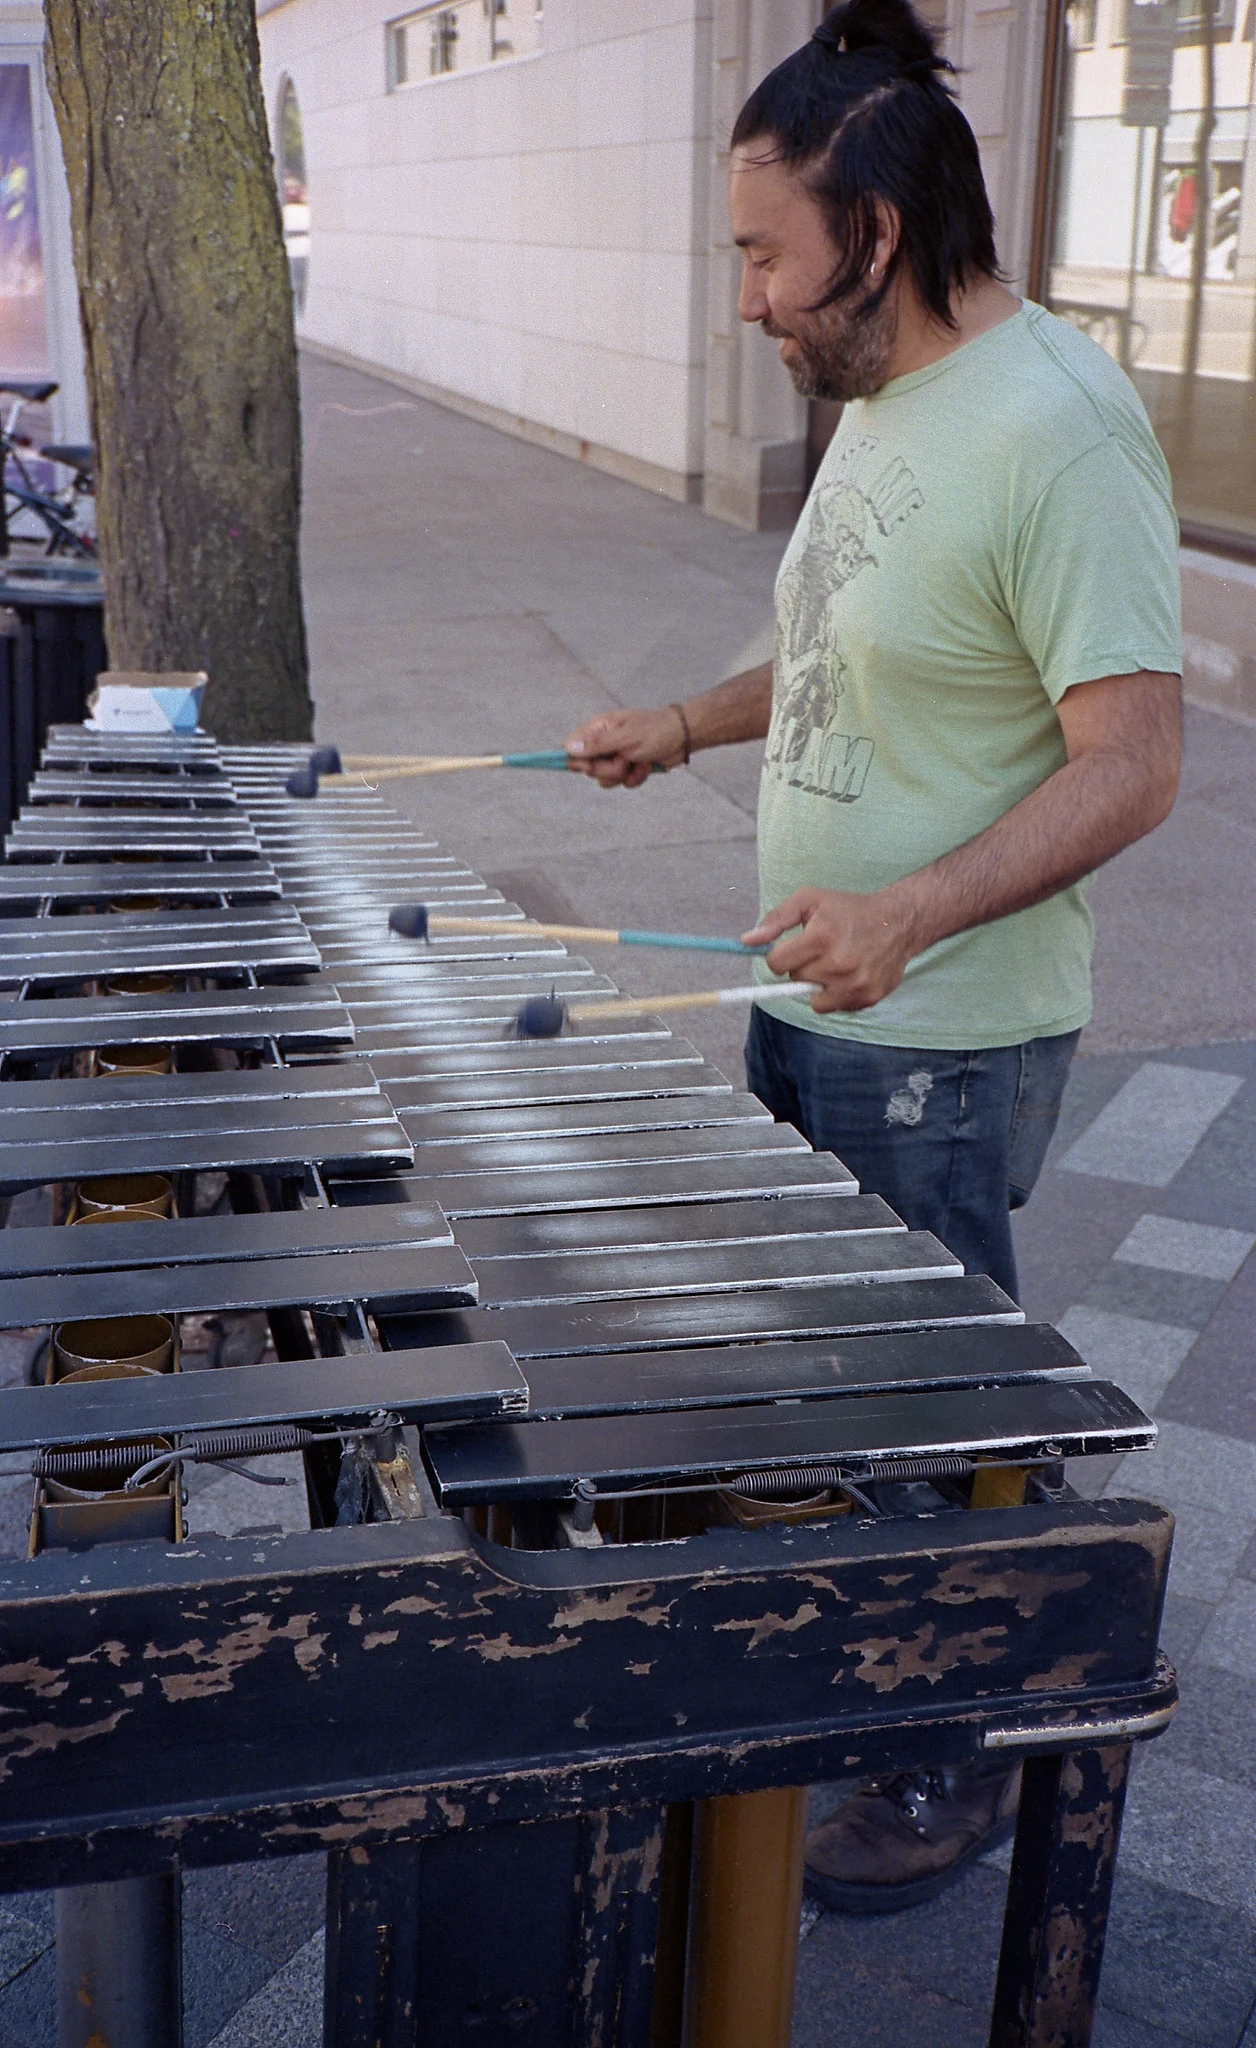
Performing in Madison, WI. Canon Sure Shot. Kodak Portra 400.
So to stick with the spirit of failing and pushing my personal boundaries, I’m going to give myself a challenge for the next thirty days. Take one portrait, of one stranger, each and every day. Just the thought of it makes me uncomfortable, which is exactly the reason I should, and need to do this. I’ve done weird little personal projects from time to time, but never anything so far out of my comfort zone.
It starts today, so expect to see another blog post pertaining to this one in about a month and a half. Until then, enjoy some more random photos :)

Canon Sure Shot. Kodak Portra 400.

Canon Sure Shot. Kodak Portra 400.

Canon Sure Shot. Kodak Portra 400.
Preservation
I’m still trying to wrap my head around what happened and why, but a friend of mine passed this weekend. I got a call Sunday night from one of her friends who I know from the rock climbing wall in Mankato. I didn’t know how to react, and I was in a state of shock until later that night. After that phone call, I raced home and started searching for the negatives I had of Abigail, the ones I had taken almost four years ago.

I’m still trying to wrap my head around what happened and why, but a friend of mine passed this weekend. I got a call Sunday night from one of her friends who I know from the rock climbing wall in Mankato. I didn’t know how to react, and I was in a state of shock until later that night. After that phone call, I raced home and started searching for the negatives I had of Abigail, the ones I had taken almost four years ago.
I don’t remember how exactly I met Abigail, but I know we both shared a passion for photography and rock climbing. She was bubbly and always smiling, and it was contagious. She became one of my better friends that year. We spent a lot of time together, whether it was rock climbing, hiking, photography, or just hanging out at her apartment listening to music. When I started my film class in the spring semester, Abigail was absolutely ecstatic to help.

On one of the many dreary spring mornings we had that year, I headed over to Abigail’s apartment to hang out with her and her roommate Brooke. My assignment that week for my photography class was to shoot portraits, so Brooke and Abigail became my subjects for the day. I pulled out my brand new light reflector and started bouncing light around like any photographer with a new tool would. I moved them all around the living room, which had nice white walls and an open window, essentially acting as one giant light reflector.

Abigail wasn’t very good at acting serious, but at the time that’s what I wanted to photograph. She dealt with my requests and gave me her all the entire time. I photographed her and Brooke for maybe 30 minutes, or as long as it took to finish the roll of film. After I got done shooting, and since it was still morning, Abigail wanted to do her thing and make some coffee. I don’t know where she got the idea from, but she heard about turkish coffee readings. Turkish coffee is very finely ground, so when you finish drinking it, all of the grounds are left on the bottom.

The method (from what I remember) goes like this: drink the coffee in one go, and flip the cup upside down on the plate. Let it sit for a few minutes so the grounds have time to settle. Different patterns and shapes carry different meaning. After my coffee sat for a bit, Abigail flipped it over and gave me the news. (Sorry for the proceeding picture as I took it with my phone over 3 years ago)
Abigail saw the creature that had formed, and described it as a demon that was haunting my life. At that point in time, I was drowning in my depression, and knew exactly what that demon represented. Abigail asked if I knew what it could be, and I told her I had a couple things in mind. We hung out for a couple more hours, I said my good byes and headed home with a lot to think about.

Abigail was the first catalyst in me getting help with my depression. I think I told her later that night about it. I truly do not know where I would be without having met Abigail. She was an incredibly positive influence in my life, and I will always be grateful for having the opportunity to know her. I’m especially grateful to have these pictures of her. They bring a lot of emotion to the surface, and help me remember that day and the others that followed.
So I’ll end this emotional roller coaster of a post by saying this: Please take pictures of the ones close to you; friends, family, whoever, just take photos of them. The more time that passes, the more meaning they start to carry. Holding the negatives with Abigail on them brought me a weird happiness, but one I’ll hold onto for a while.
Abigail, thank you for being in my life, I’m going to miss you a lot.
