

COVID-19 and Some Goals pt. 2!!!
Today is the last day of working 14 days in a row straight, and I am so excited to get started on the goals I had outlined in my last post here. BUT - I completely forgot that I finally got my Leica back from being serviced. I sent the damn thing off in August of 2018, and got it in the mail on Thursday.

Today is the last day of working 14 days in a row straight, and I am so excited to get started on the goals I had outlined in my last post here. BUT - I completely forgot that I finally got my Leica back from being serviced. I sent the damn thing off in August of 2018, and got it in the mail on Thursday.
It’s a Leica M3 Double Stroke from 1958/1959, with a 90mm Elmarit f/2.8 attached. It’s a thing of pure beauty and I can’t wait to finally use it.
So, in addition to learning to shoot and edit videos, I’ll be typing up a short review of the camera after running a roll or two through it. My goal for a video will be something along the lines of shooting with the Leica, showing the use of the camera, followed by the process of developing, drying, and scanning the film, and finish off with the end product. I have absolutely no idea how to input photos into videos so it should be a very interesting week to say the least.
Until I get started on all of that, enjoy some photos of this late 1950’s feat of German engineering.


Shout out to the moron that carved a serial number into this.
Old Photos
DISCLAIMER: I wrote this at the end of February, so before all of the insanity of COVID-19 was around.
For the past couple months, I’ve been thinking about going through and editing old photos to bring them up to my current standards and editing style. For the first couple of years with my digital camera, I was exporting images in the wrong color profile, which would wash out the colors, making them look dull and lifeless.
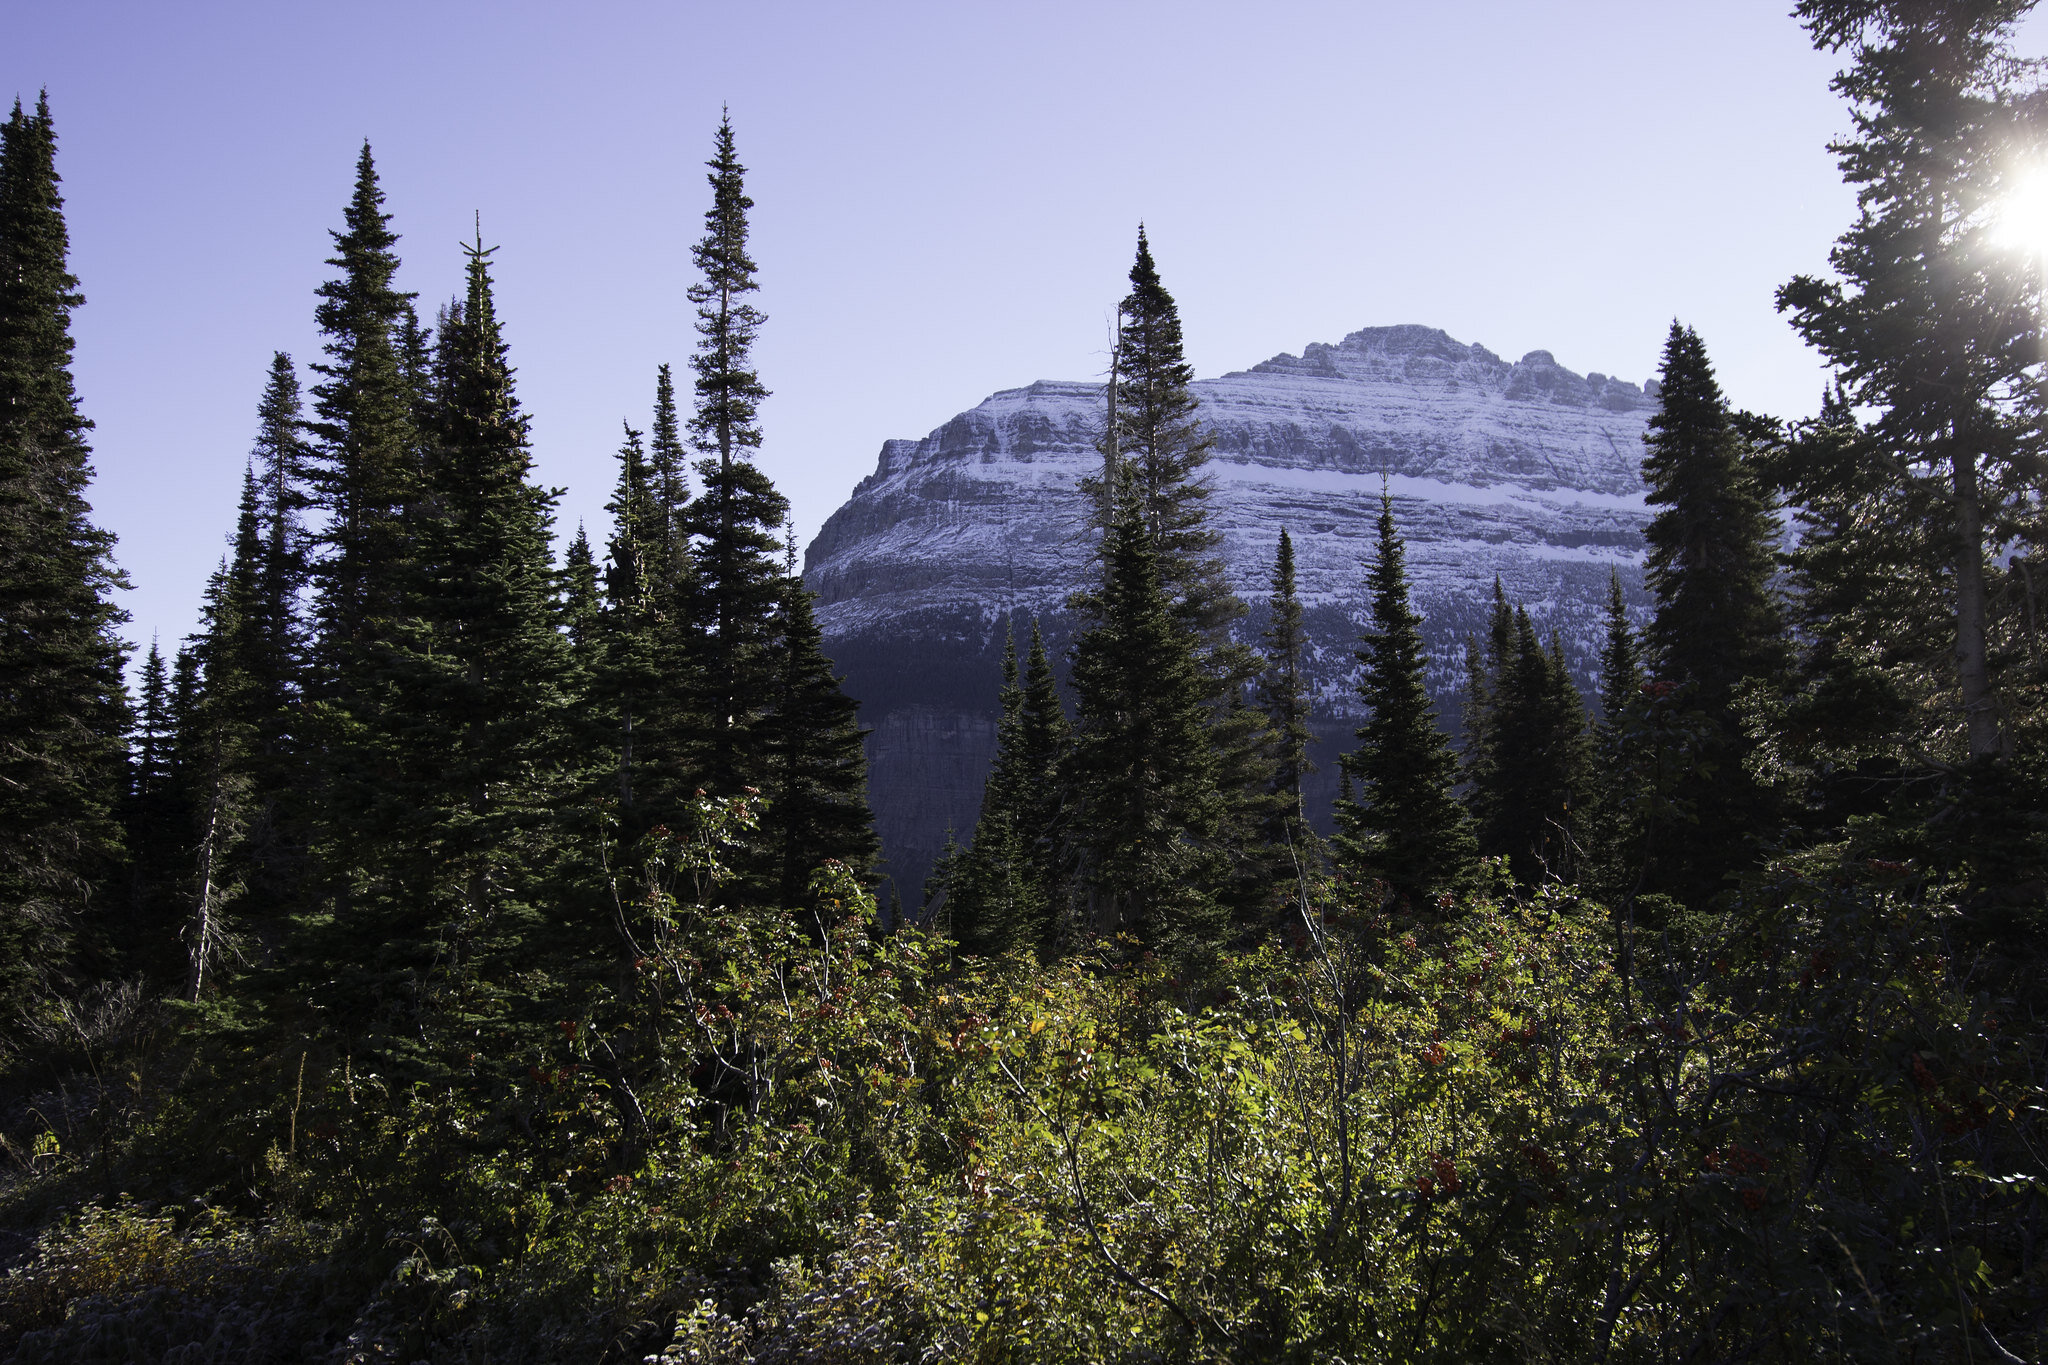
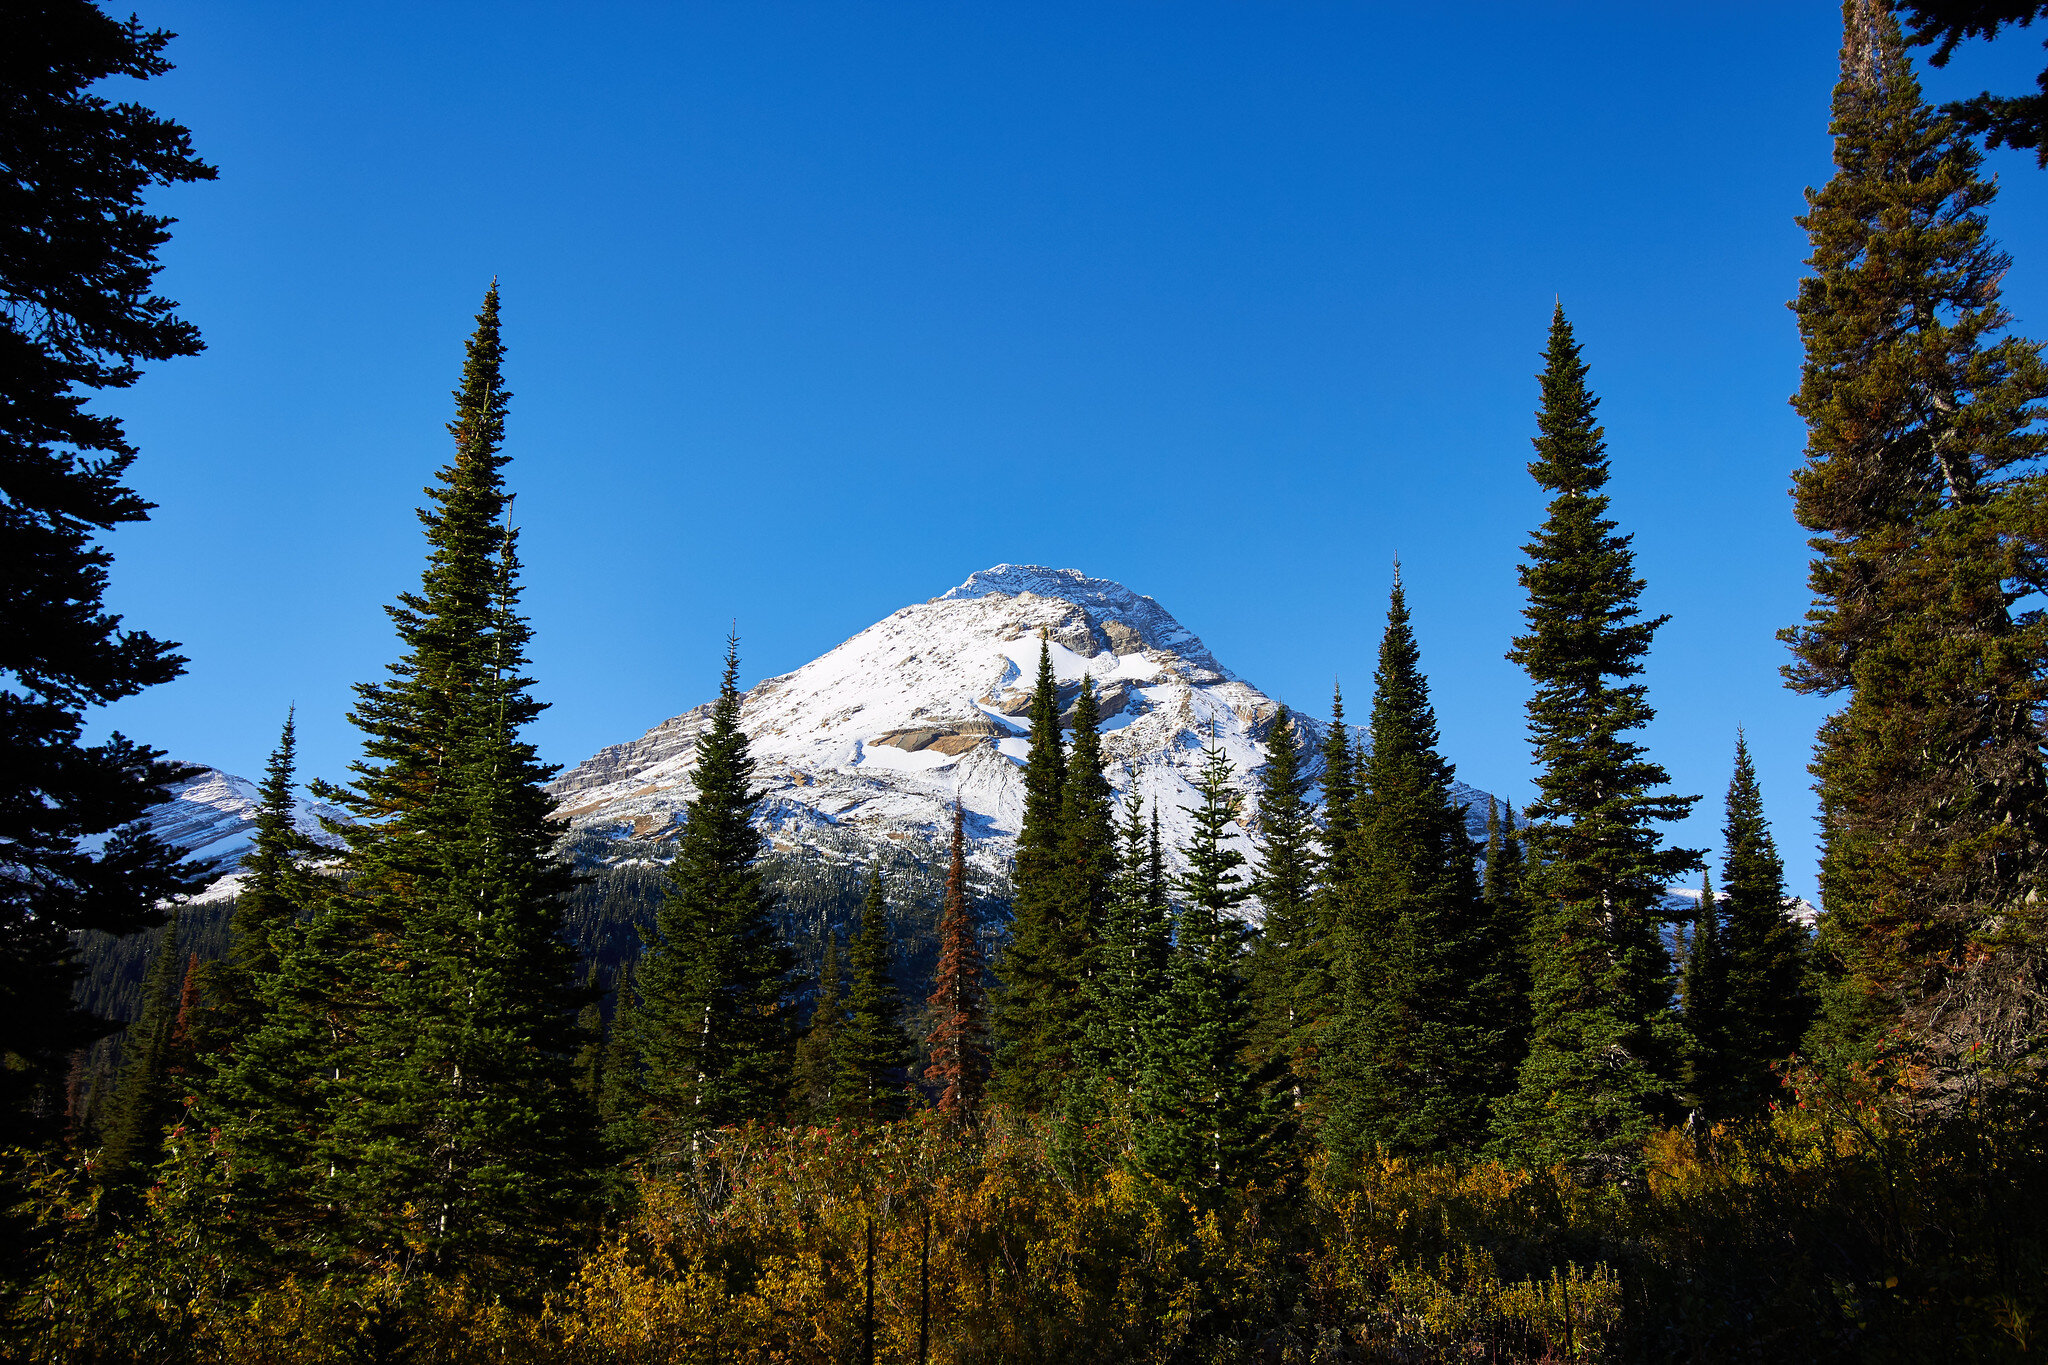
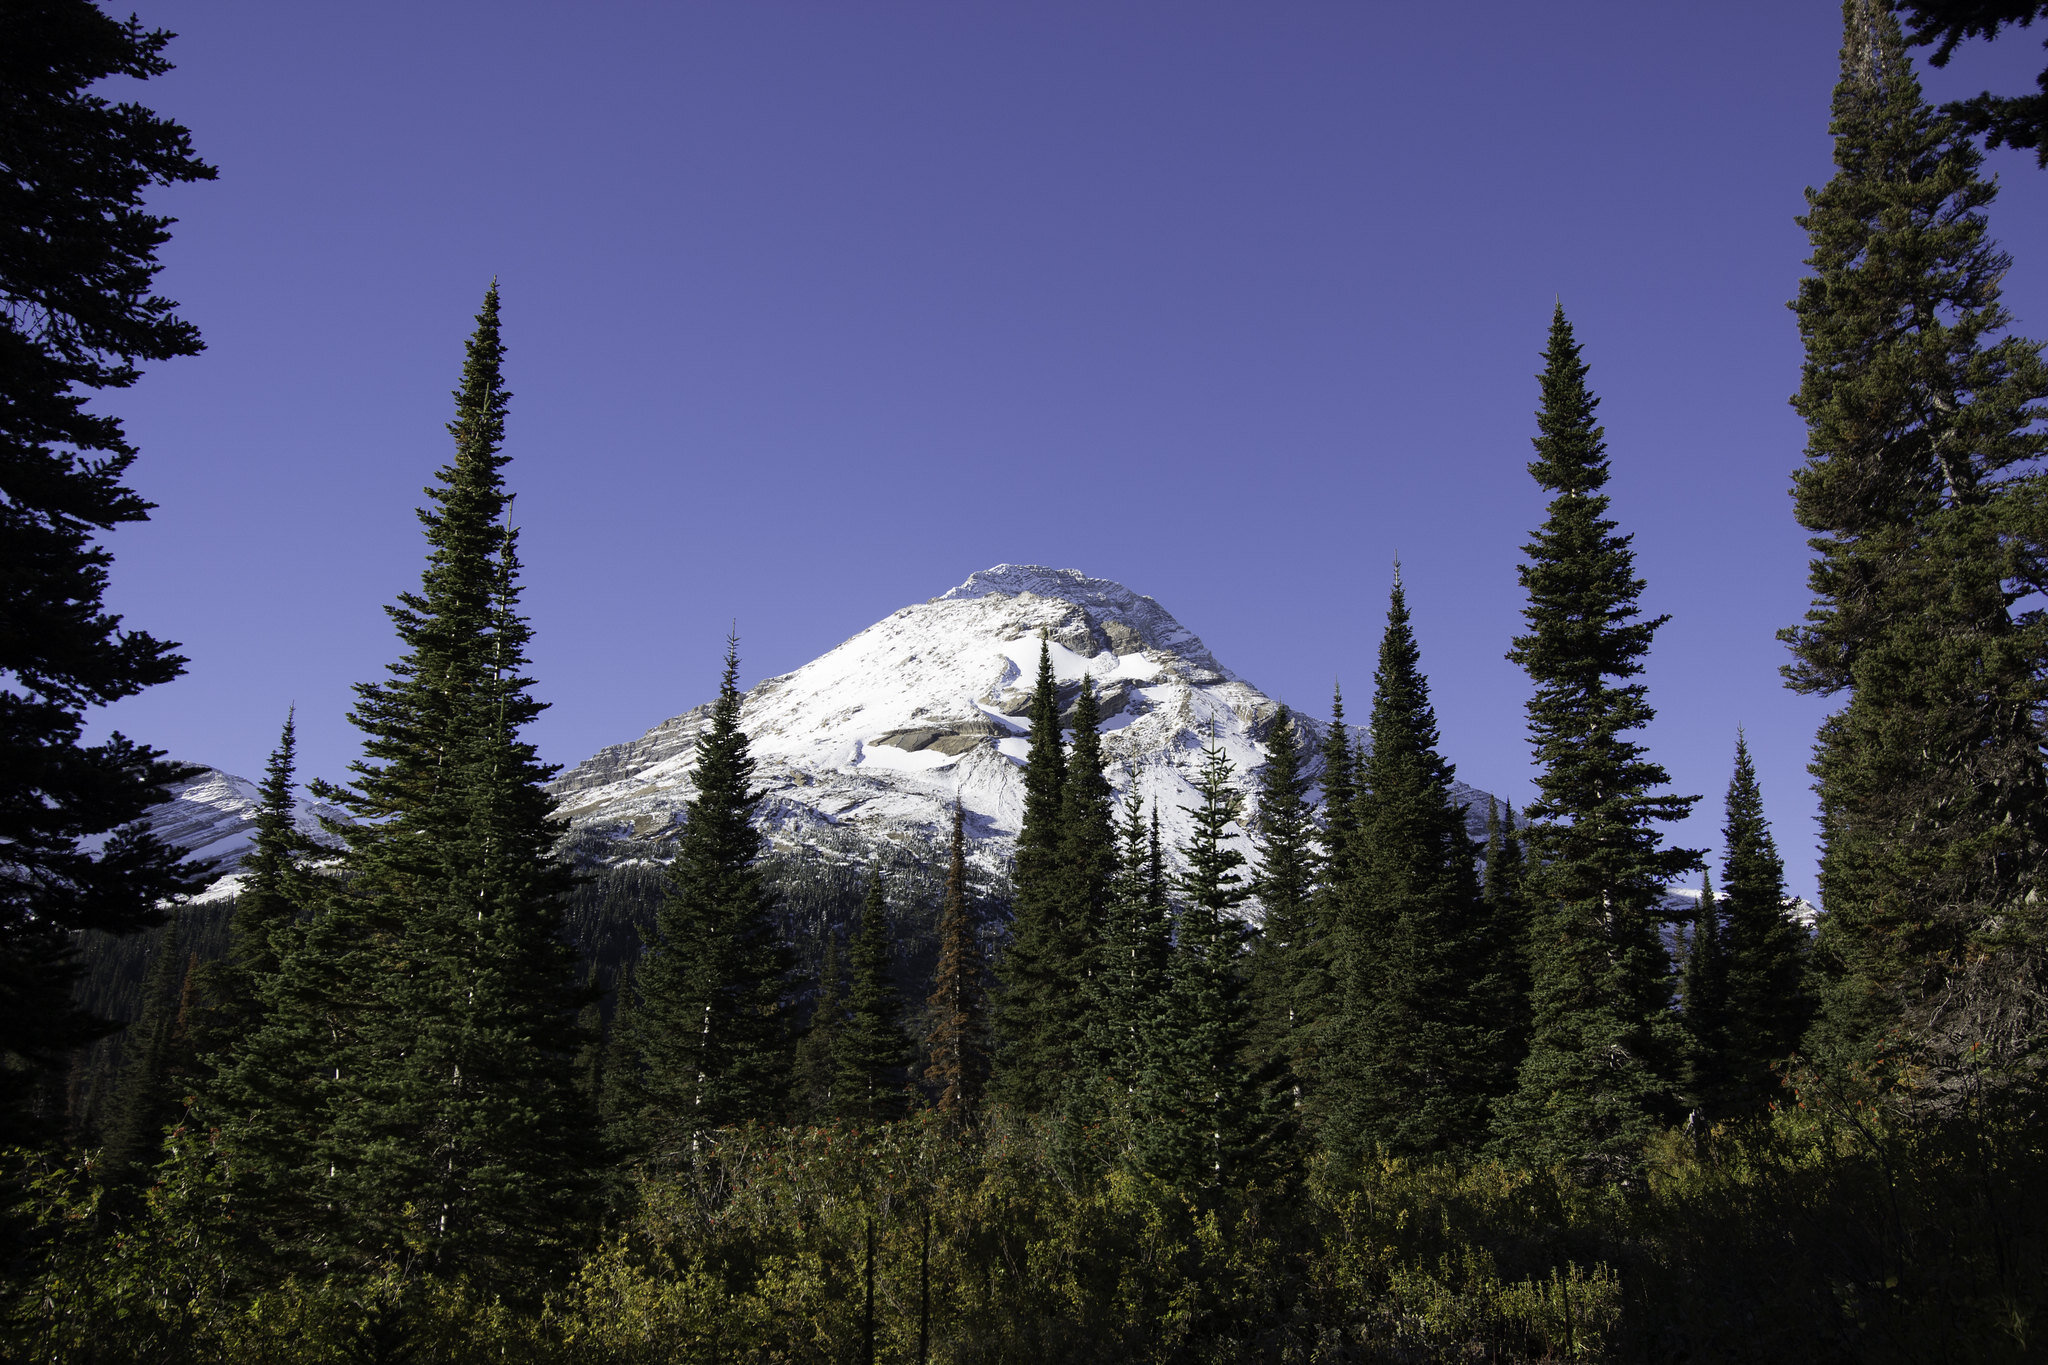
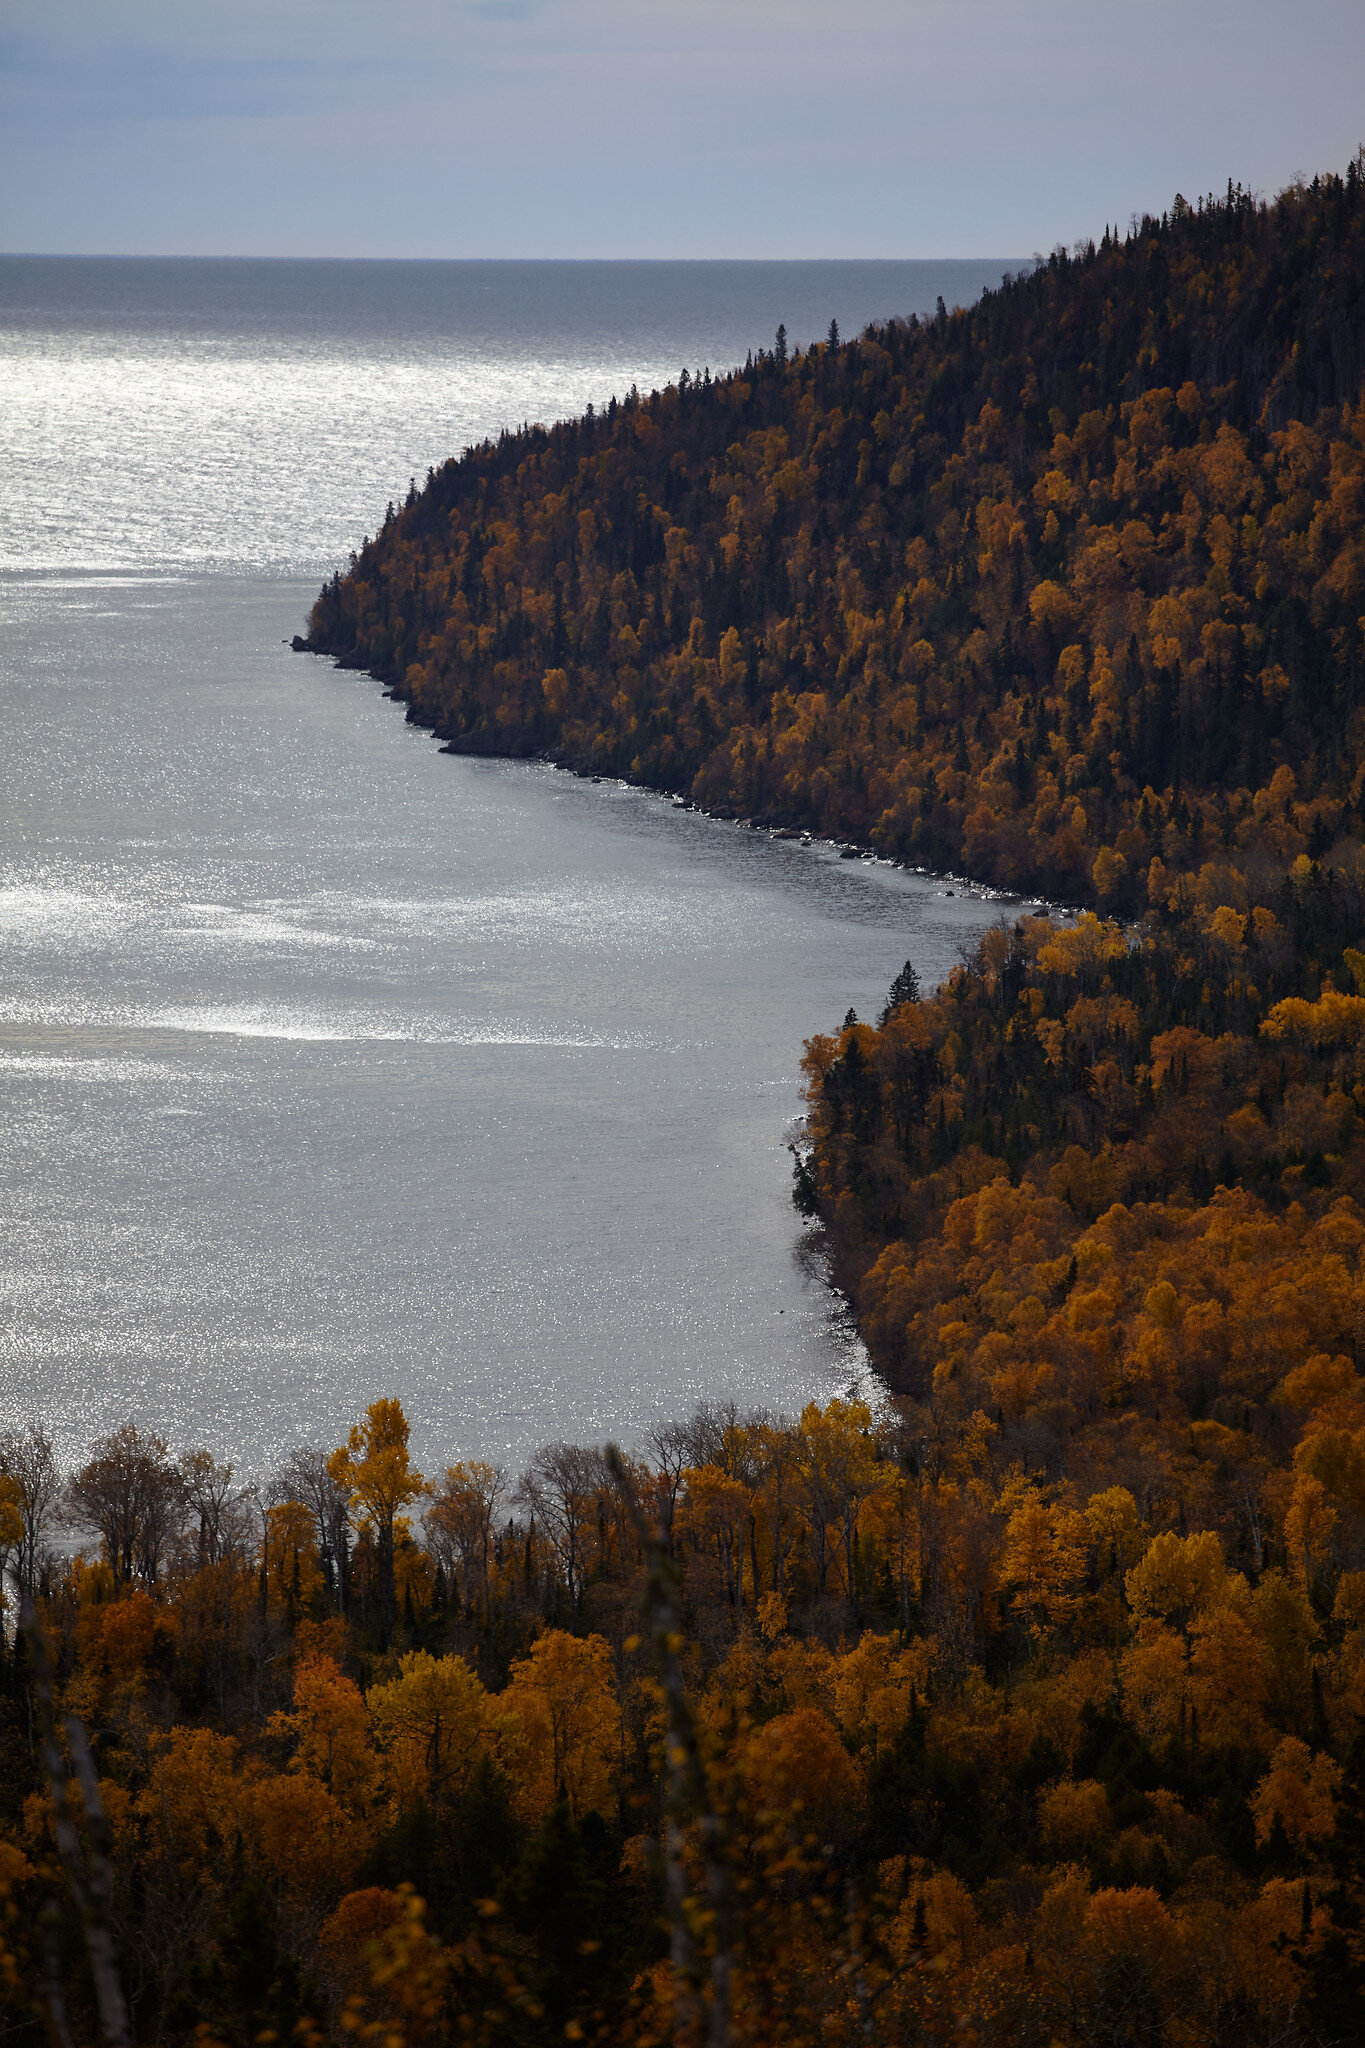
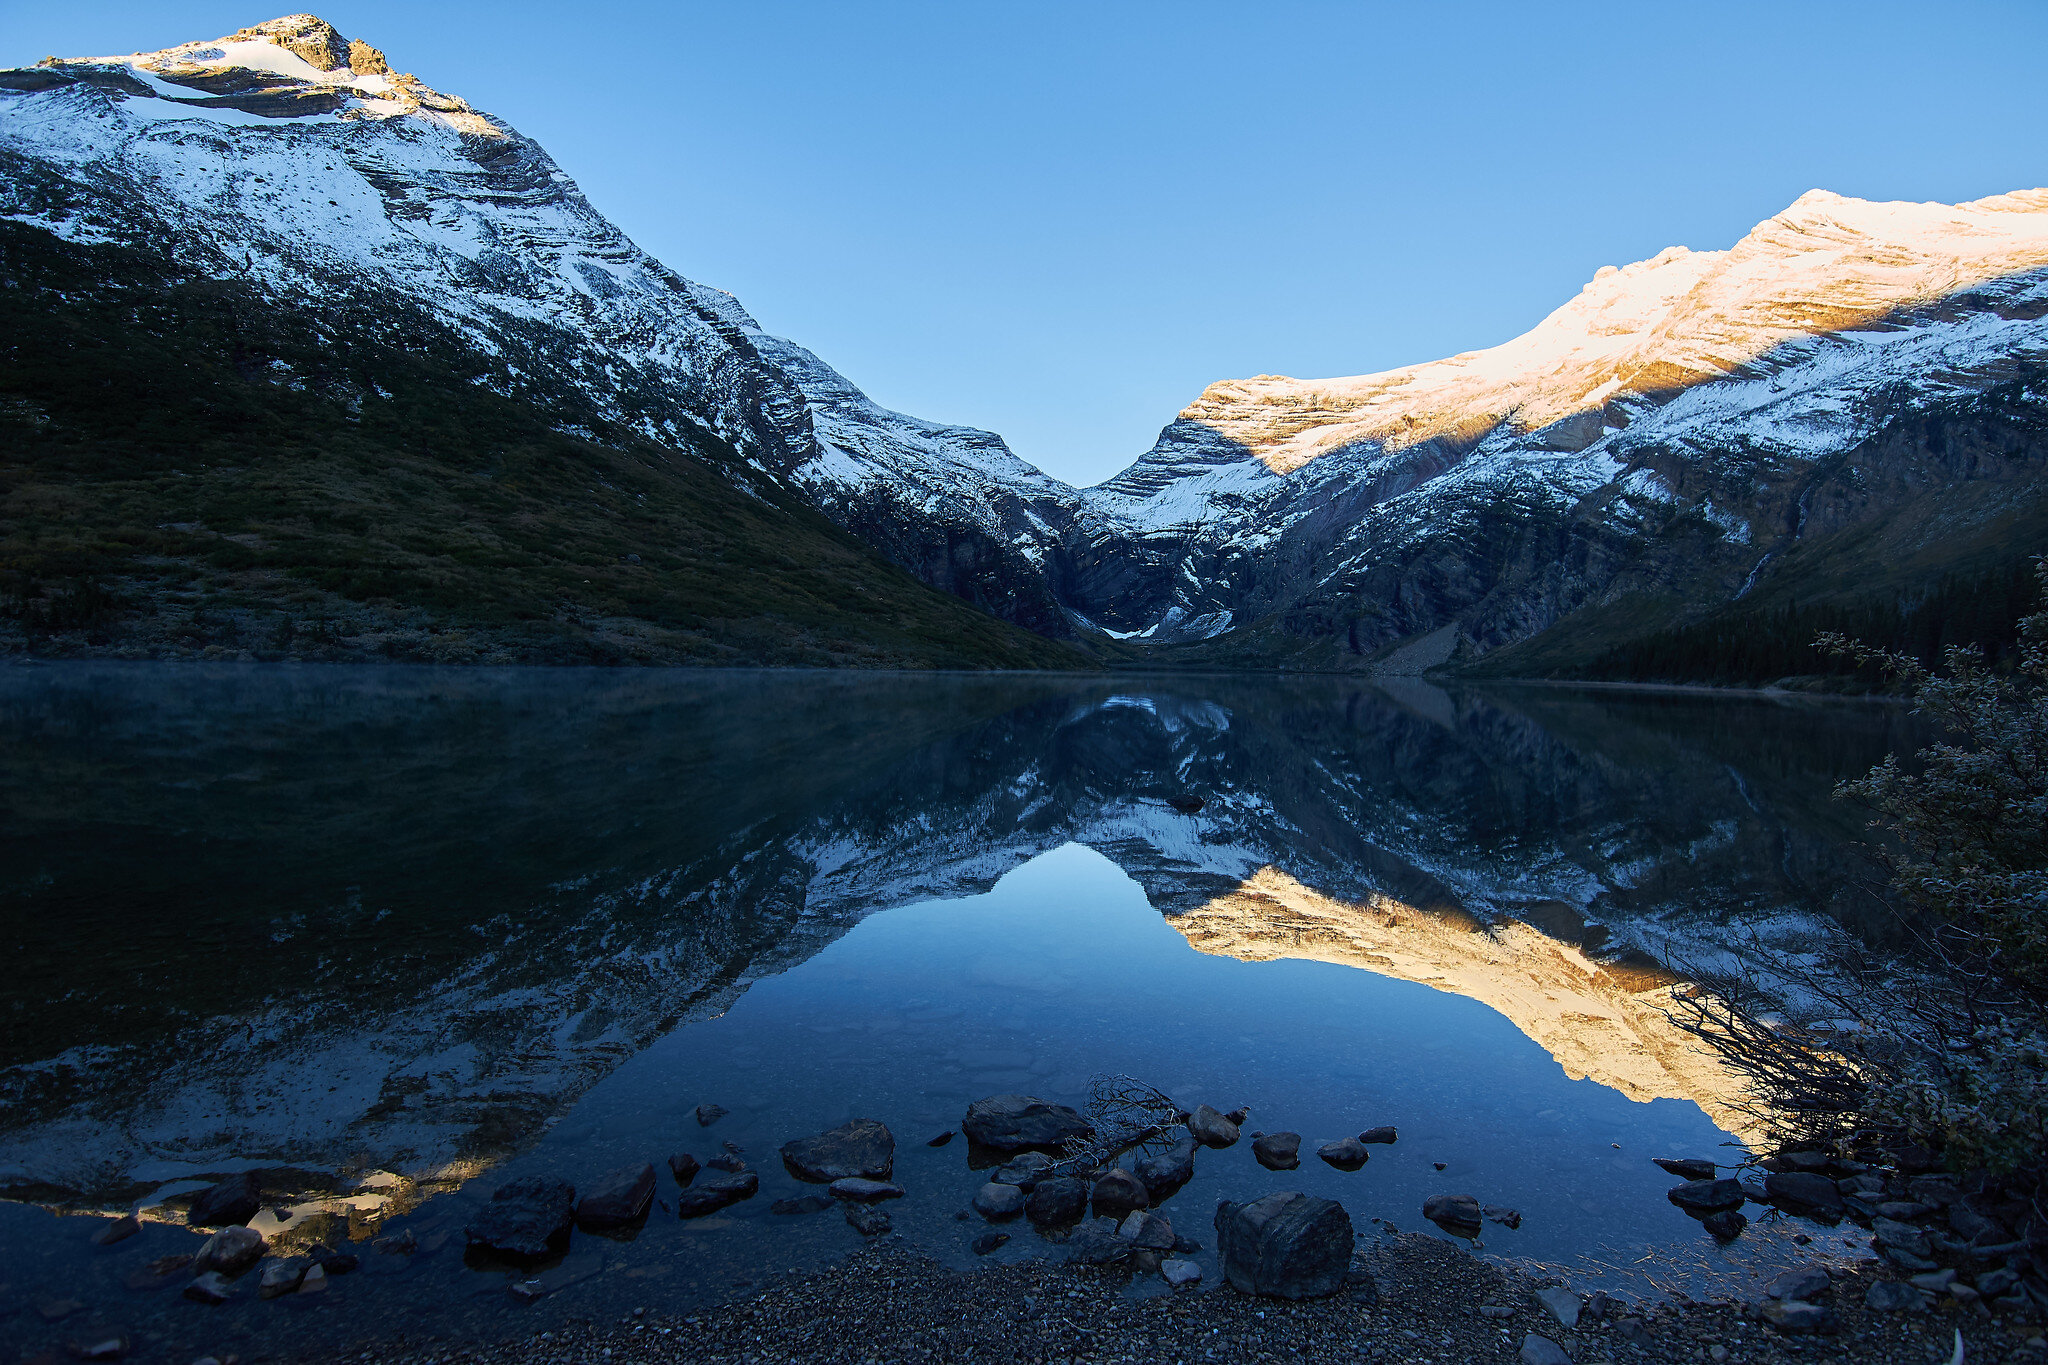
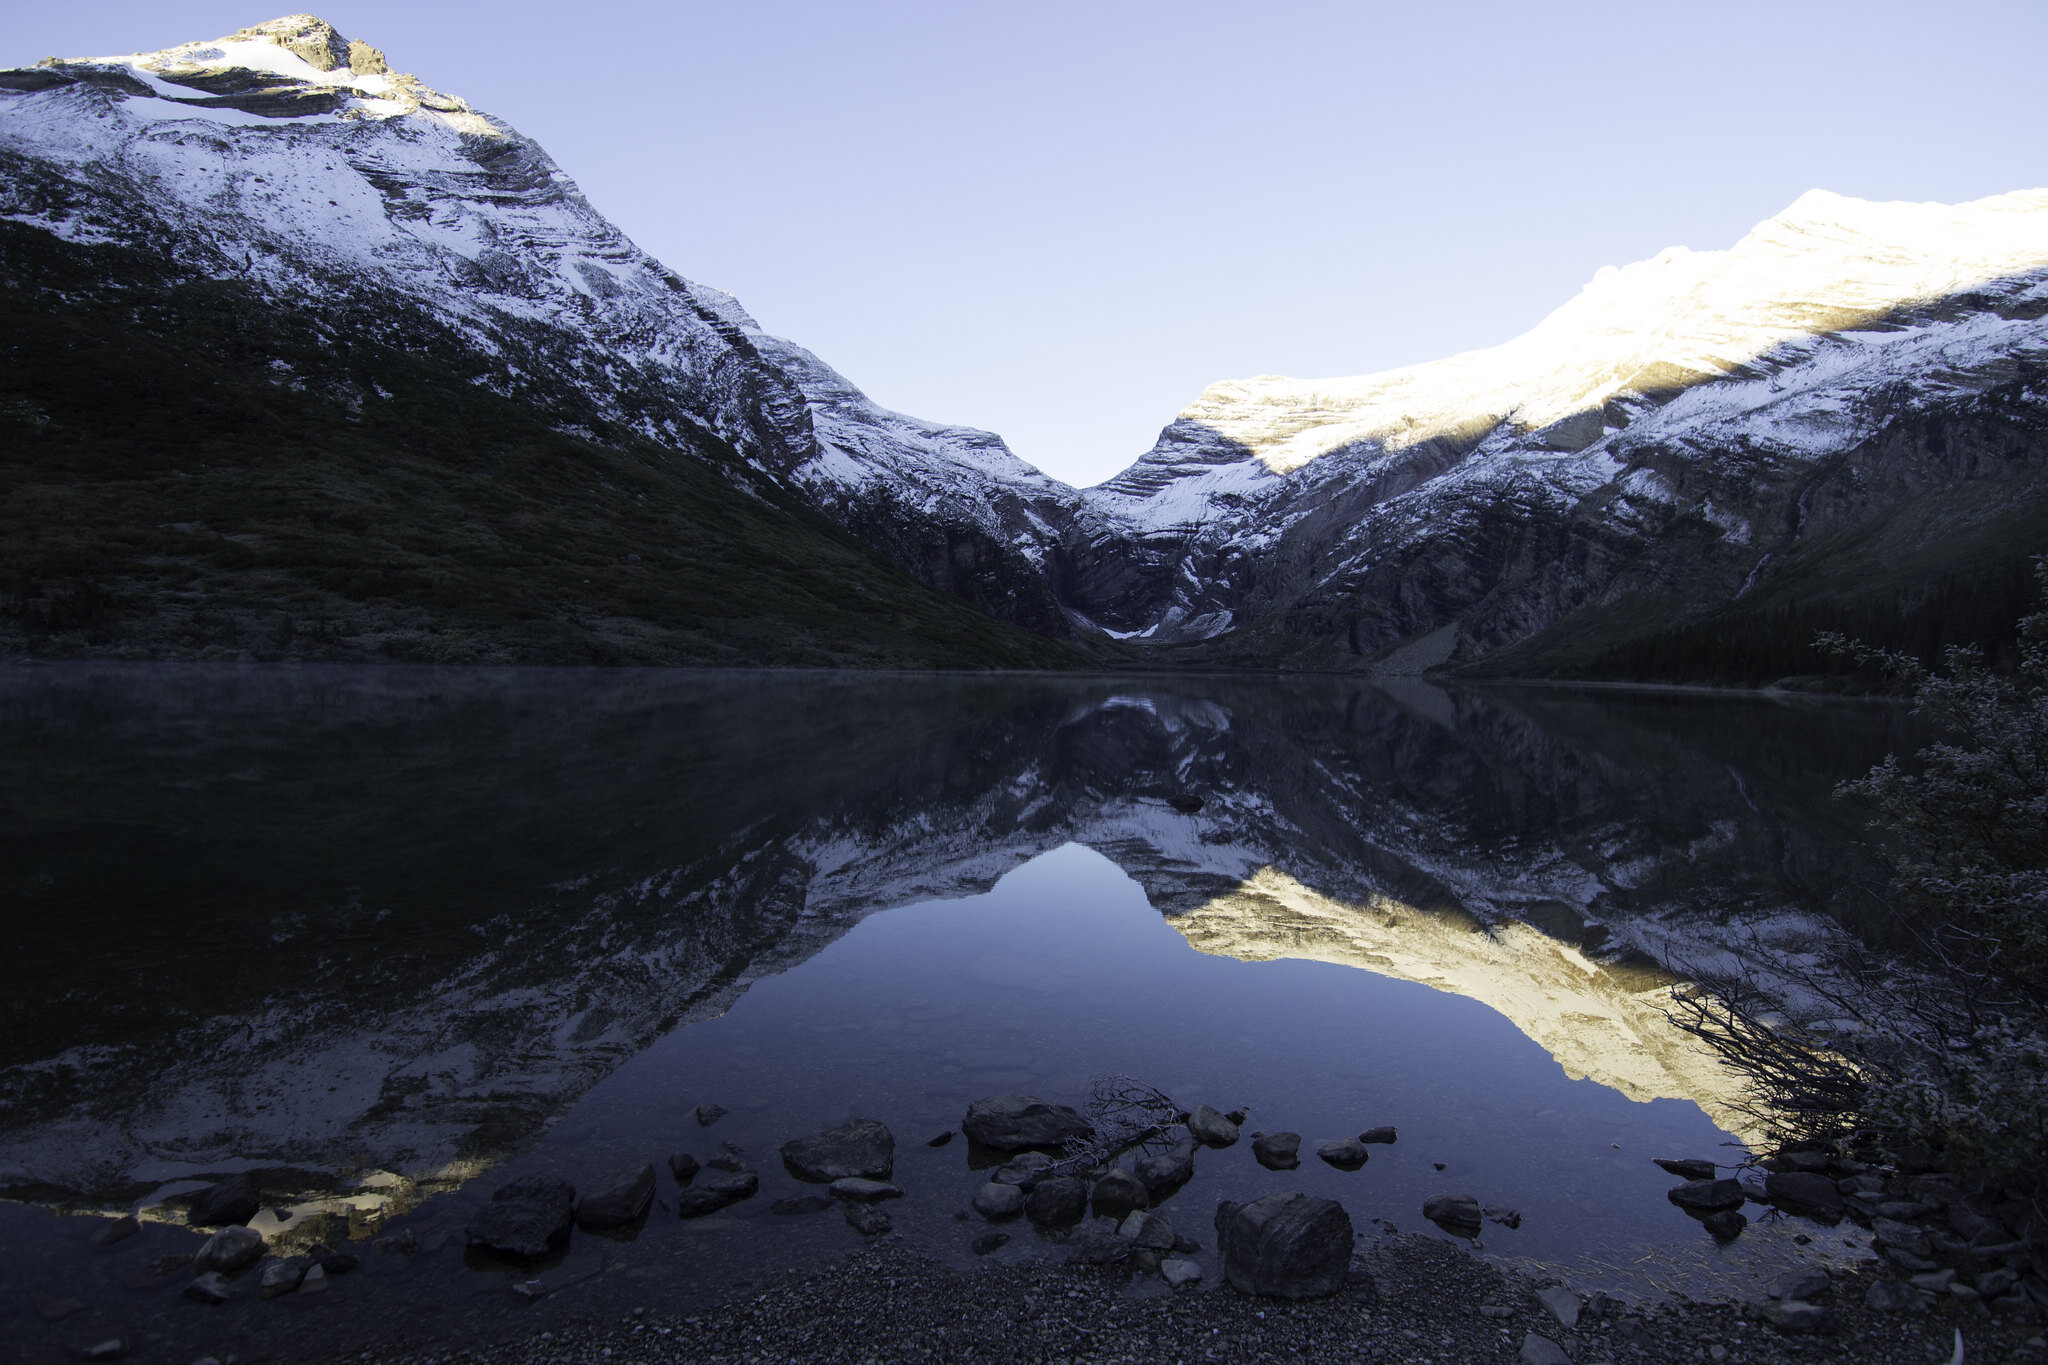
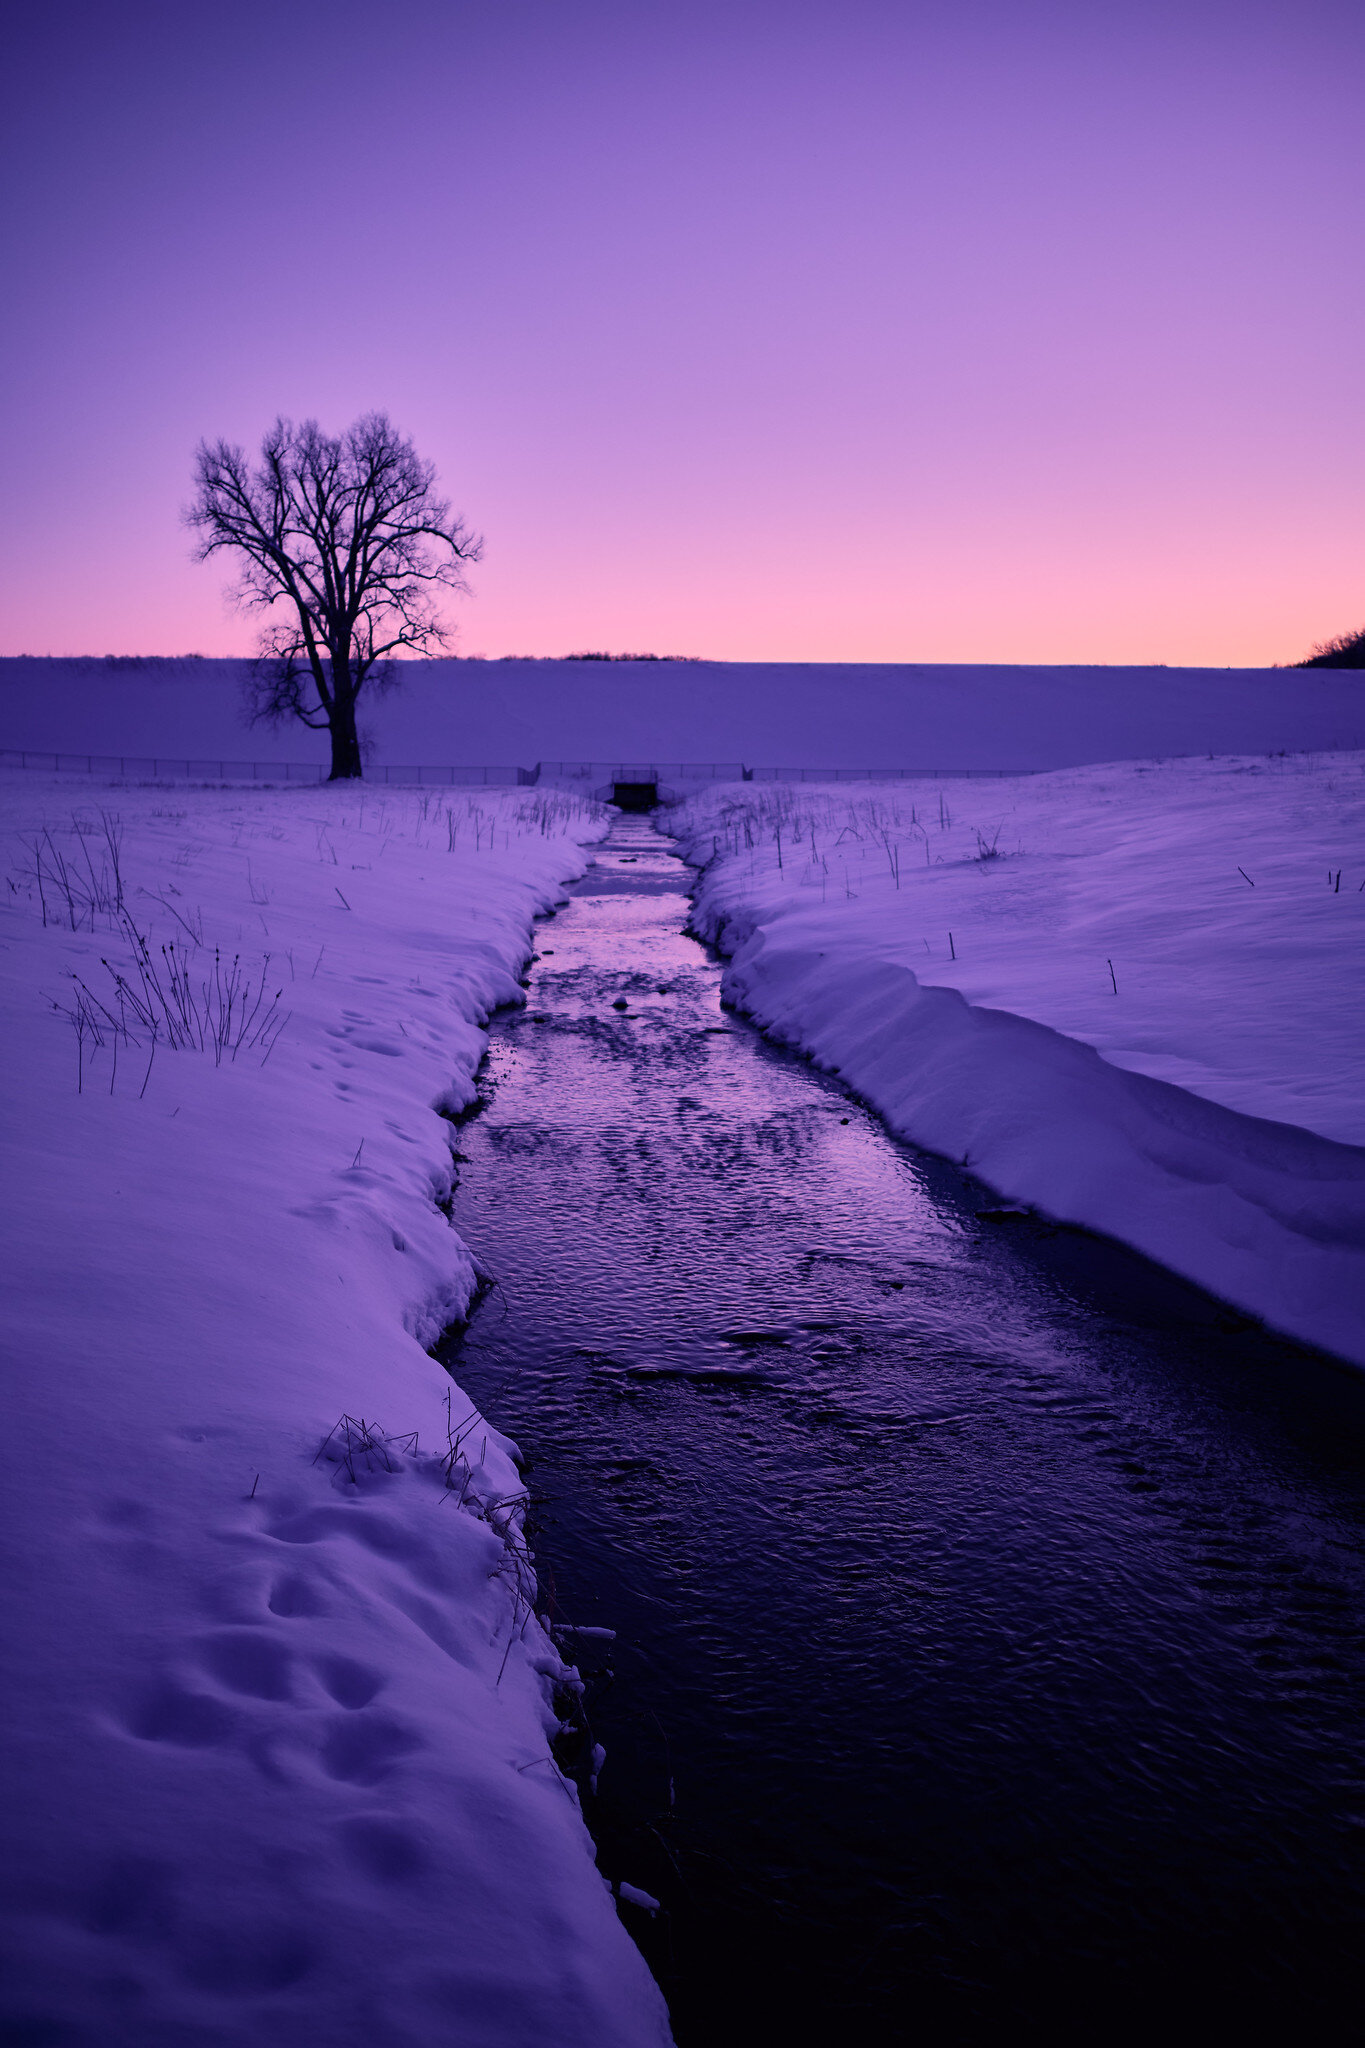
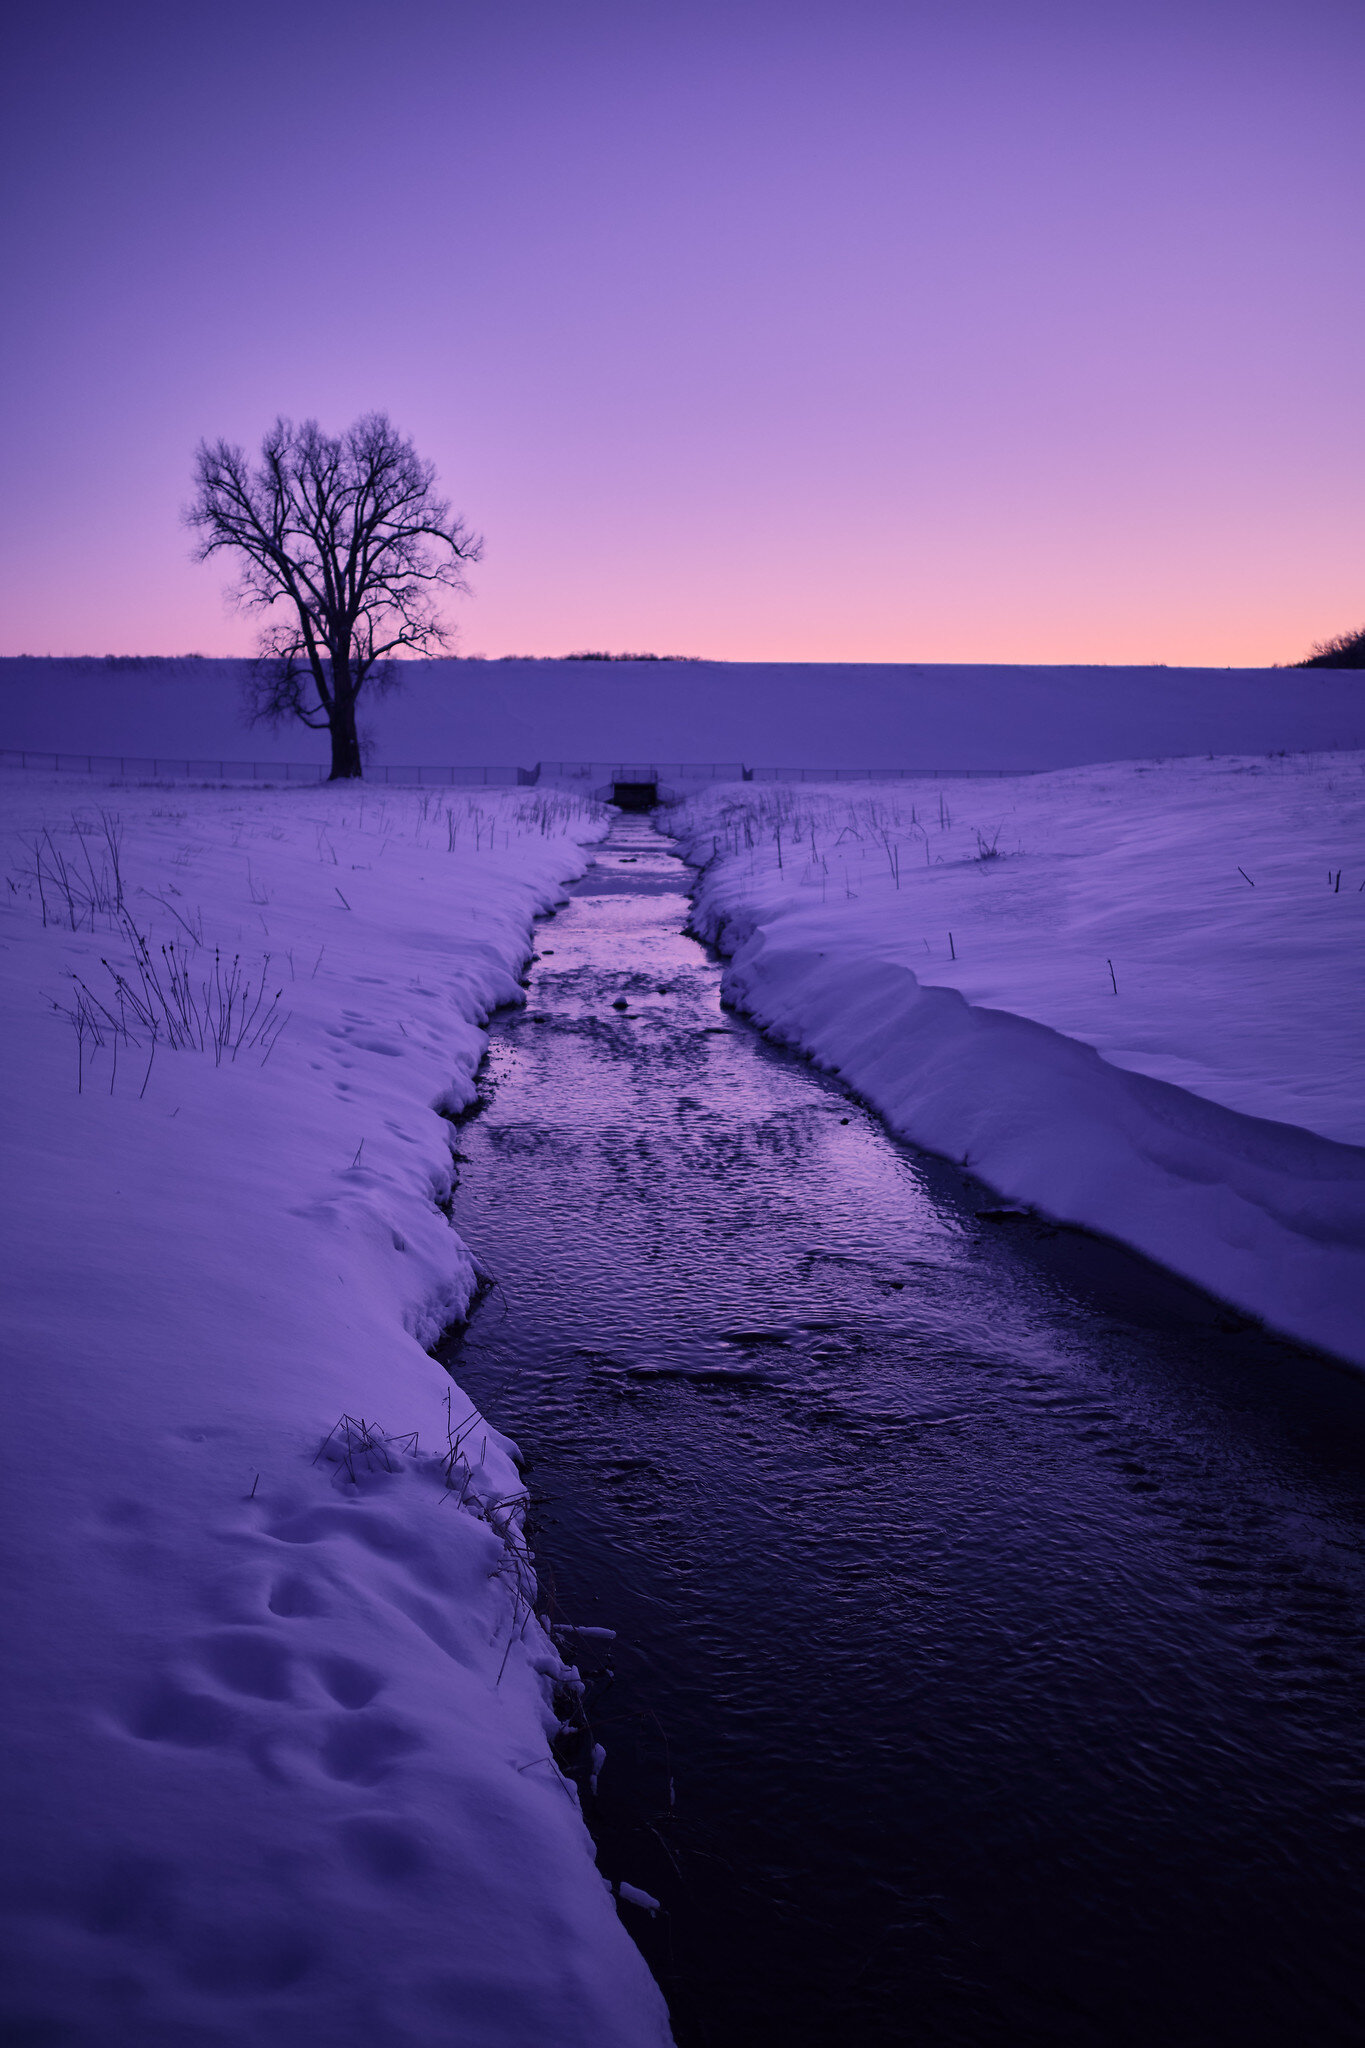
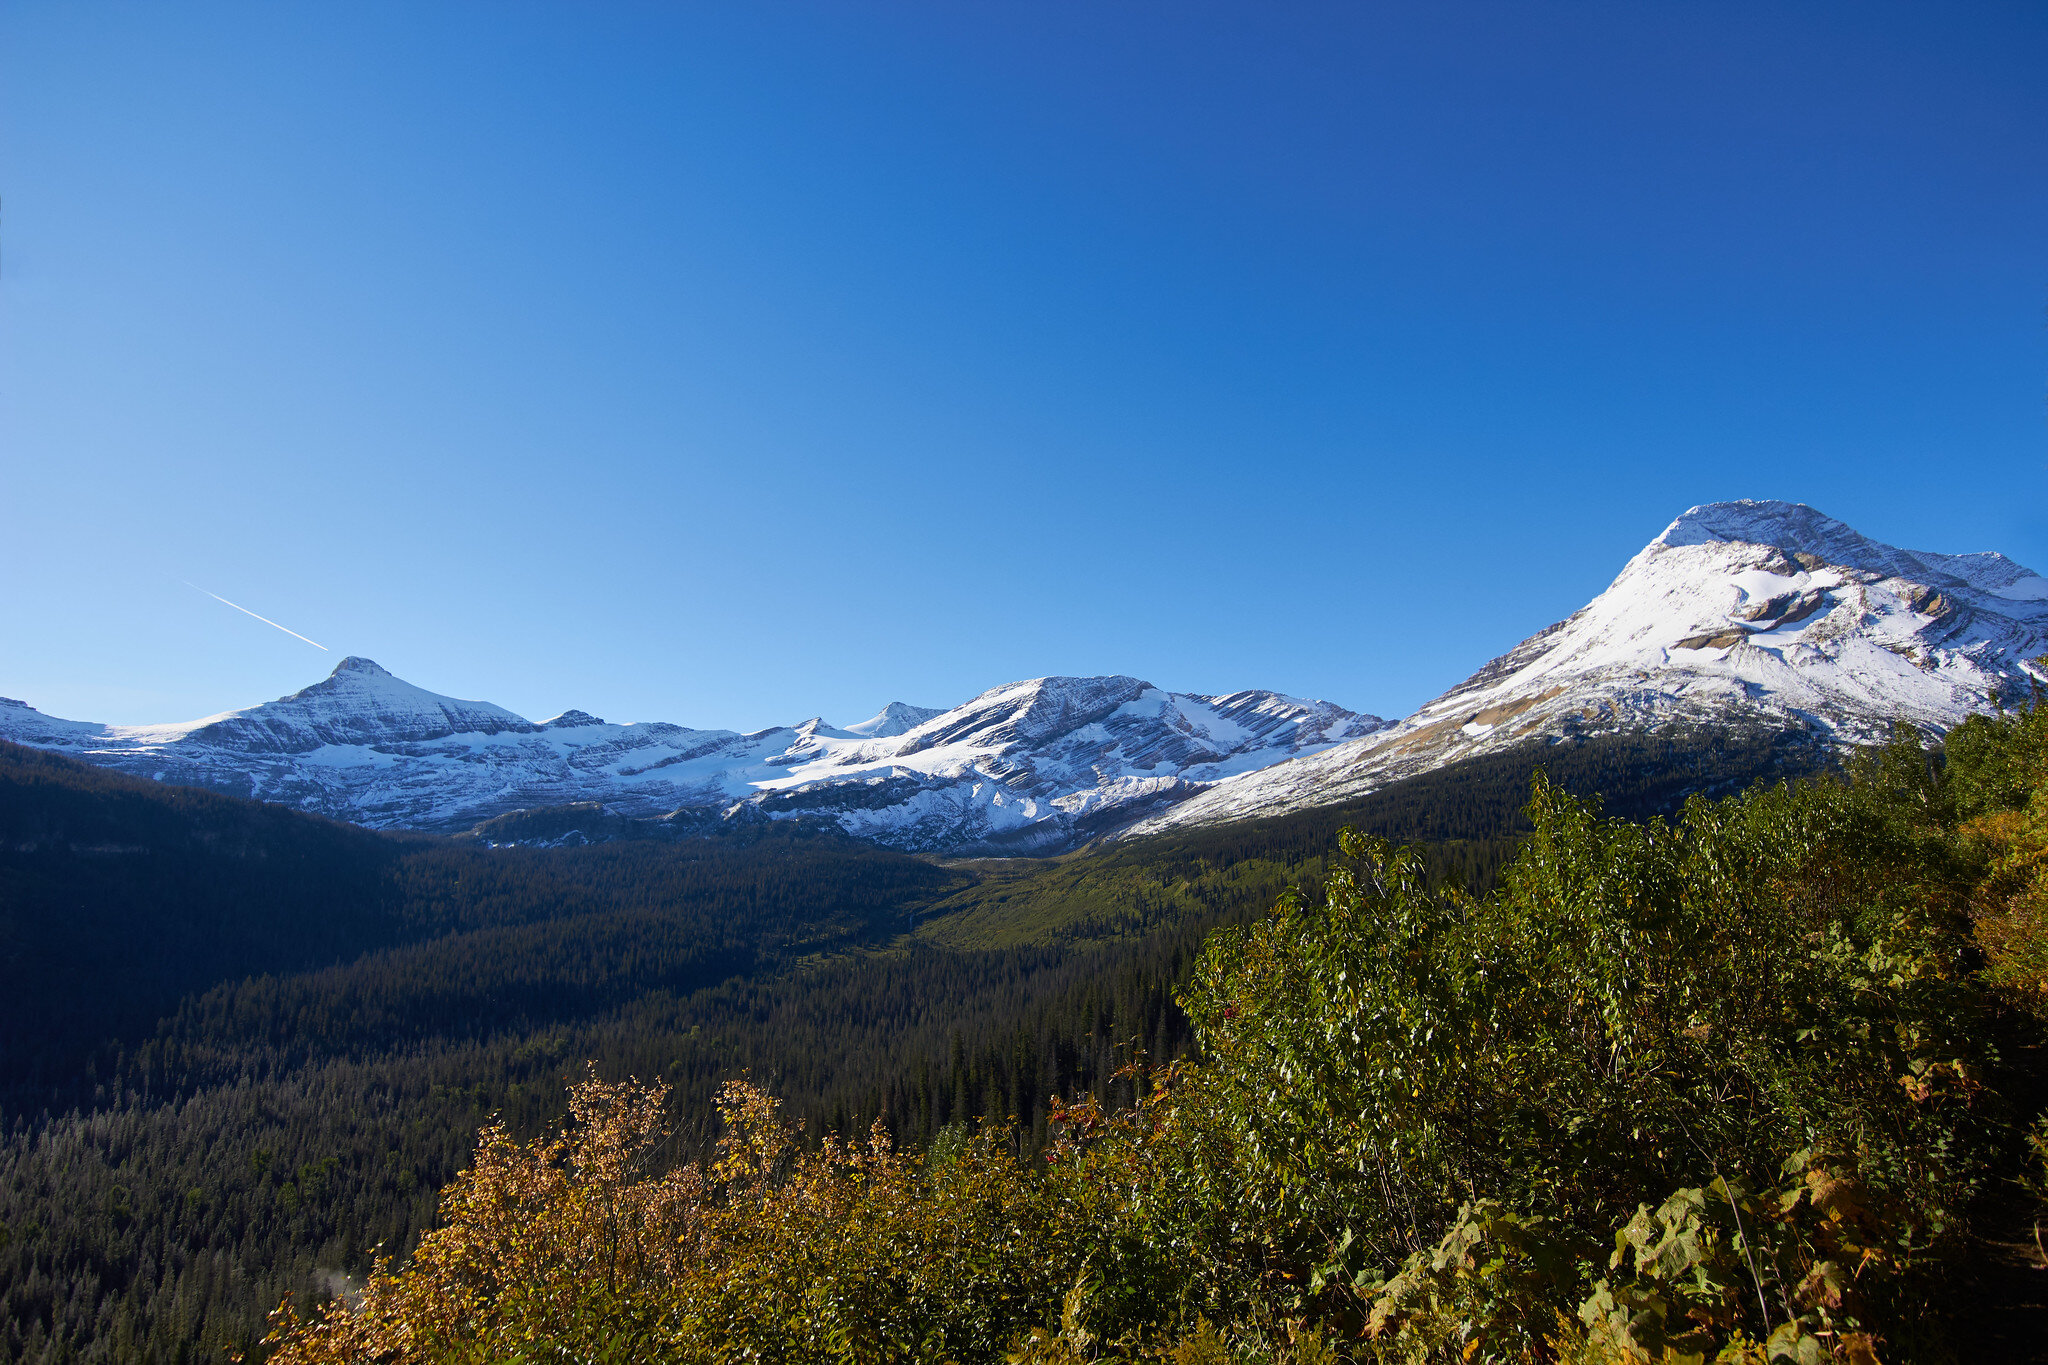
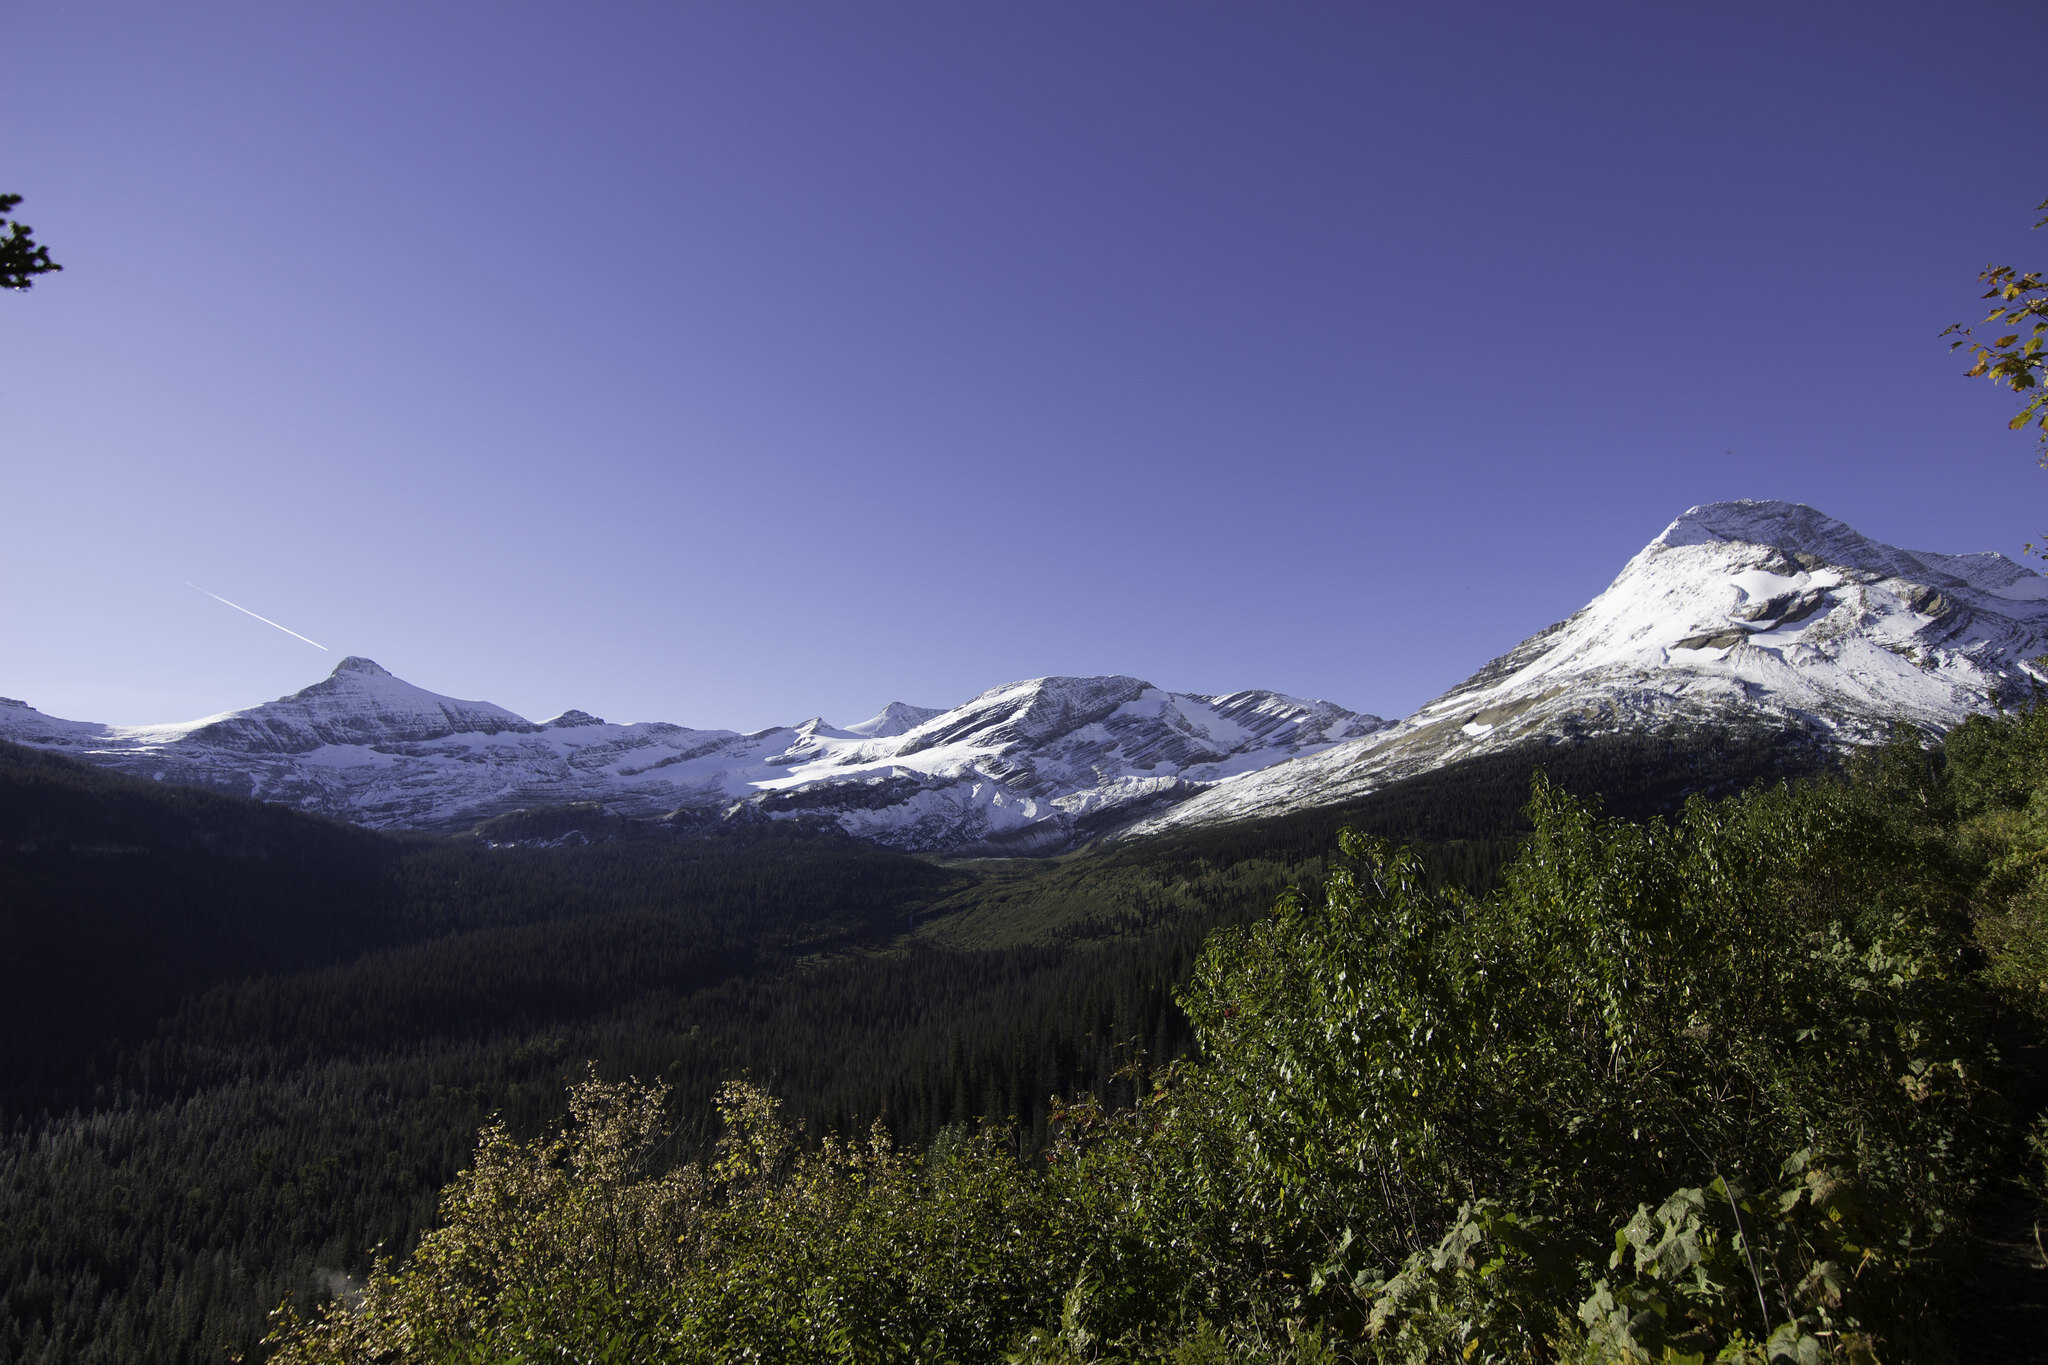
P.S.A - There will be a much larger difference between photos if you look at them on a mobile device compared to a computer. sRGB photos will be on the left/top, and ProPhoto/AdobeRGB with be on the right/bottom.
Now, not to go too much into it, but the world, for the most part, uses sRGB; it’s the standard. Tablets, phones, laptops, and any other mobile device, is able to see the sRGB color spectrum, with computers typically showing a bit more into the other color spectrums.
There are many different color spectrums you can physically work in, but there are three main ones; ProPhoto RGB, AdobeRGB, and sRGB. ProPhoto gives you the widest range of colors, sRGB gives you the least, and AdobeRGB is smack dab in the middle.

Because I was editing and exporting photos in ProPhoto RGB, most of my photos ended up looking washed out on mobile devices, but fine on my laptop at the time. For nearly two years, I dealt with whatever strange phenomenon was happening to my photos. I’d bring the photo into Instagram to post it, and all of a sudden the colors were absolute trash. I’d have to re-saturate the colors, boost the contrast, and hope I was close to what I had edited it like beforehand.


Now that I’m on one of my infamous social media breaks, I’ve actually had the mental energy and time to go through and find those old photos, and edit them like I would today. And more importantly, export them in the right fucking color space. I dug out my old hard drives, plugged them into my computer, and got incredibly lucky when they still worked. All good, photos weren’t gone, but I did have to go through and find the damn things.
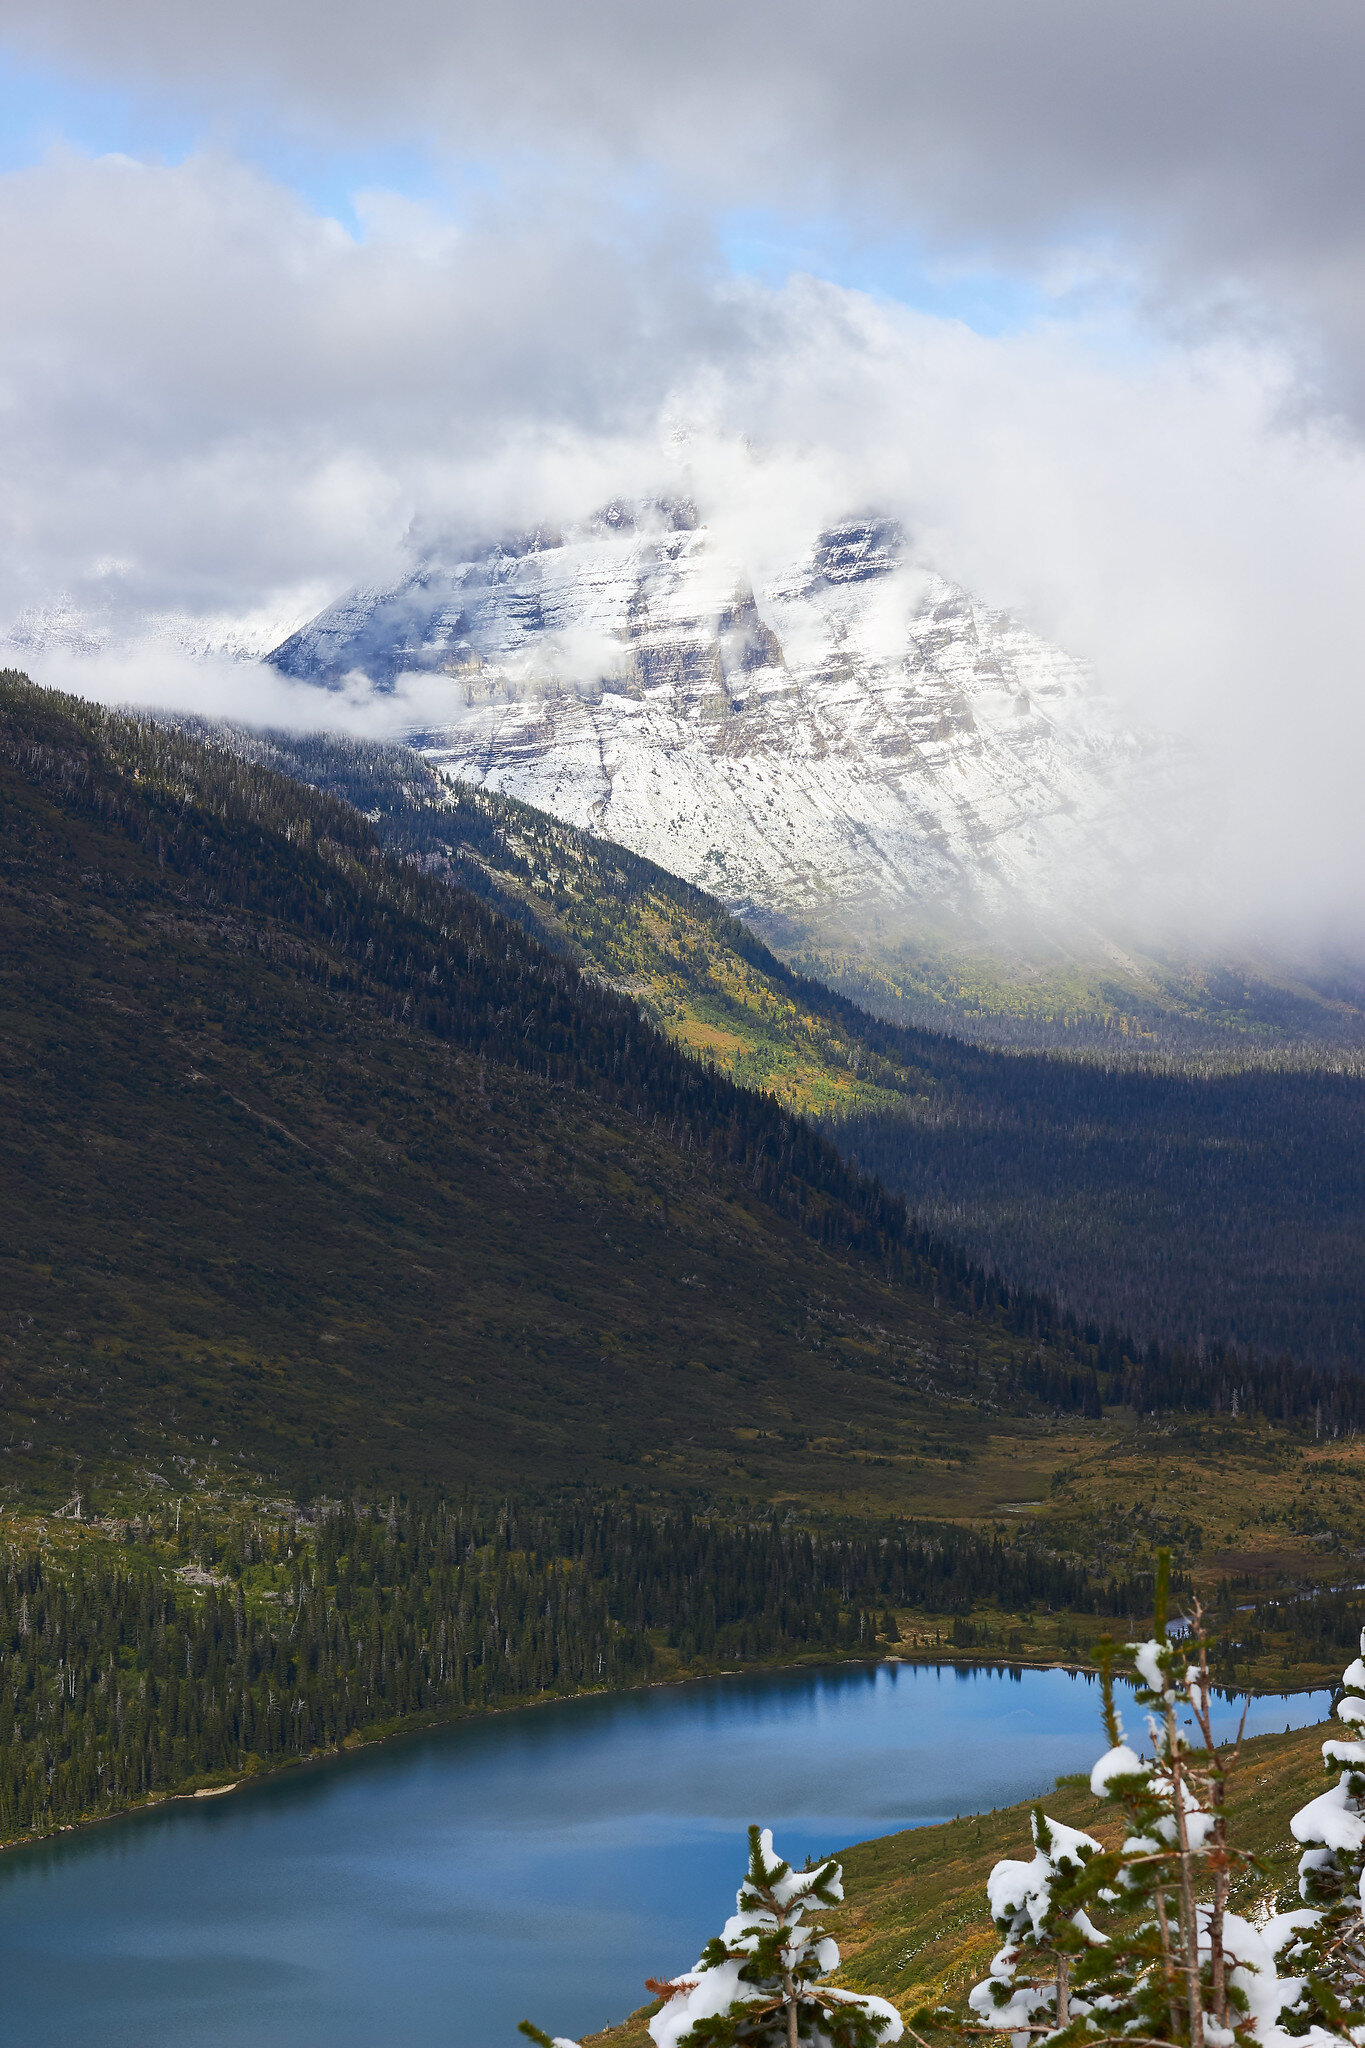

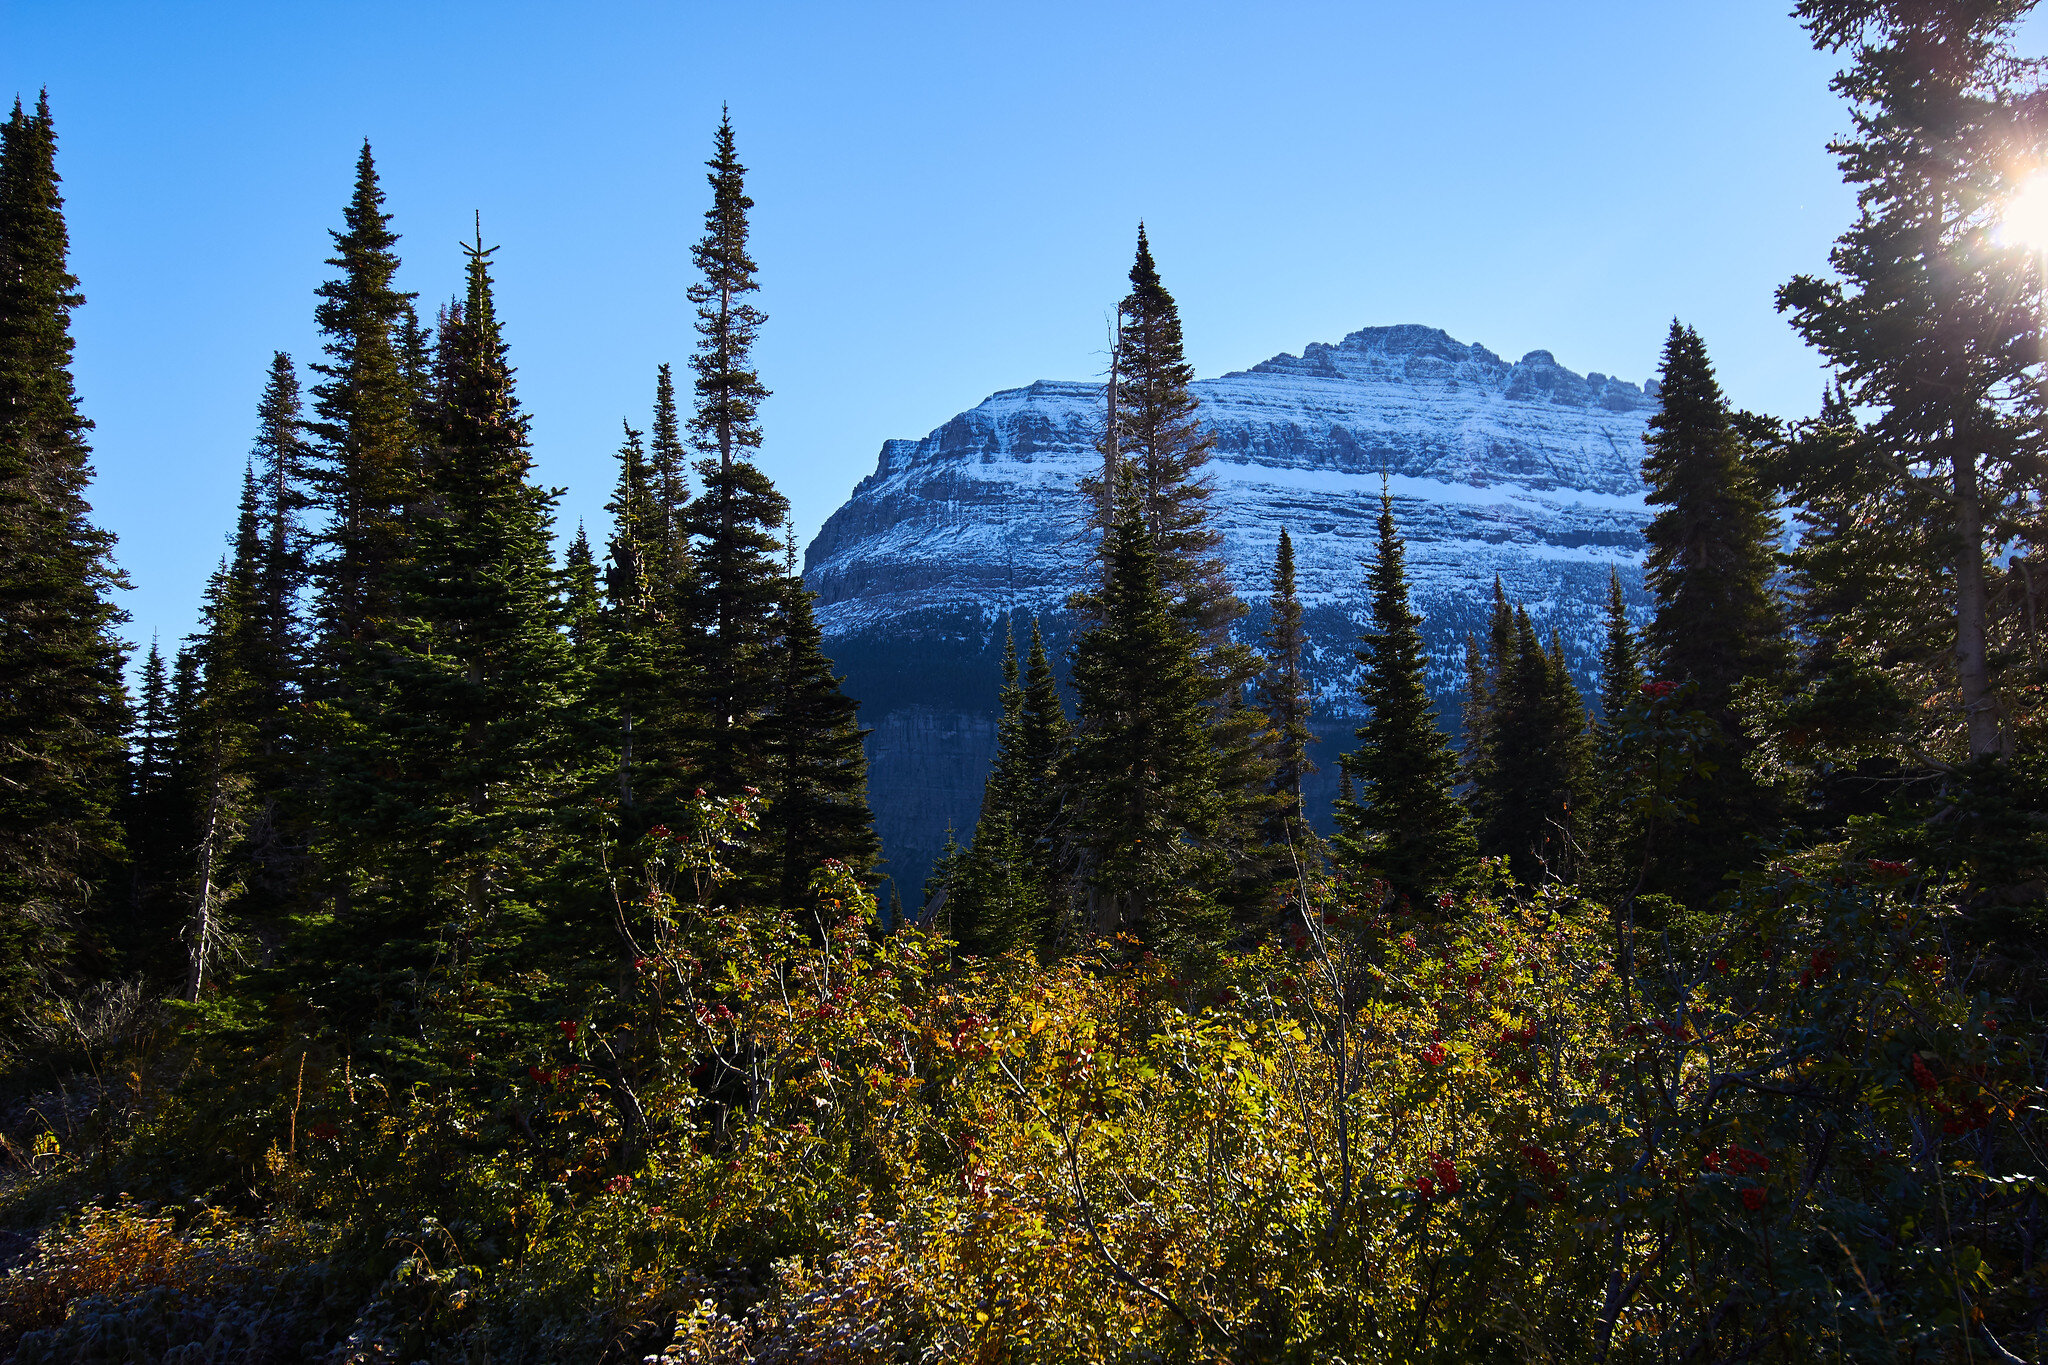
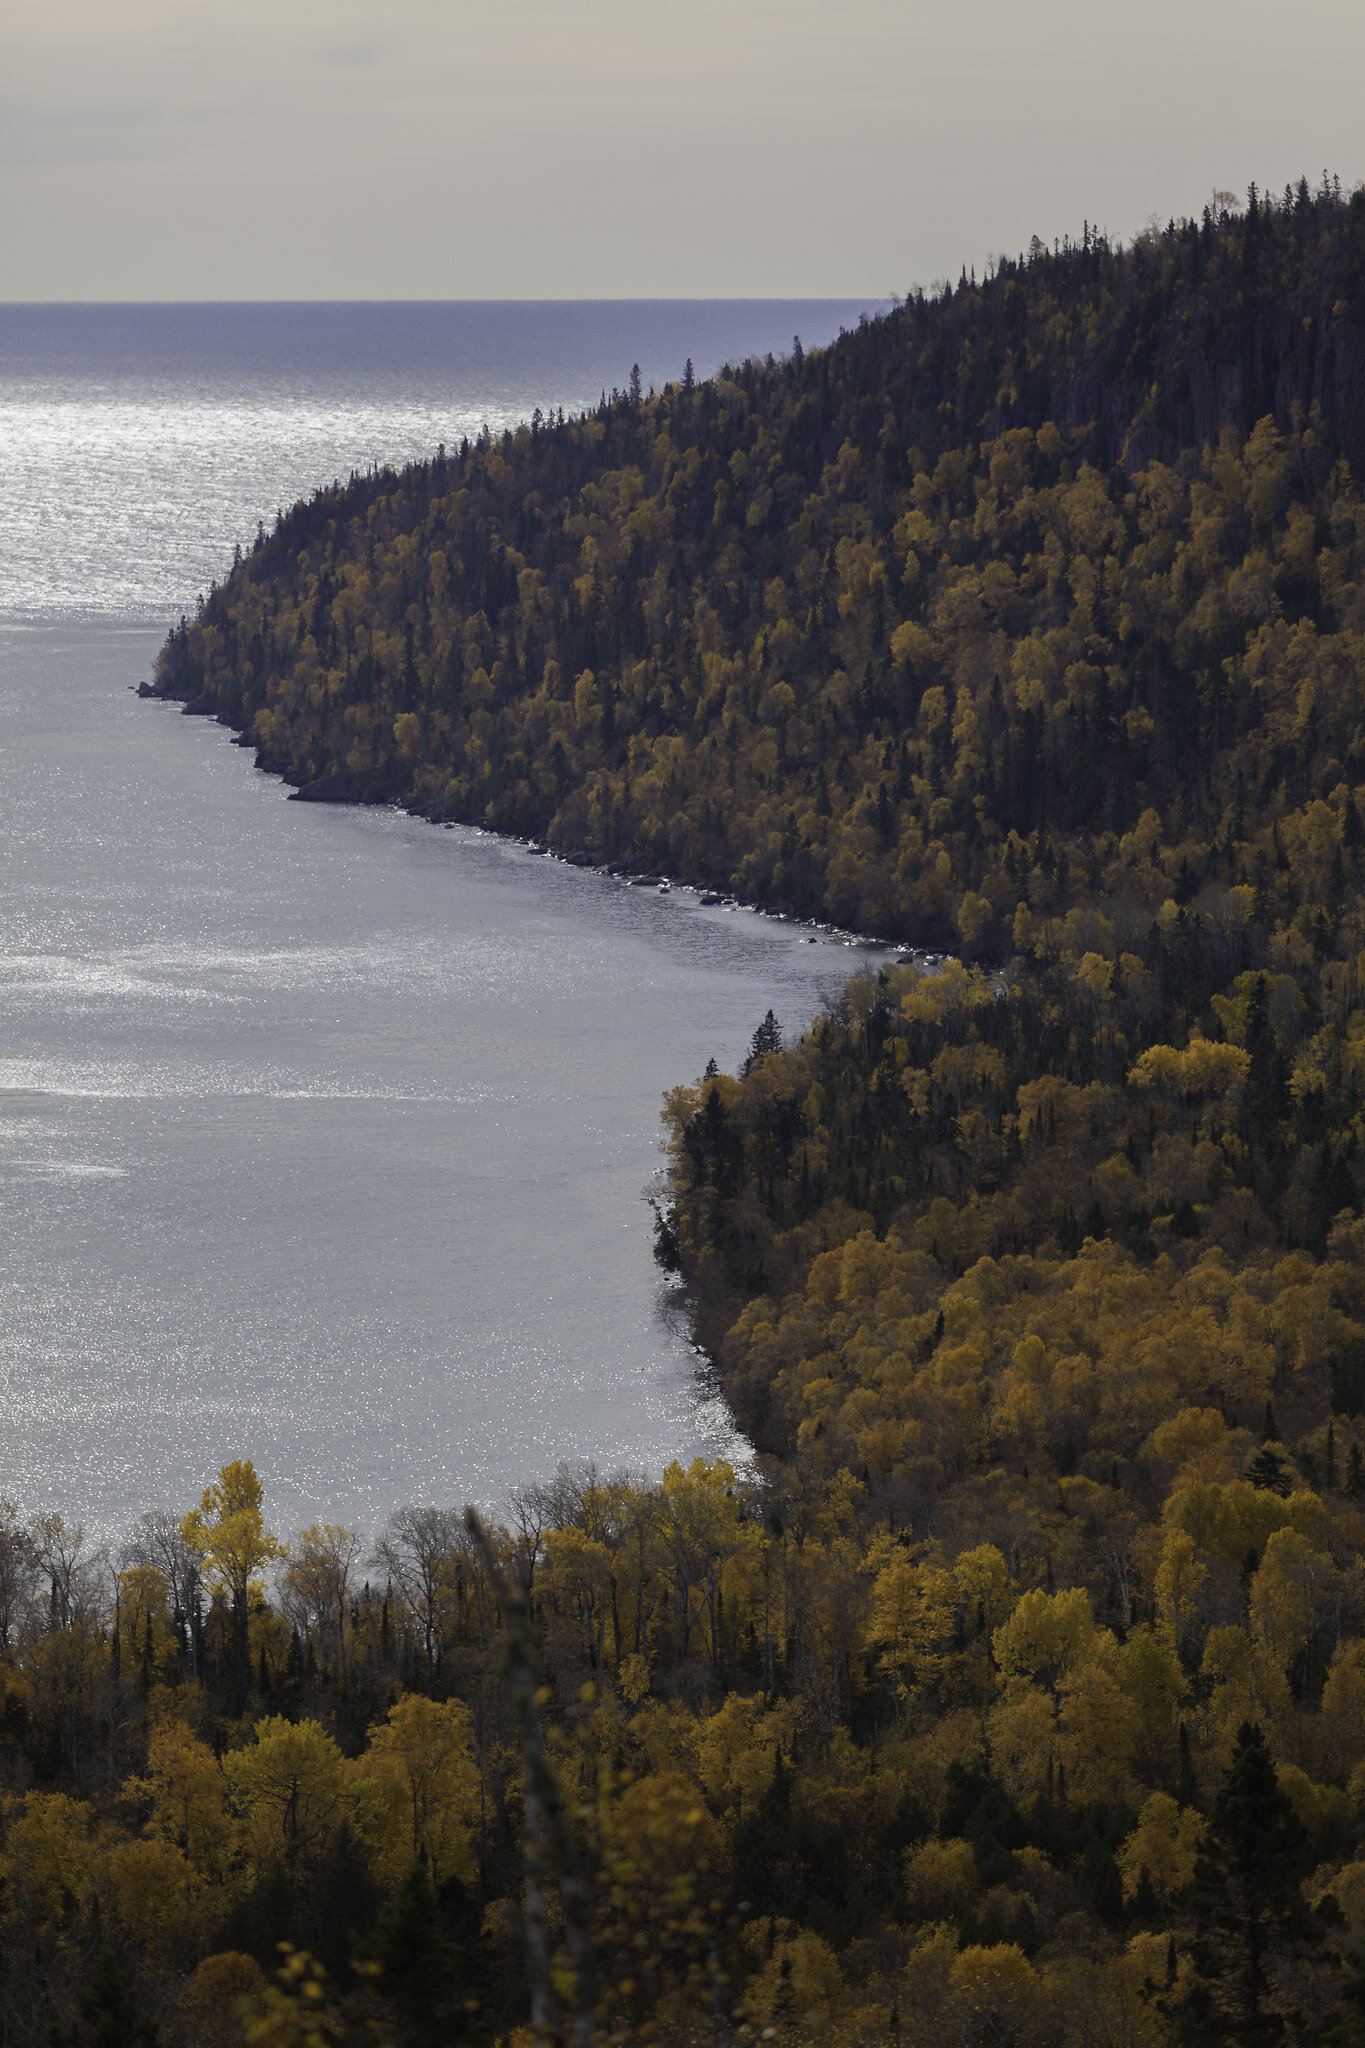
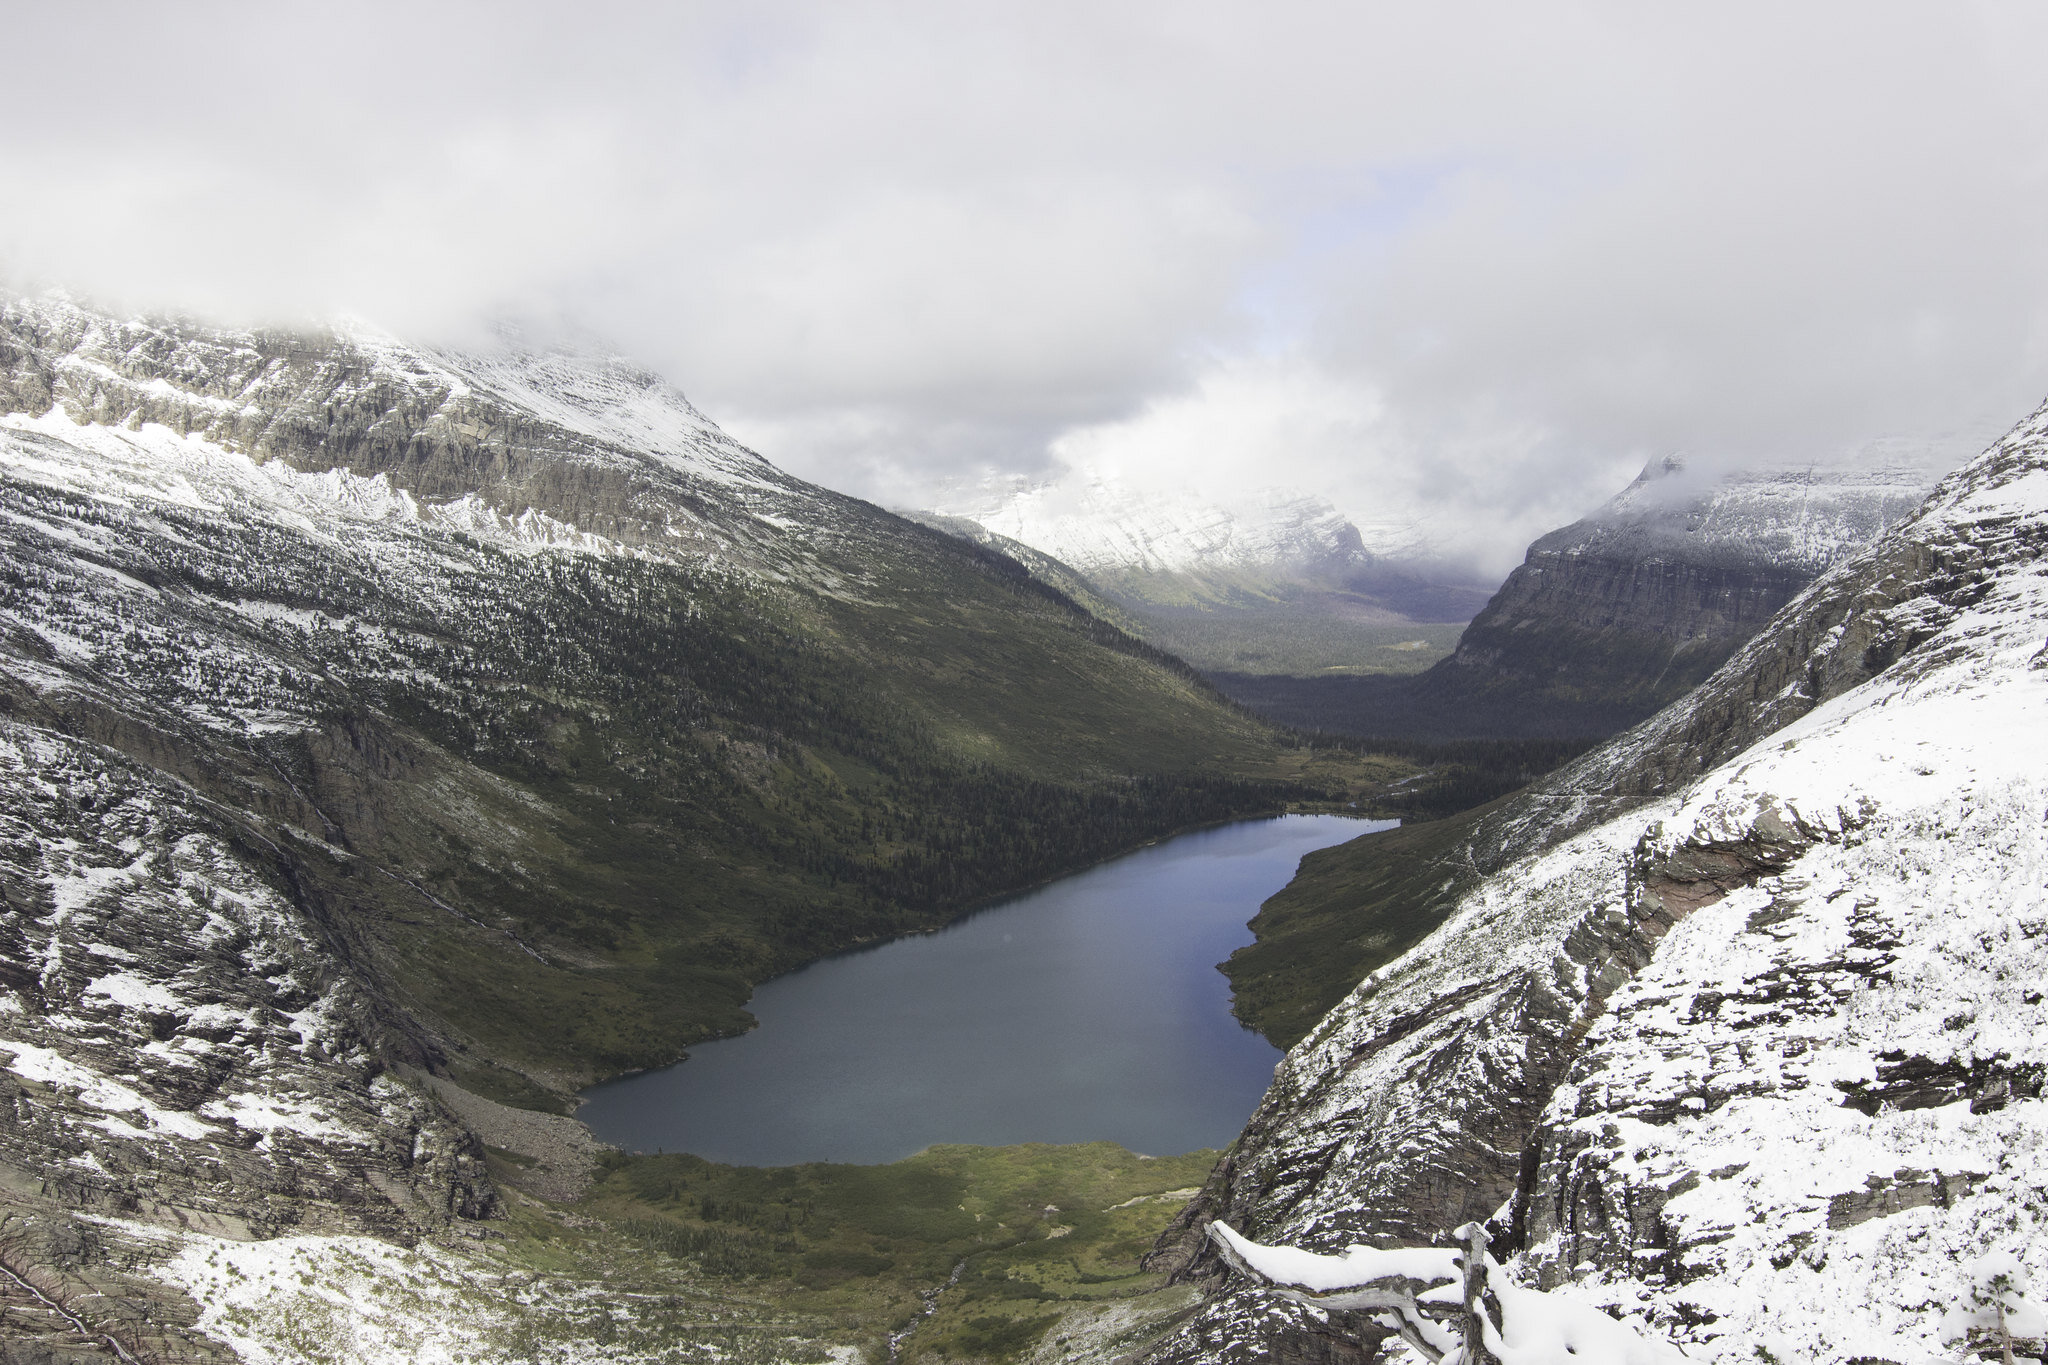
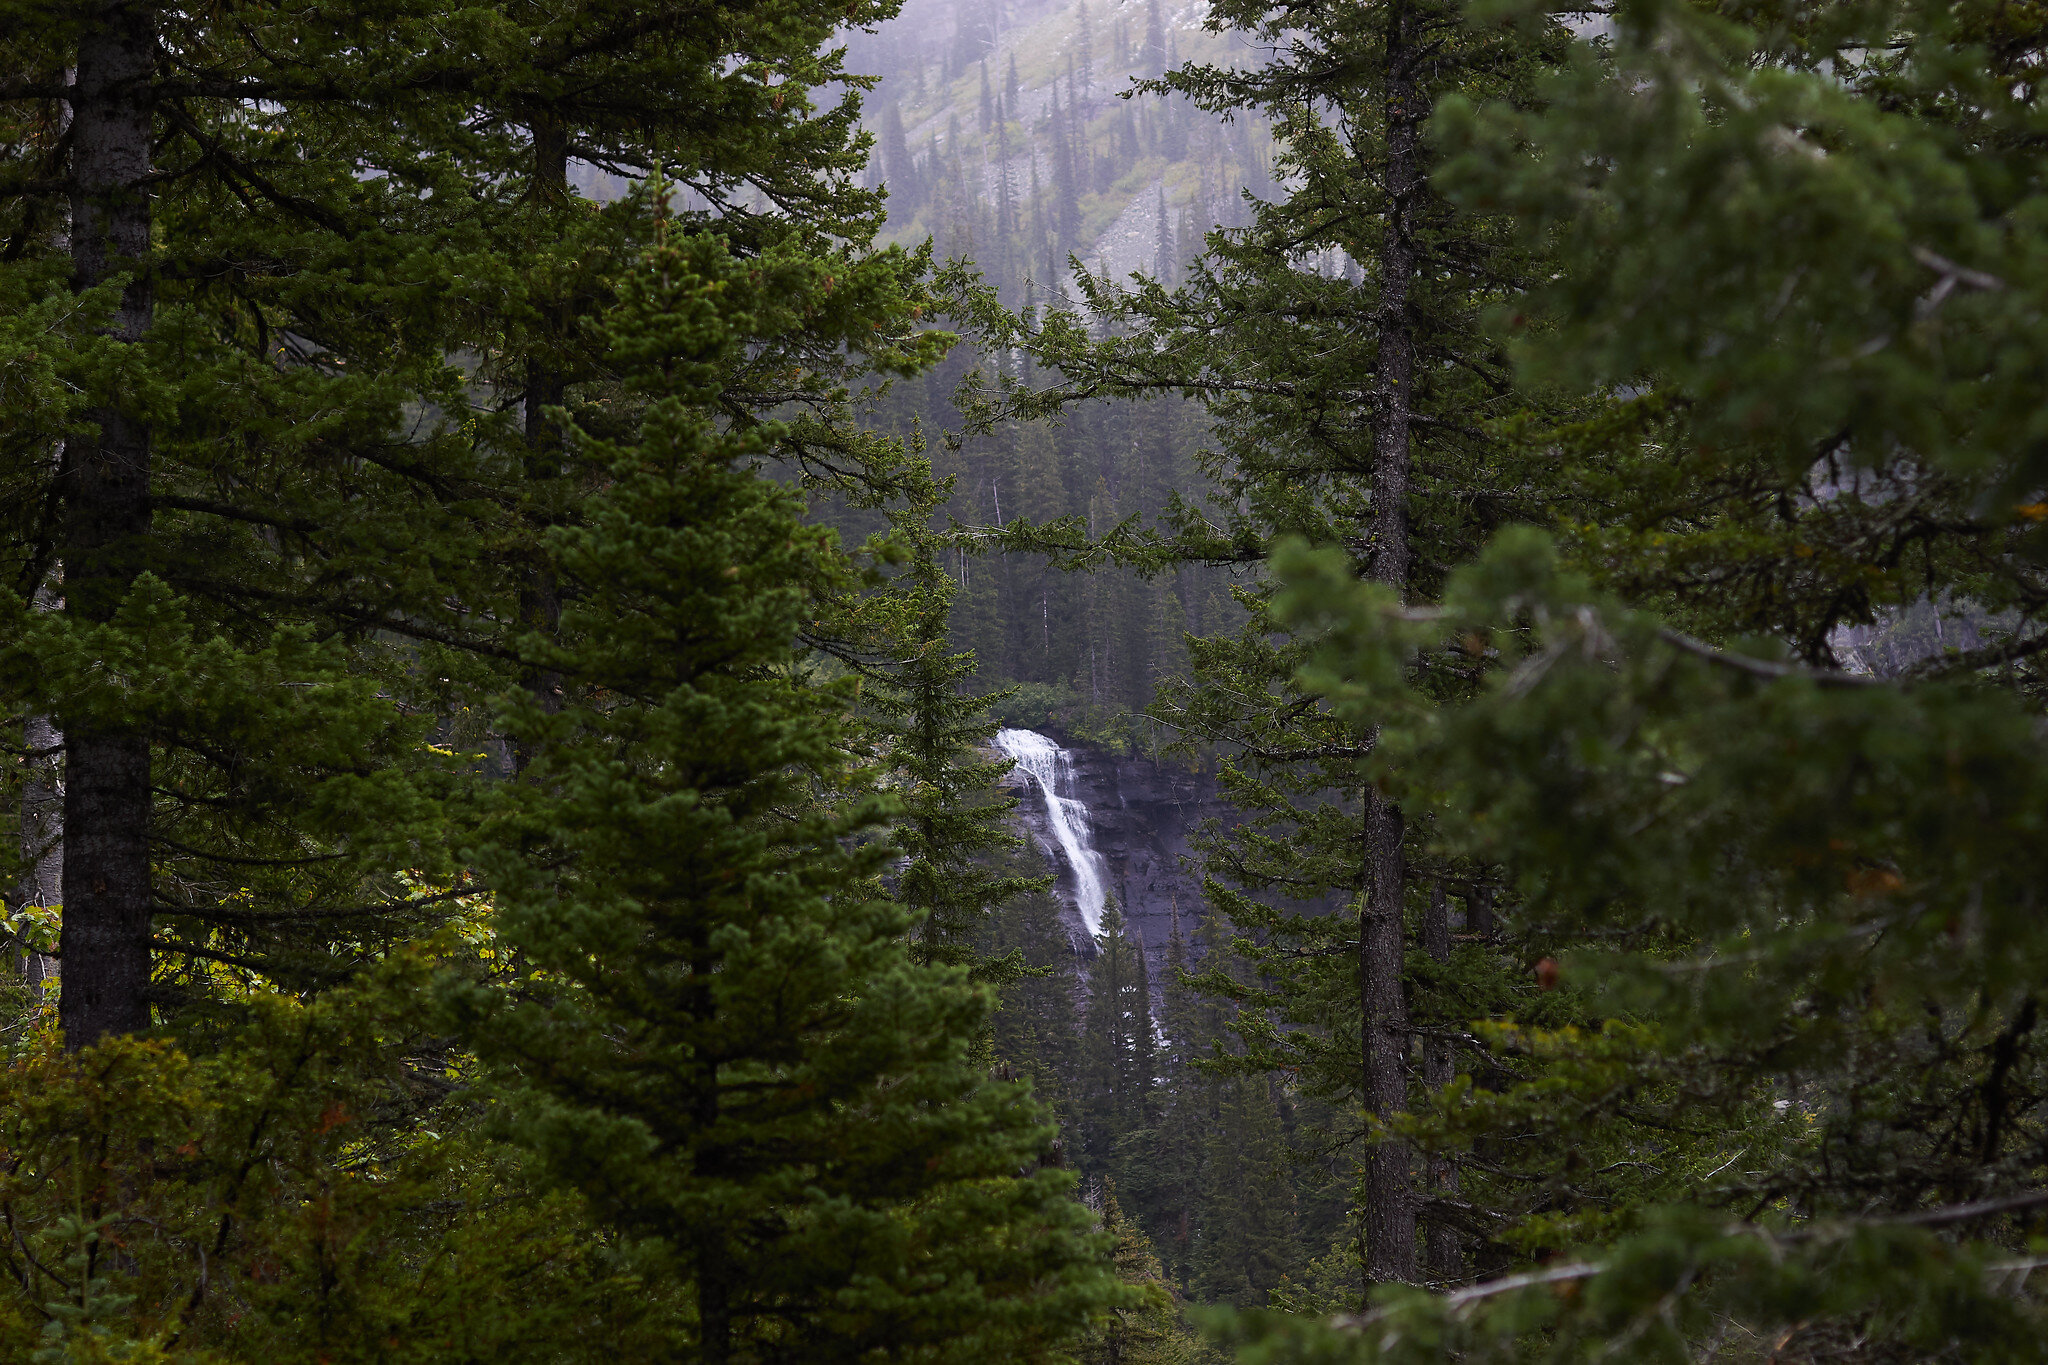
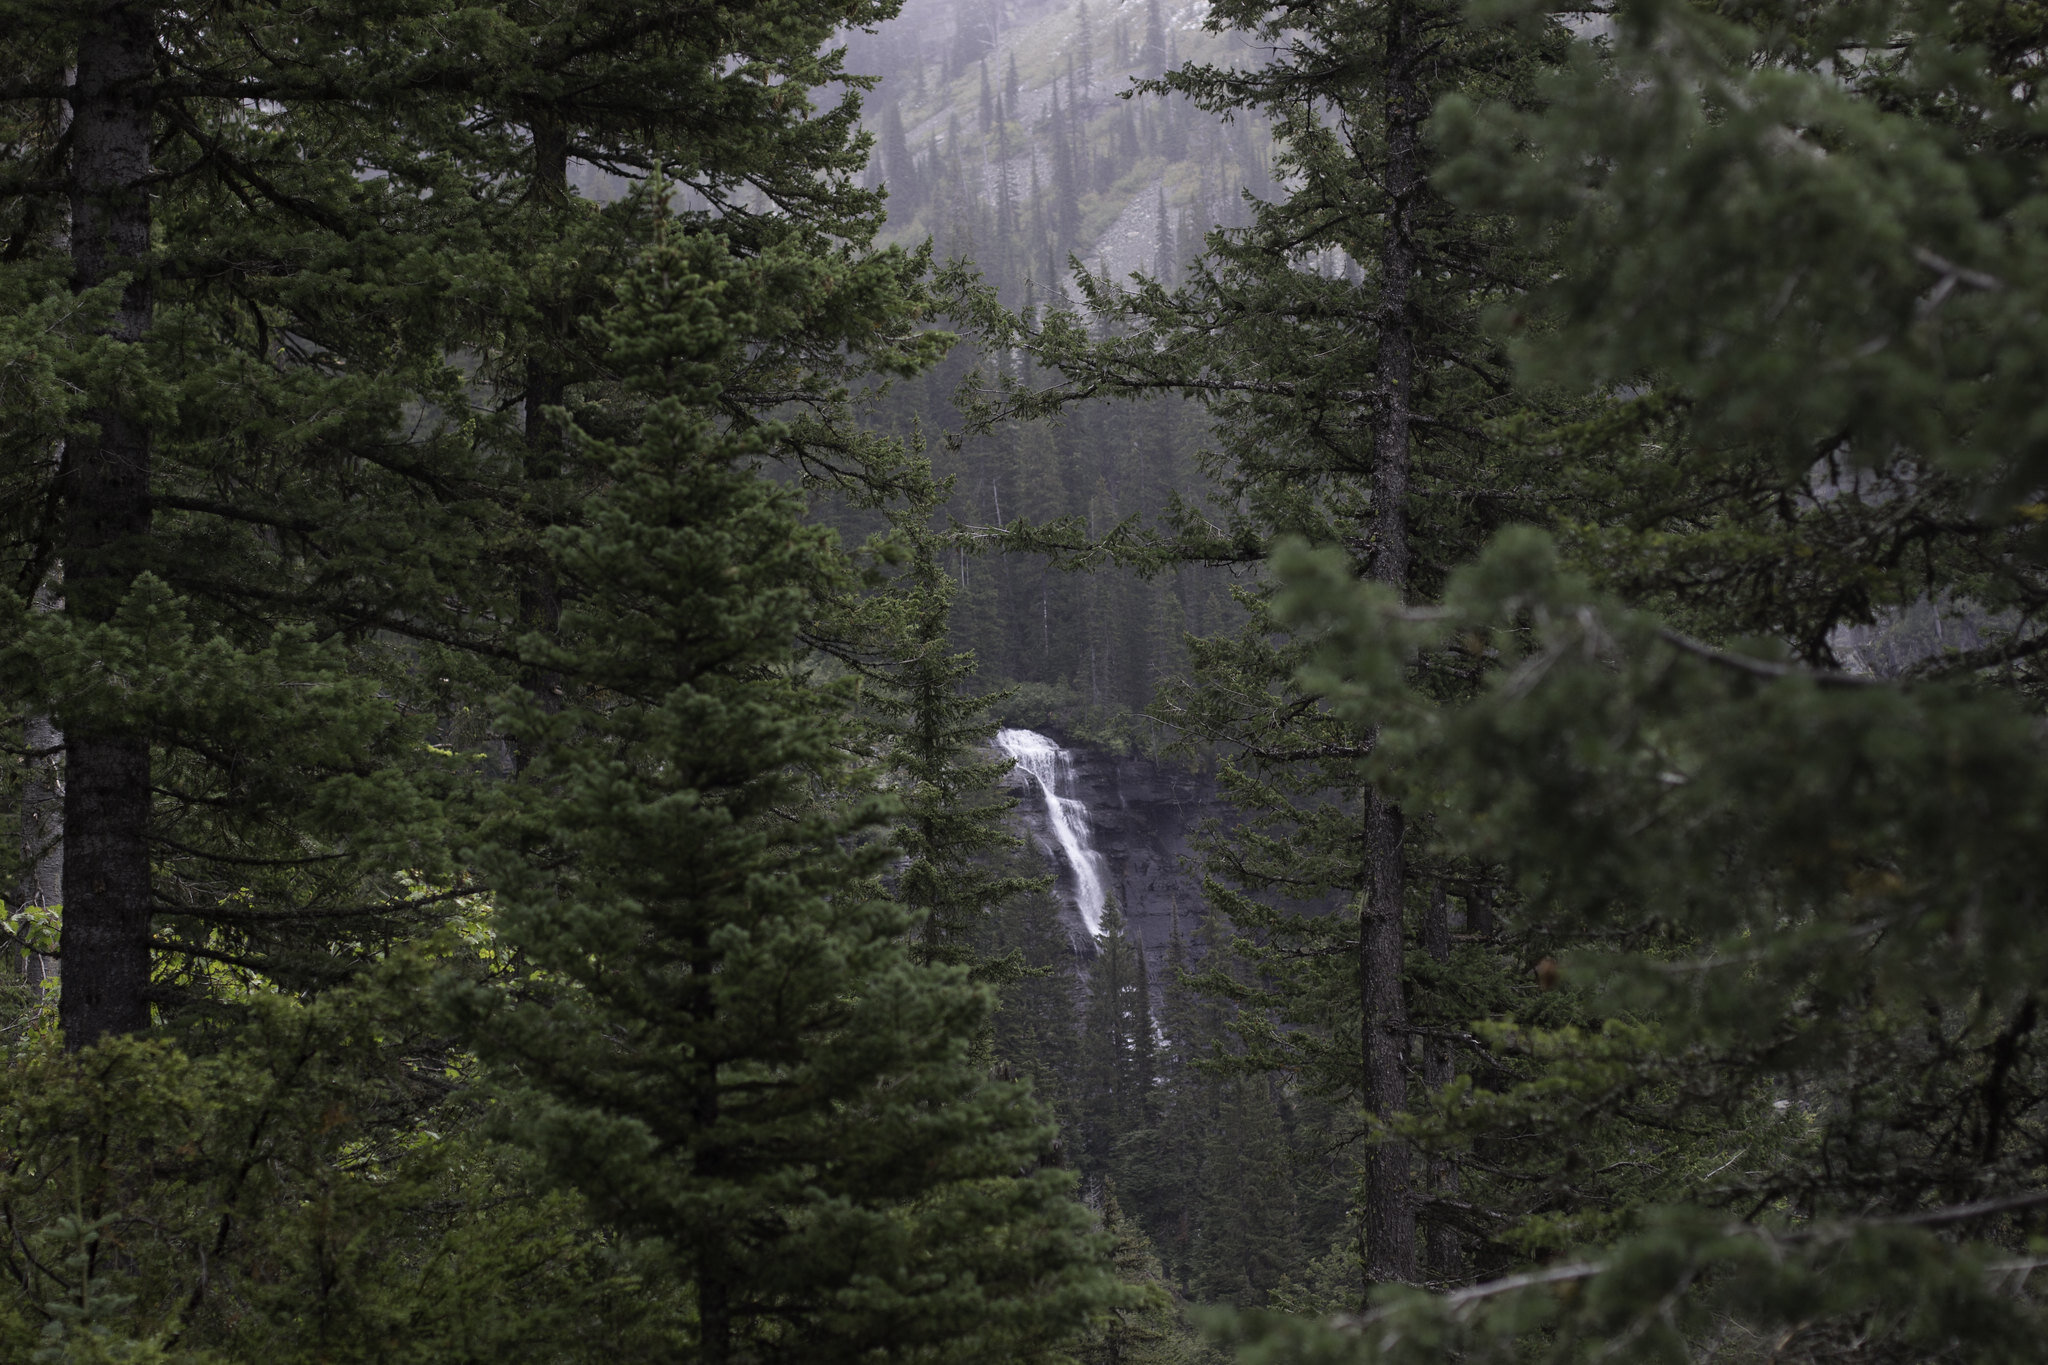
I sucked at color back then, but I was abysmal at sorting my photos. It took me about 30 minutes to actually find the photos I wanted to go through. I knew the month and the year of taking the photos, but ended up combing through every single folder on the drives to find them. I had two specific trips I wanted to re-edit; my trip to Glacier National Park, and the trip we took to Canada for Miah’s first birthday.
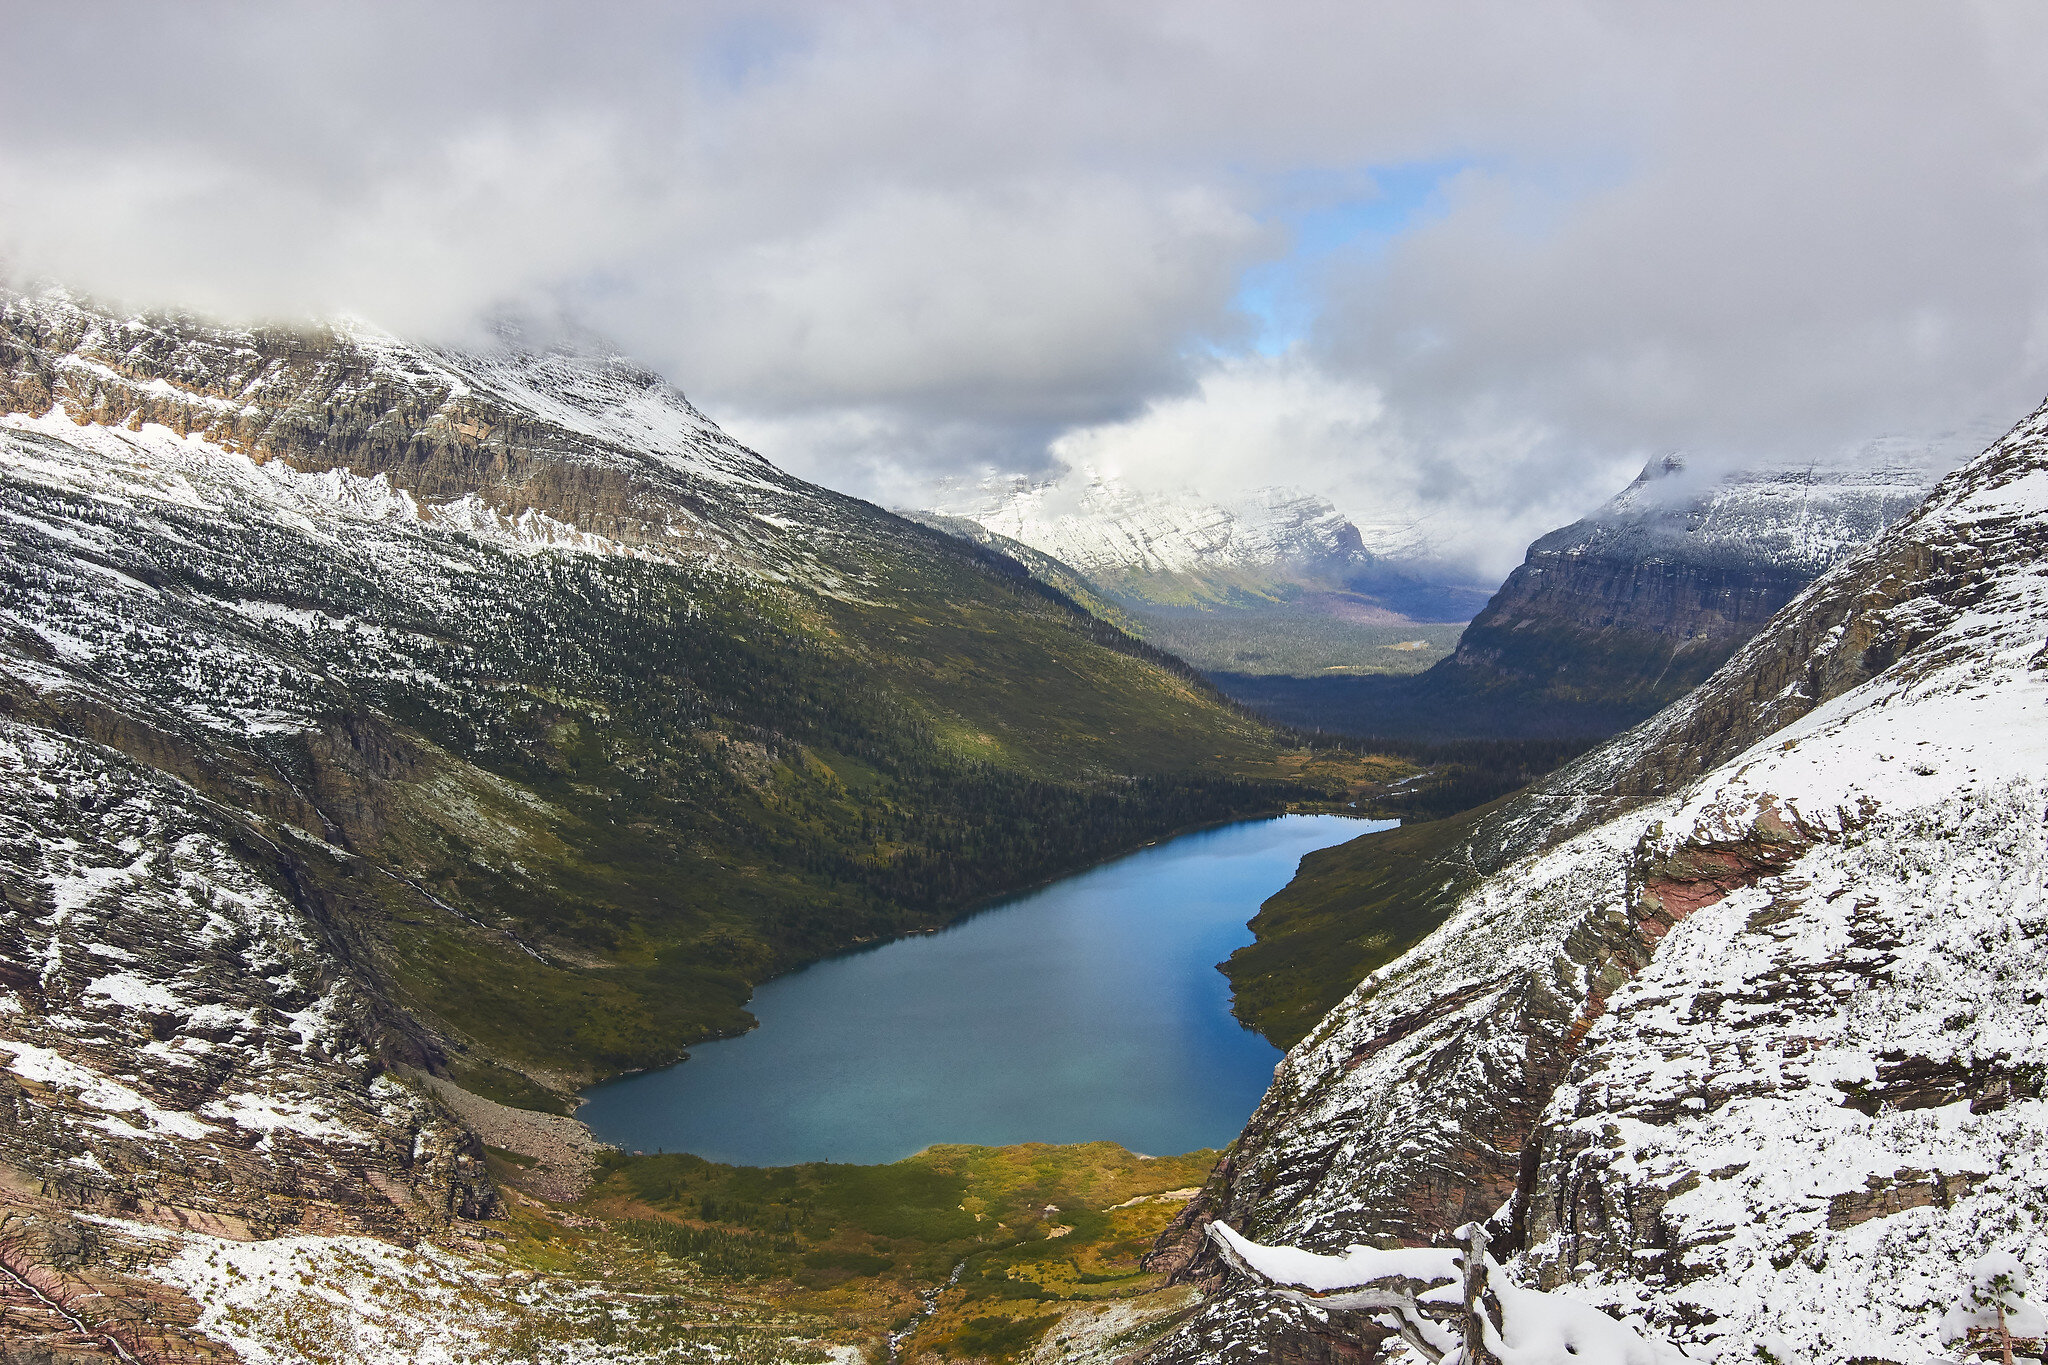
Each of those trips had hundreds of photos, so I restarted the culling process (think picking and choosing photos to work on) and found some keepers I had for some reason ignored back then. I went through the Montana pictures, and honestly, I have no idea how I walked away with any keepers at all from that trip. I had absolutely no idea what I was doing, and missed focus on multiple shots that would have been amazing. How do you miss focus on a mountain? I have no clue how, but I somehow did on at least a quarter of my shots. That was disappointing, but I’ll just chalk that down to being young and ignorant. It doesn’t happen that much anymore.
So, even after missing focus on a ton of shots, I then ruined the good ones by exporting them incorrectly. I have known for years, what kind of potential the photos had, but was either too busy or too lazy to really try and tackle the issue. I’ll admit, it did take a lot of work. I spent a good 10 hours over the weekend editing the photos again, but I’m glad I did. I no longer cringe at photos whenever I see them.
This whole process has taught me a couple different things:
I’ve come a long way in what I know, and what I’m capable of doing with a camera,
Proper storage and organization of photos can be incredibly helpful if and when you need to go back to find them,
And lastly, editing photos with a fresh eye can help find those photos that you once glanced over.

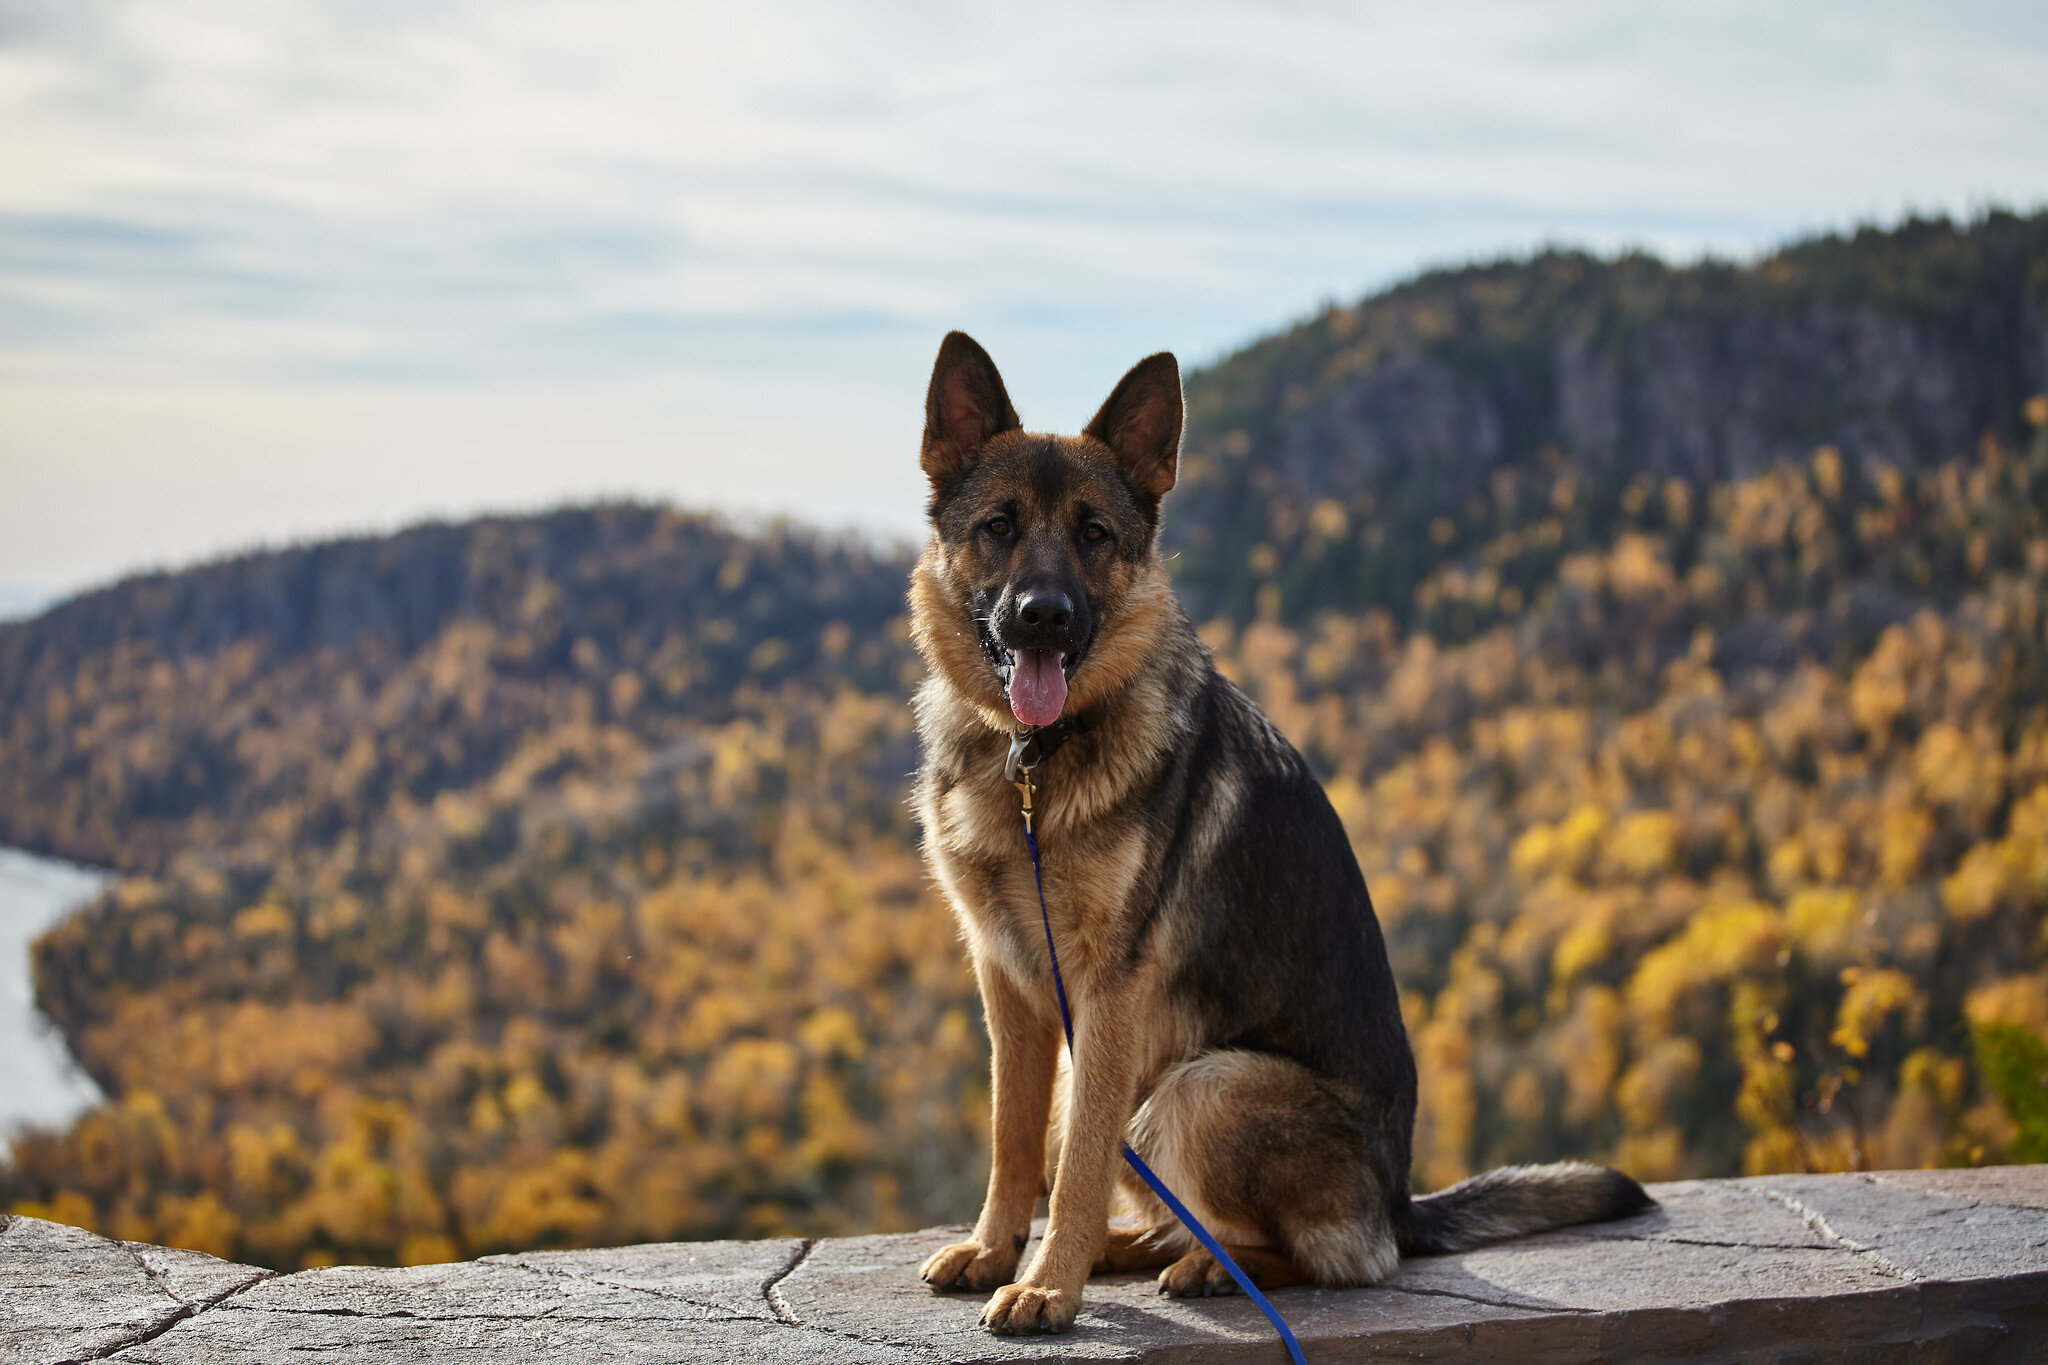
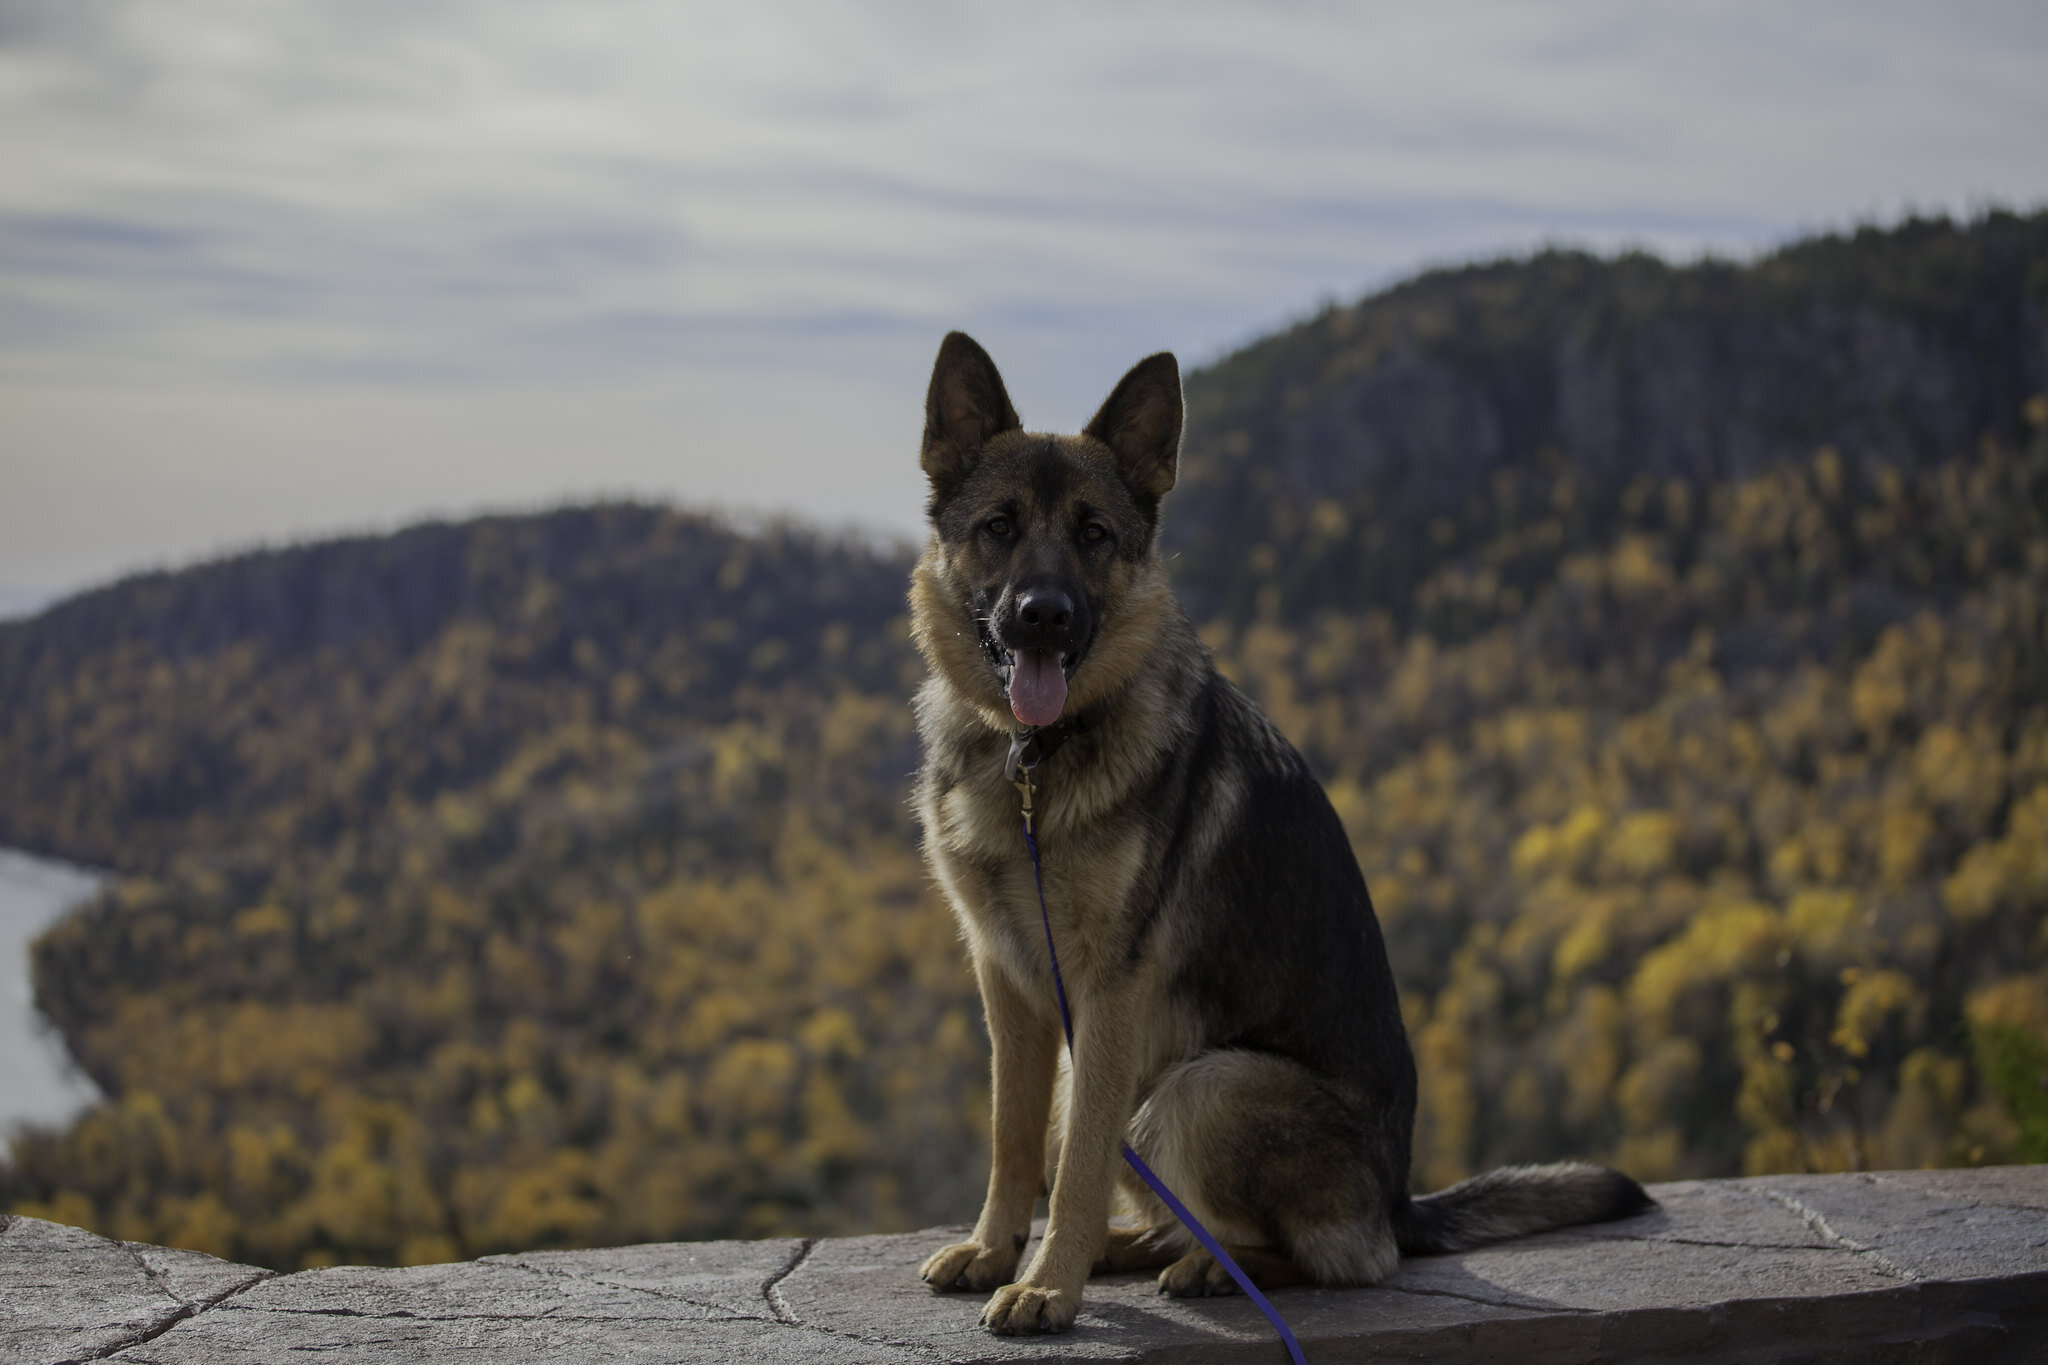
A photo I glossed over from Miah’s birthday trip to Canada.

A photo I edited with newly learned skills to improve the original, which I had cropped significantly to get rid of unwanted things in the frame.
That’s pretty much all I’ve got to say about this whole matter, so I’ll just throw a bunch of other comparison photos for the rest of this and hope whoever is reading this can learn from my mistakes.
Enjoying *Most* of the Process
There are multiple reasons I started shooting film again, but the biggest reason is that it slows me down and makes me more present in the moment. Shooting film is inherently a slow process, and since I started developing and scanning at home, it has become even slower.
There are multiple reasons I started shooting film again, but the biggest reason is that it slows me down and makes me more present in the moment. Shooting film is inherently a slow process, and since I started developing and scanning at home, it has become even slower. I’m learning to set aside an hour or two a week to develop film that has been sitting idly by for sometimes two months before I get to it.
Shooting is obviously my favorite part of the whole experience. Developing only takes about 20 minutes from start to finish, hanging to dry takes about two hours. I find the process of developing very therapeutic; I am fully engulfed in the moment, and it feels like my own form of meditation.
After the film has dried, I get to cutting it up into scannable sections to hopefully make it a little more efficient.
BUT, scanning is awful. It’s painfully slow, the software is buggy and reminiscent of early 2000’s Internet Explorer. It’s like someone designed the software back in ‘01 and failed to ever update the interface. Trying to edit within the scanning software feels like walking through the woods on an unknown trail, blindfolded. You take one step off the trail, kick a rock, trip and fall into a ditch. I’m only being slightly dramatic. Pull up the histogram to edit the blacks, mid-tones, and highlights, and what you see happening to your photo doesn’t make any sense compared to what you’re doing to the histogram. It’s incredibly inaccurate and doesn’t loan much confidence in the scanning program.

Epson V750 - Nothing PRO about it.
Another issue I had with scanning was the inability to leave the computer and software to run and go do something else. If you didn't keep clicking on the screen between every photo, it would stop. How incredibly efficient. After digging through a couple pages of Google results, I actually found out there is a solution to this stop-go issue I was having. I had to download another file which was separate from the main program, restart the whole software, and then it would scan continuously like it’s supposed to. I have no clue as to why they chose to keep those things separate instead of just including it in an update. But again, early 2000’s design.
Scanning does go quite a bit faster now, but it’s still the worst part of shooting film. If I have a professional lab do the scanning, I have to pay at least $20 a roll, and that adds up quickly with how much I shoot. Scanning at home is the more economic option, but my $300 scanner doesn’t quite give the quality that the professional lab’s $15,000 scanner is capable of.
If I try to push the scans too much while editing afterwards, they get some gnarly lines going up and down the frame. Everyone loves seeing lines going across the frame and spending 30+ minutes trying to edit them out right?

Unedited scan from an unnamed lab in Arizona. Notice the vertical lines across the entire image.
Any attempt to make the scanner do what it’s designed to do, and it’ll wreak havoc on the scans. I tried to apply the “Digital ICE” function to this picture to have the dust, scratches and other blobs removed from the photo. It didn’t work in the least bit, and honestly I think it made the entire scan worse than if I had kept it off like usual. These scans were a cluster from the beginning, as the lab I went to in Arizona mailed back the negatives on top of one another, which in the film world is a huge no-no. They stuck together, ready to rip off the emulsion from the negatives.
Thing is, just because there’s one awful part to shooting film, doesn’t mean I’ll stop anytime soon. The majority of the process is a blast, scanning just sucks. I leave the negatives under books for a couple days to help flatten them out anyways, and I’ve found myself doing that more often now that I’m scanning at home. Maybe one day I’ll be able to invest in a $15,000 scanner, but that ain’t happening for a long, long time. Until then, I’ll keep dealing with this crap shoot of a system.
Say cheese!
In the world of portrait photography, getting a genuine smile out of someone is the most sought after moment. Capturing that moment can be incredibly hard, because most of the time, it ends up being forced. Photographers who shoot lifestyle portraits tend to let the scene play out between subjects (families, individuals, etc.), aiming to capture the moments in between direction. On the contrary, fashion photographers that have had years of practice to know how to twist, turn, and tilt their models to look as flattering as possible. Ordinary people typically don’t know how to pose, but they know how to force a smile.
Most of us grew up hearing the phrase “Say cheese!” And most times, all this accomplishes is something between the look of a nut cracker’s painted face, and a child meeting their favorite character at Disney World. It also doesn’t help that most people, if any, don’t actually like having their picture taken. I can’t stand it, so I understand when other people don’t either. When I’m taking pictures, I try and fall in the middle somewhere between lifestyle and fashion photography, certainly leaning towards the more relaxed flow of lifestyle.
Posing is a topic I’ll discuss in length, but on another day. What I’m after, for the most part, is to capture the small details that come with everyone’s own personal smile. My favorite smile is the one that follows a big laugh. Why the laugh occurred in the first place doesn’t matter. Whether it’s from a cracked joke, a failed attempt to look serious, or some other goofy situation developing nearby; all that matters is that for one split second, something made my subject happy enough for their real smile to shine through.
One thing that I’ve found helps tremendously is having my client bringing friends. I’m not talking the entire class of 2019, but two or three close friends that can make the person being photographed smile with just a look. A one on one session is incredibly awkward, so what better to loosen someone up than having their best friends with them?
Something I hope my clientele will come to expect from me is a relaxed, organic session. Having your photo taken doesn’t need to be a stressful, awkward situation. Bring your friends, don’t be afraid to be yourself, and lastly, let’s make this as fun of an experience as possible.