

Short Term Review of the Leica M3
The Leica M3 is one of the most fabled cameras in the film community. It was the first camera I bought once I started shooting film again in the summer of 2018. I bought both the body and lens I have on eBay for pretty cheap, but ended up sending them off to be fully serviced so they would be in good working order.

The Leica M3 is one of the most fabled cameras in the film community. It was the first camera I bought once I started shooting film again in the summer of 2018. I bought both the body and lens I have on eBay for pretty cheap, but ended up sending them off to be fully serviced so they would be in good working order.
A little over a year and a half later, I finally have the camera back, and have put four rolls of film through it so far. I’ll go over some of the generic details of the camera and lens and a little bit about my specific ones.
The Basics
The Leica M3 was manufactured from 1954, all the way to 1966. There were two different variations, a Double Stroke (DS) and a Single Stroke (SS). All that means is you either need to crank the film advance once or twice to get to the next frame of film. My version (serial number 854 256) is one of the later DS variations. They started producing the SS versions around the serial number 915xxx. Looking it up, my specific M3 was built in 1957, so is about 63 years old!
I’m not sure when or by who, but some dingle dick decided to carve another serial number into the back of the M3, below the film advance, Y932534. Probably why I got it so much cheaper than they usually sell for.
The Leica Elmarit 90mm f/2.8 was made from 1959 to 1974. It’s not great optically wide open at f/2.8, but gets better and better as you stop it down to f/5.6 or f/8. According to my serial number (1879958), my particular lens was made in 1961. It’s in pretty great condition for it’s age, and was definitely taken care of much better than my M3.
All of the following images were shot with Ilford HP5+, developed at home with Ilford HC-110 (dilution B) and scanned with an Epson V750.

Red Wing, Minnesota.

Wide open at f/2.8, not super sharp but it does the job.

Shot around f/8, in a mostly dead downtown Rochester.

STICK!!!

*not sure if bugs or dust*

Lines and leaves are artsy right?
Overall, I’ve really enjoyed using this set up so far, but I’m not really sure it’s the camera for me in the long run. It’s an absolute marvel of German engineering so very beautiful thing to look at, but in day to day use, it’s not very practical for my needs and how I shoot. I’ll take it on some more hikes in the coming months with some color film and really try and put it through its paces. Fully manual cameras really do shine when you have static objects to shoot.
We’ll see if I can get some more shots I’m proud of down the road, and hopefully some portraits that aren’t of Miah. I’ll end this mini review with a shot I somehow got of Miah running towards me with one of her toys.

Feel free to sponsor us Jolly Pet.
Olympus XA2 Review
Let me start out this review by saying this; I never thought I would own a point and shoot camera. I went to an estate sale on my day off, looking for film cameras, and ended up leaving with two point and shoots, both from the same era.

The Olympus XA2 and all of its plasticky goodness.
DISCLAIMER: This post contains affiliate links. If you make a purchase through these links, I may earn a small commission at no extra cost to you. I only recommend products I personally use and trust.
Let me start out this review by saying this; I never thought I would own a point and shoot camera. I went to an estate sale on my day off, looking for film cameras, and ended up leaving with two point and shoots, both from the same era.
The XA2 is not nearly as popular as its predecessor, the original XA. The XA put a little bit more of the exposure equation in the hands of the photographer, allowing them to choose focus distance, ISO, AND the aperture. The XA also had a slightly faster lens, with an f/2.8 instead of the XA2’s f/3.5 lens. While there are slight differences between the original XA and all its subsequent siblings, they all revolve around a 35mm lens in a very pocketable body. Most came new with some sort of flash unit attachment, which adds a little bit of length as it attaches to the side. The XA2 came with the A-11 flash unit, which I have, for the most part, left at home. The flash is like a bomb going off, usually providing a wonderful ‘deer in the headlights’ look.
The Body
Now that I’ve said my part about the flash, I’ll start with the body itself. It’s basically a plastic brick that fits in the palm of your hand, slides easily into any pocket, and does not draw any attention to the one holding it. The slider conveniently covers the lens, viewfinder, and light meter when closed, and also deactivates the shutter so you can’t accidentally take any shots. This small plastic brick houses a 35mm f/3.5 lens which is surprisingly sharp for it’s age. To keep the body as small as possible, they used a leaf shutter instead of a focal plane shutter. For those don’t know what either of those terms mean, just know that a leaf shutter is massively quieter than a focal plane shutter. The leaf shutter in this camera is one of the few things that isn’t plastic. Pressing the shutter button provides a quick click sound. Maybe the sound of a pen clicking, but much quieter? I’m not sure honestly, but it’s quiet.
The loudest thing about this camera is advancing the film to the next frame. Think disposable camera wind on noisy, and that’s exactly what this sounds and feels like. My particular copy doesn’t have the most consistent framing, but I have not had any shots overlap, yet. Besides pressing the shutter and selecting ISO sensitivity for the lighter meter, you can also shoot the focus range! The options are located to the left of the lens and show pictures interpreting the distance that the lens should about focus to.
Bottom - Head & Shoulders - 4 feet
Center - Full Body - 9 feet
Top - Mountain - 40 feet
This method is called zone focusing, and is essentially a guess as to where your subject is. If it’s bright enough out, it doesn’t really matter if you set it in the right place, though I usually leave mine in the default center position. Which reminds me, the tab for the focus resets to the center when you close the slider, handy, but also annoying at times.
So there are three different things you can control, focus, ISO, the flash (if you have it on), and firing of the shutter. There are a few things about this camera that I don’t quite understand. There is the red light on the front of the camera, and I have no idea what it does. I haven’t seen it light up at any point in time since I’ve had it. There is a red light on the inside of the viewfinder that lights up if the shutter will be too slow, but the front light does not light up with it? Superfluous red light cover to make it look better? Another thing I don’t quite understand was the addition of a tripod socket on the bottom. I can’t imagine any person, ever, mounting this on a tripod. The socket itself is plastic, so I’m not sure how many uses it could take before it breaks. Also on the bottom of the camera is a little switch for a self-timer (which would explain the need for a tripod socket), and the battery check. I have no idea if it’s just my camera, but when I turn the switch to battery check, it makes a horrendously high-pitched whining noise. It doesn’t sound right, but the camera works so I haven’t worried about it. I haven’t tested the self-timer, but I’m sure it’s something like two or ten seconds before it goes off. I’ll try it one of these days.

Fuji Superia 400
Shooting Experience
Now that I’ve covered most of the body, I’ll dive into what I like and don’t like about shooting with it.
First off, sometimes it’s nice not to have to think about what you’re doing. See something cool? Point, and shoot. These cameras are great for a quick capture, a moment. If that sounds like your perfect shooting scenario, go ahead and get one of these, because they’re perfect for it! Most of the time I am very methodical about what and how I shoot. This camera is simply fun to use, so it’s an appreciated deviation from my normal style. I wish I had a little bit more control like I could with the original XA, but I’m not sure it would be quite as enjoyable of an experience.
So far, the camera is quiet, fun, and easy to use. The thing I absolutely love about this camera is how incredibly portable it is. Back pocket, front pocket, fanny pack; you name it, and it’ll fit. I haven’t tested the durability of it, but you could take this camera along with you just about anywhere, and it wouldn’t add more than half a pound of weight.

Fuji Superia 400. My therapists building is incredibly photogenic in the morning light.
Portable, quiet, fun, and easy to use. It’s honestly a great camera, one of the only major complaints I have is the rewind crank. Remember when I said the camera is a plastic brick? So is the rewind crank. It feels like it is going to break the entire time I’m rolling up a finished canister of film. 36 frames feels monstrously worse than 24 as you have 12 more frames of resistance to fight back into the film canister. I’m honestly surprised it hasn’t broken yet. Another thing I despise about the rewind crank is how it’s engaged. There is a tiny little button on the bottom of the camera, it unlocks the gears in the camera that advances the frame. If you don’t press this little button in, you can still get the film rewound, but each and every sprocket will rip and tear, and your entire roll of film with essentially be destroyed. Any guesses as to how I figured this out?

Kodak Portra 400, wine tour in Wisconsin.
If this does happen to you, I wish you the best of luck in cleaning out the tiny little squares of broken film sprockets, and I hope developing it goes as smoothly as possible. I’m surprised I even wasted time developing that roll of film after how fucked it got. I ended up throwing the entire roll of film away, just glad that the camera could take pictures.
If it weren’t for the rewind crank, and the rewind crank button, I think this would be an almost perfect camera. But since I can’t get over the rewind crank, I’ll probably keep looking for a better point and shoot that will work for me better. My next review will be on the Canon Sure Shot, which is another point and shoot that I’ve enjoyed using these past couple of months. The review for the Canon Sure Shot/Autoboy can be found here! If point and shoot cameras aren’t really your thing, I have a review on the classic Leica M3 here.
TLDR: It’s fun and easy to use, get it, but be careful rewinding the film.
And if you purchase an Olympus XA2 (Affiliate link to eBay) through that link, I get a little bit of a kickback so I can keep making reviews like this! And please feel free to let me know other cameras you’d like to see reviewed in the future.
Now onto more pictures!

Fuji Superia 400, taken 5 minutes from my house.

Kodak Portra 400, parking lot of the place above after a lot of rain.

Kodak Portra 400, lake after the rain. Featuring Miah in her constant state of movement.

Kodak Portra 400. Winona, Minnesota.
The Case for an Expensive Tripod
Tripods, like cameras, lenses, and everything else in the world, come in a wide array of choices. Variety is the spice of life, but when it comes to anything photography related, things get quite blurred quickly.
Tripods, like cameras, lenses, and everything else in the world, come in a wide array of choices. Variety is the spice of life, but when it comes to anything photography related, things get quite blurred quickly. There are options ranging from the $25 Amazon Basics tripod, to a $1500 Really Right Stuff tripod. As the old adage goes, you get what you pay for. With tripods, that statement rings true in every single way.
I paid 80 dollars for my first tripod and head, and they worked the way I needed them to. As my gear collection and skill set expanded, I outgrew my tripod head. It couldn’t handle the weight of my larger lenses, nor could it spin horizontally like I needed when I got into panoramas. I ended up buying a new tripod head to mount onto the legs, spending another $100. That head worked great the last three years with the gear I had, but as my dive into medium format grew deeper and deeper (think holding two bricks worth of a camera), that tripod set up could no longer support my needs or my gear.

Size doesn’t always equate to increased stability, in this case it does.
Every time I put my camera on that tripod and locked it up, the legs would bend, the ball head would slowly adjust itself, and my composition I worked so hard to get would end up shifting into whatever the tripod felt most comfortable with. Long exposure shots would get blurred because the tripod would blow and bend with the breeze. I can’t even begin to count the number of shots that got ruined because my gear was too much for the tripod.

Both tripods extended to max height.
With my trip coming up, I knew I needed something sturdier if I wanted my shots to turn out. It was painful, but I ended up shelling out around $800 total for Oben carbon fiber legs and an RRS ball head. The difference between the two set ups was clear the first time I set them up next to each other. I put my camera on the new set, locked it in, and proceeded to push down on the top of it to see what would happen. I couldn’t believe what happened; Not. A. Damn. Thing. It didn’t shift or bow, I was blown away.

Six pounds of metal on top of another five pounds of metal.
Not only was the whole thing sturdier, it was friendlier to use. It’s quicker and easier to set up and take down. It’s weighs a whole lot more than my other tripod and head, but with more weight comes more security. I’m not saying to go spend $800 like I did, because honestly I’m kind of insane, but please spend more than you think you need to, because it will help in the long run as your needs grow.
“Your shots are only as sharp as your tripod allows them to be.” - No idea who said it but it’s a solid quote.
I'm a failure
“Failure is simply the opportunity to begin again, this time more intelligently.”
“Failure is simply the opportunity to begin again, this time more intelligently.”
Photography, like life, is full of failures. And like life, our growth depends on our reaction to those failures. Failed shots often get thrown to the wayside to make way for the successful shots that were taken. The thing is, if you don’t try and understand why those shots failed, you’ll never figure out how to prevent those failures from happening in the first place.
People tend to dwell on the failures in life, no matter how small. The thing that surprises me with photography, is how easy it is to ignore the failed shots and go straight for the keepers. Files are deleted, negatives thrown away, never to be looked at, or learned from.
This issue seems more common place in 35mm film where there are an abundance of exposures to pick from. When shooting medium format, you only get 15 shots max, and the failures tend to hit a lot harder. About a month and a half ago, I spent two weekends going on lots of trips. In the span of those weekends, I shot 4 rolls of slide film, which are $10-12 each. Of those four rolls, I got 4 or 5 usable shots. It hurt, a lot.

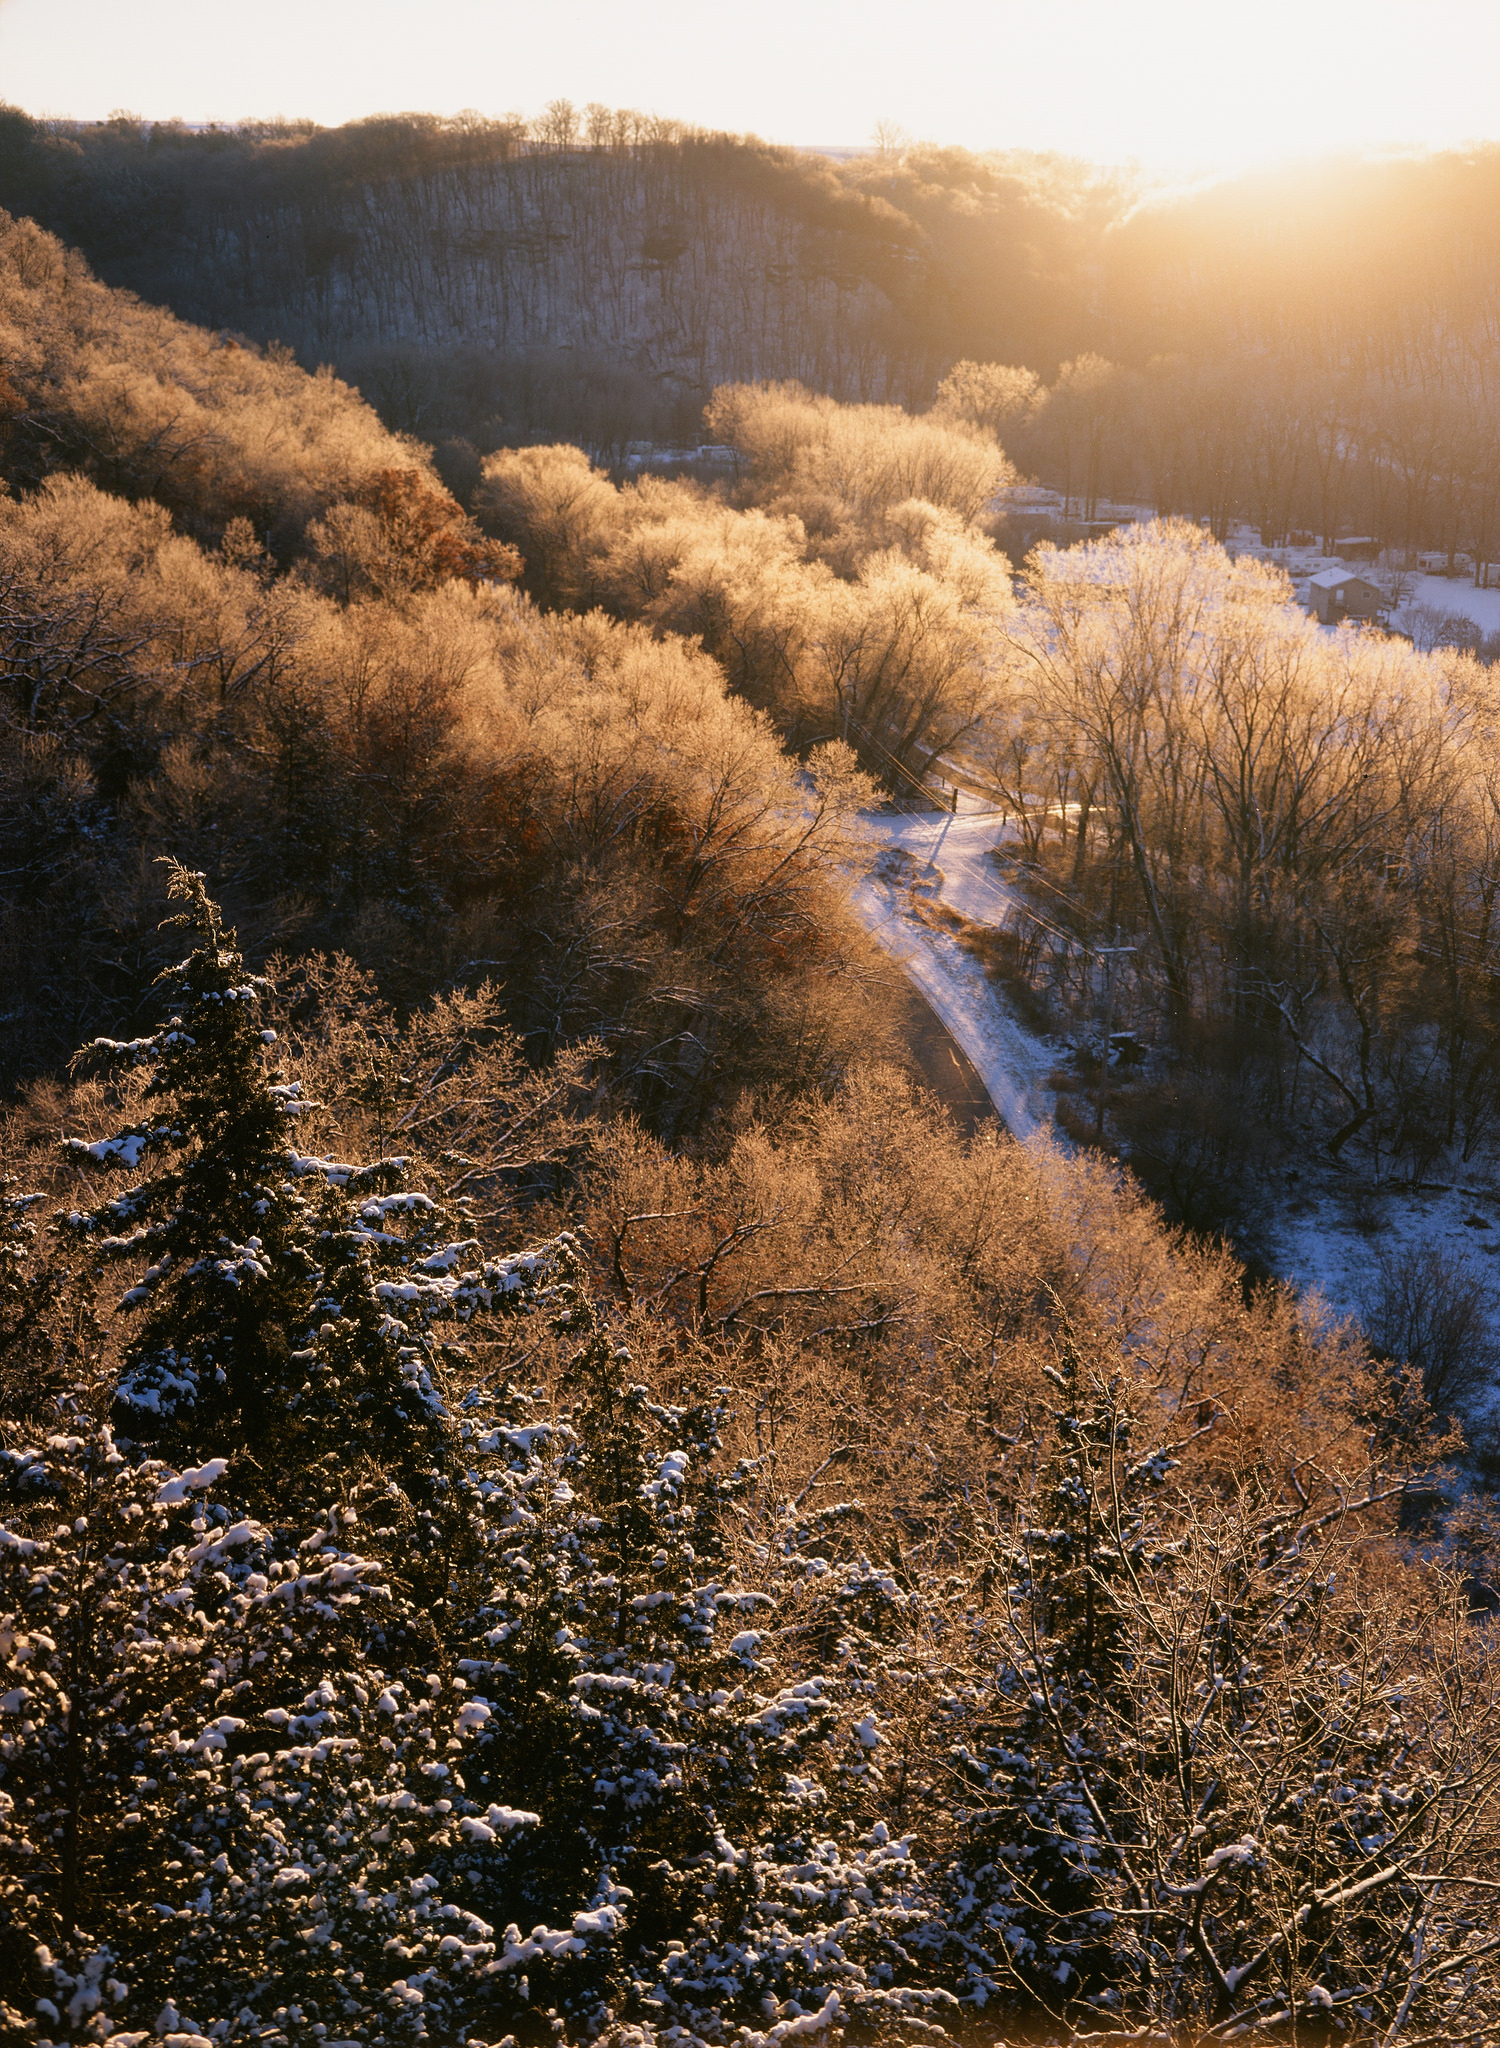
Overexposed Velvia 50, Lanesboro
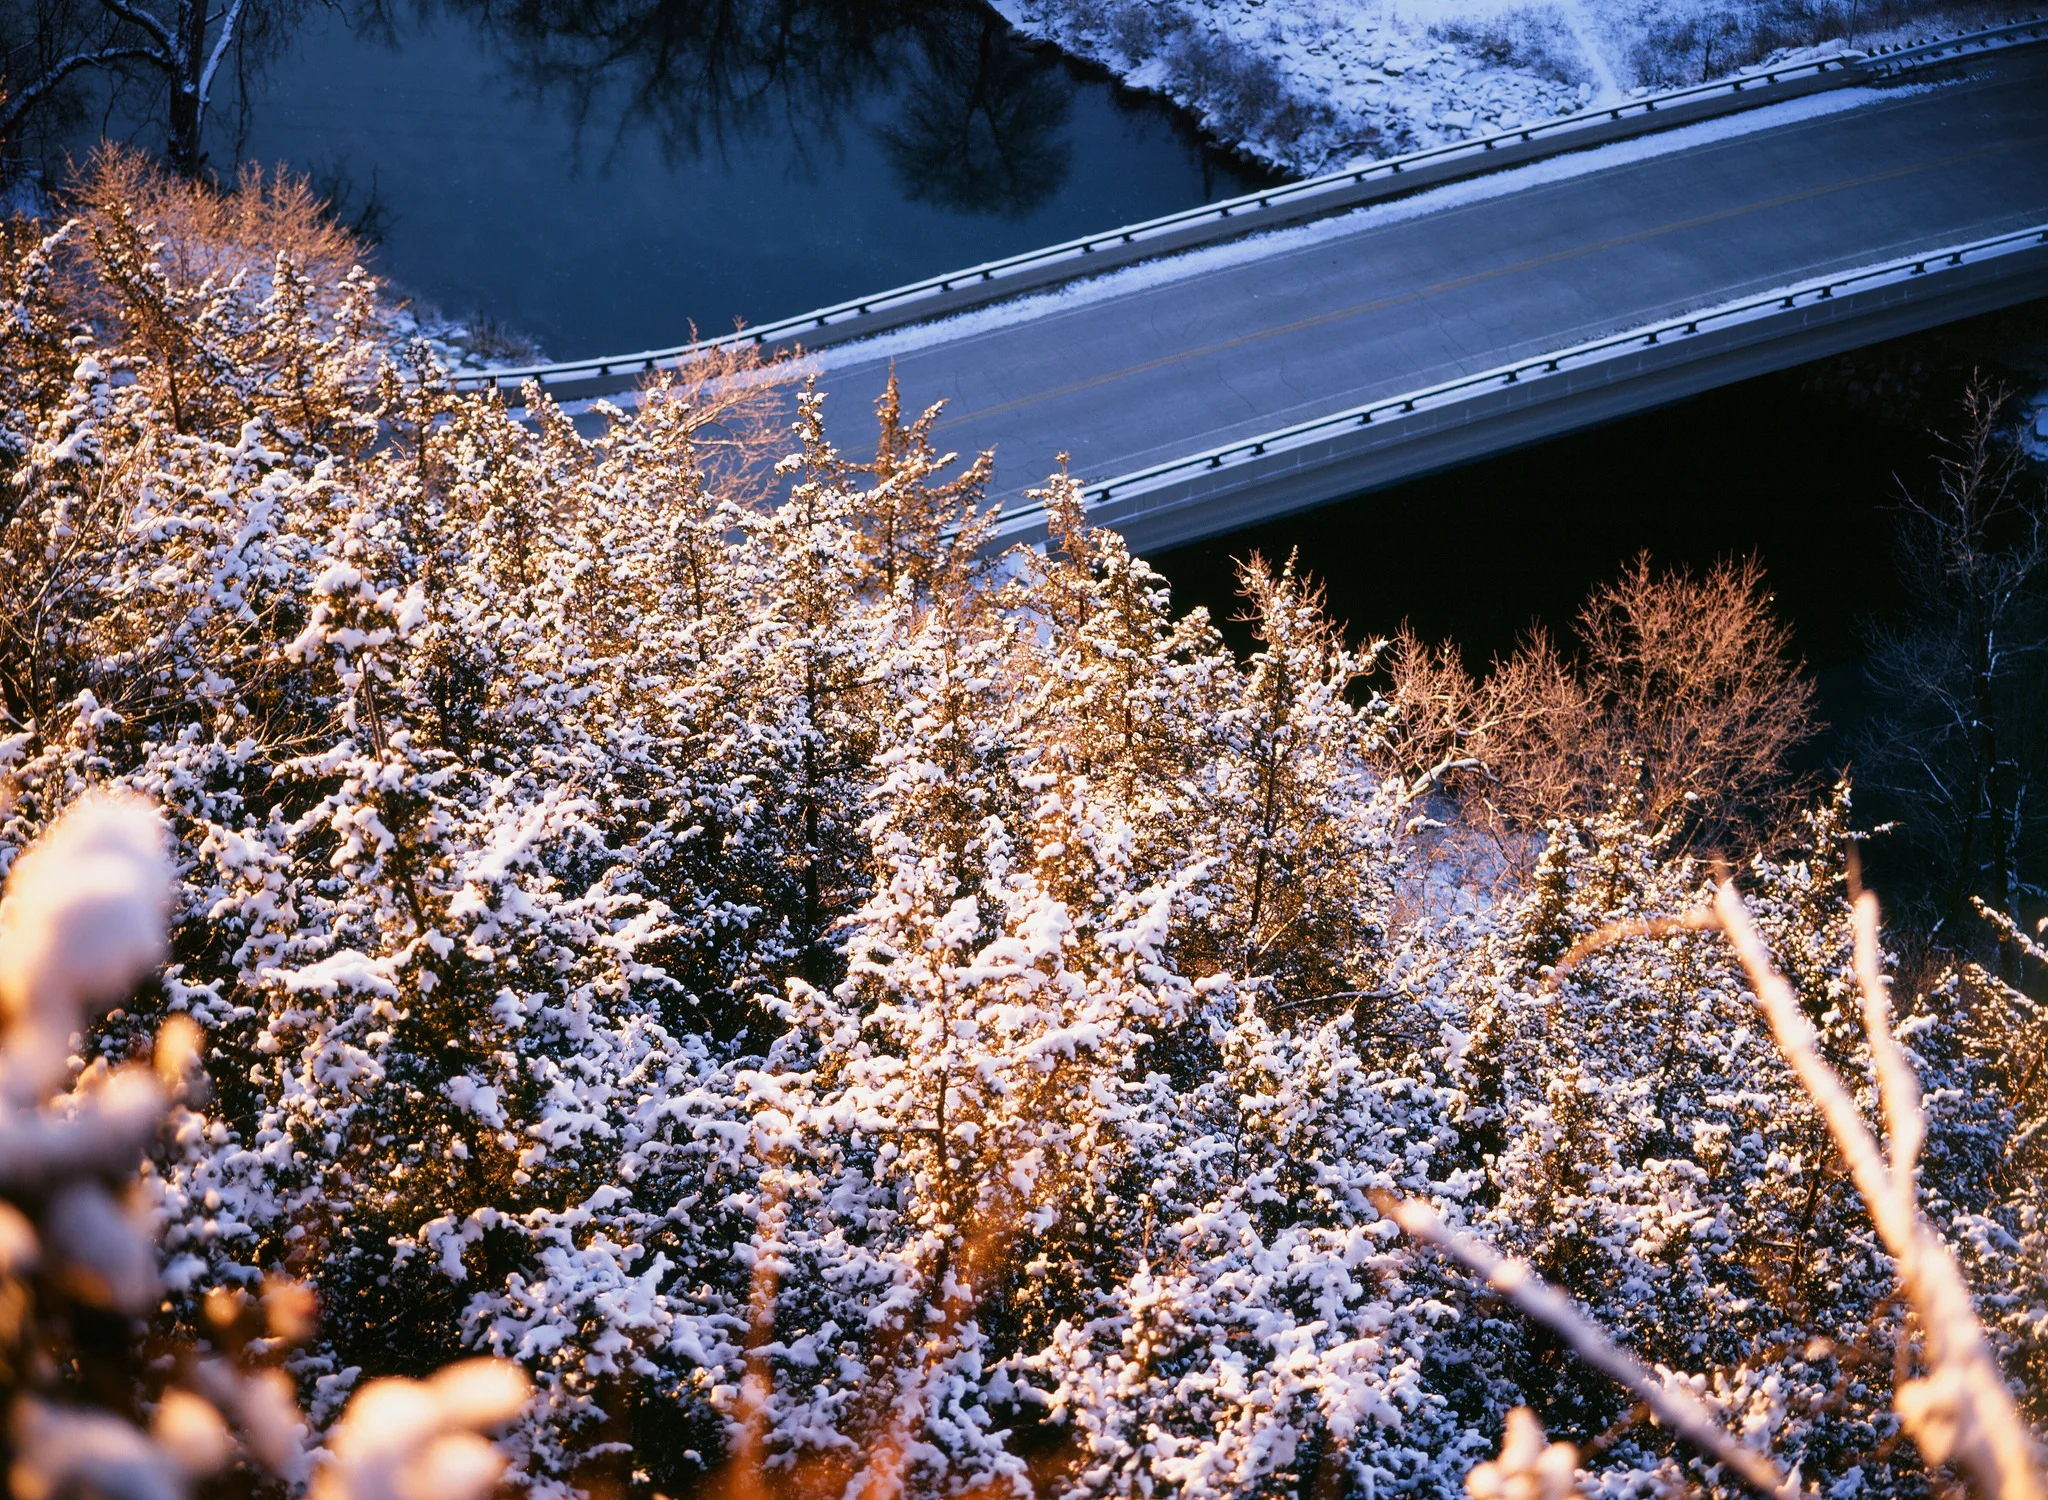
I spent the weekends in Lanesboro, the cities, and on the North Shore, and had nothing to show for it. After I was done feeling disappointed of myself, I sat back and asked what went wrong. Once I had my head on straight, I did some research, and found out just how little wiggle room you have with slide film. Half a stop overexposed and you get a shot like the one above. One whole stop and you lose any and all remnants of detail in the snow like the one below.

Overexposed Provia 100, at least I got the focus right… Whitetail Woods Regional Park
Since I had shot so much negative film (Color and B&W) I was going off of the same rules, but to a lesser degree. Come to find out, I should have been doing the exact opposite with the slide film. Negative films have a greater latitude, meaning they have objectively more room for error, and deal very well with overexposure. Slide film on the other hand, typically requires a slight underexposure to prevent any brighter areas from losing detail.
I was doing what I was taught, and in the same vein, I taught myself even more about film. One $45 photography lesson later and, underexpose slide film, meter for the highlights, don’t do that again.

Overexposed Provia 100, Whitetail Woods Regional Park
I’ve spent a lot of the past two years, learning to take my failures in stride, look at them as objectively as possible, and take away what lessons I can. This mentality has helped me grow as a person, and as a photographer.
So, here’s to screwing up everything, and hopefully learning from it. Just make sure you keep pushing on.
5 Frames With the Mamiya M645 1000s and Mamiya-Sekor C 55mm f/2.8
My dive into medium format film was hard and fast. Less than two months after I started shooting film again, and after buying a Leica M3, I found this beauty of a Mamiya M645 set up on eBay.
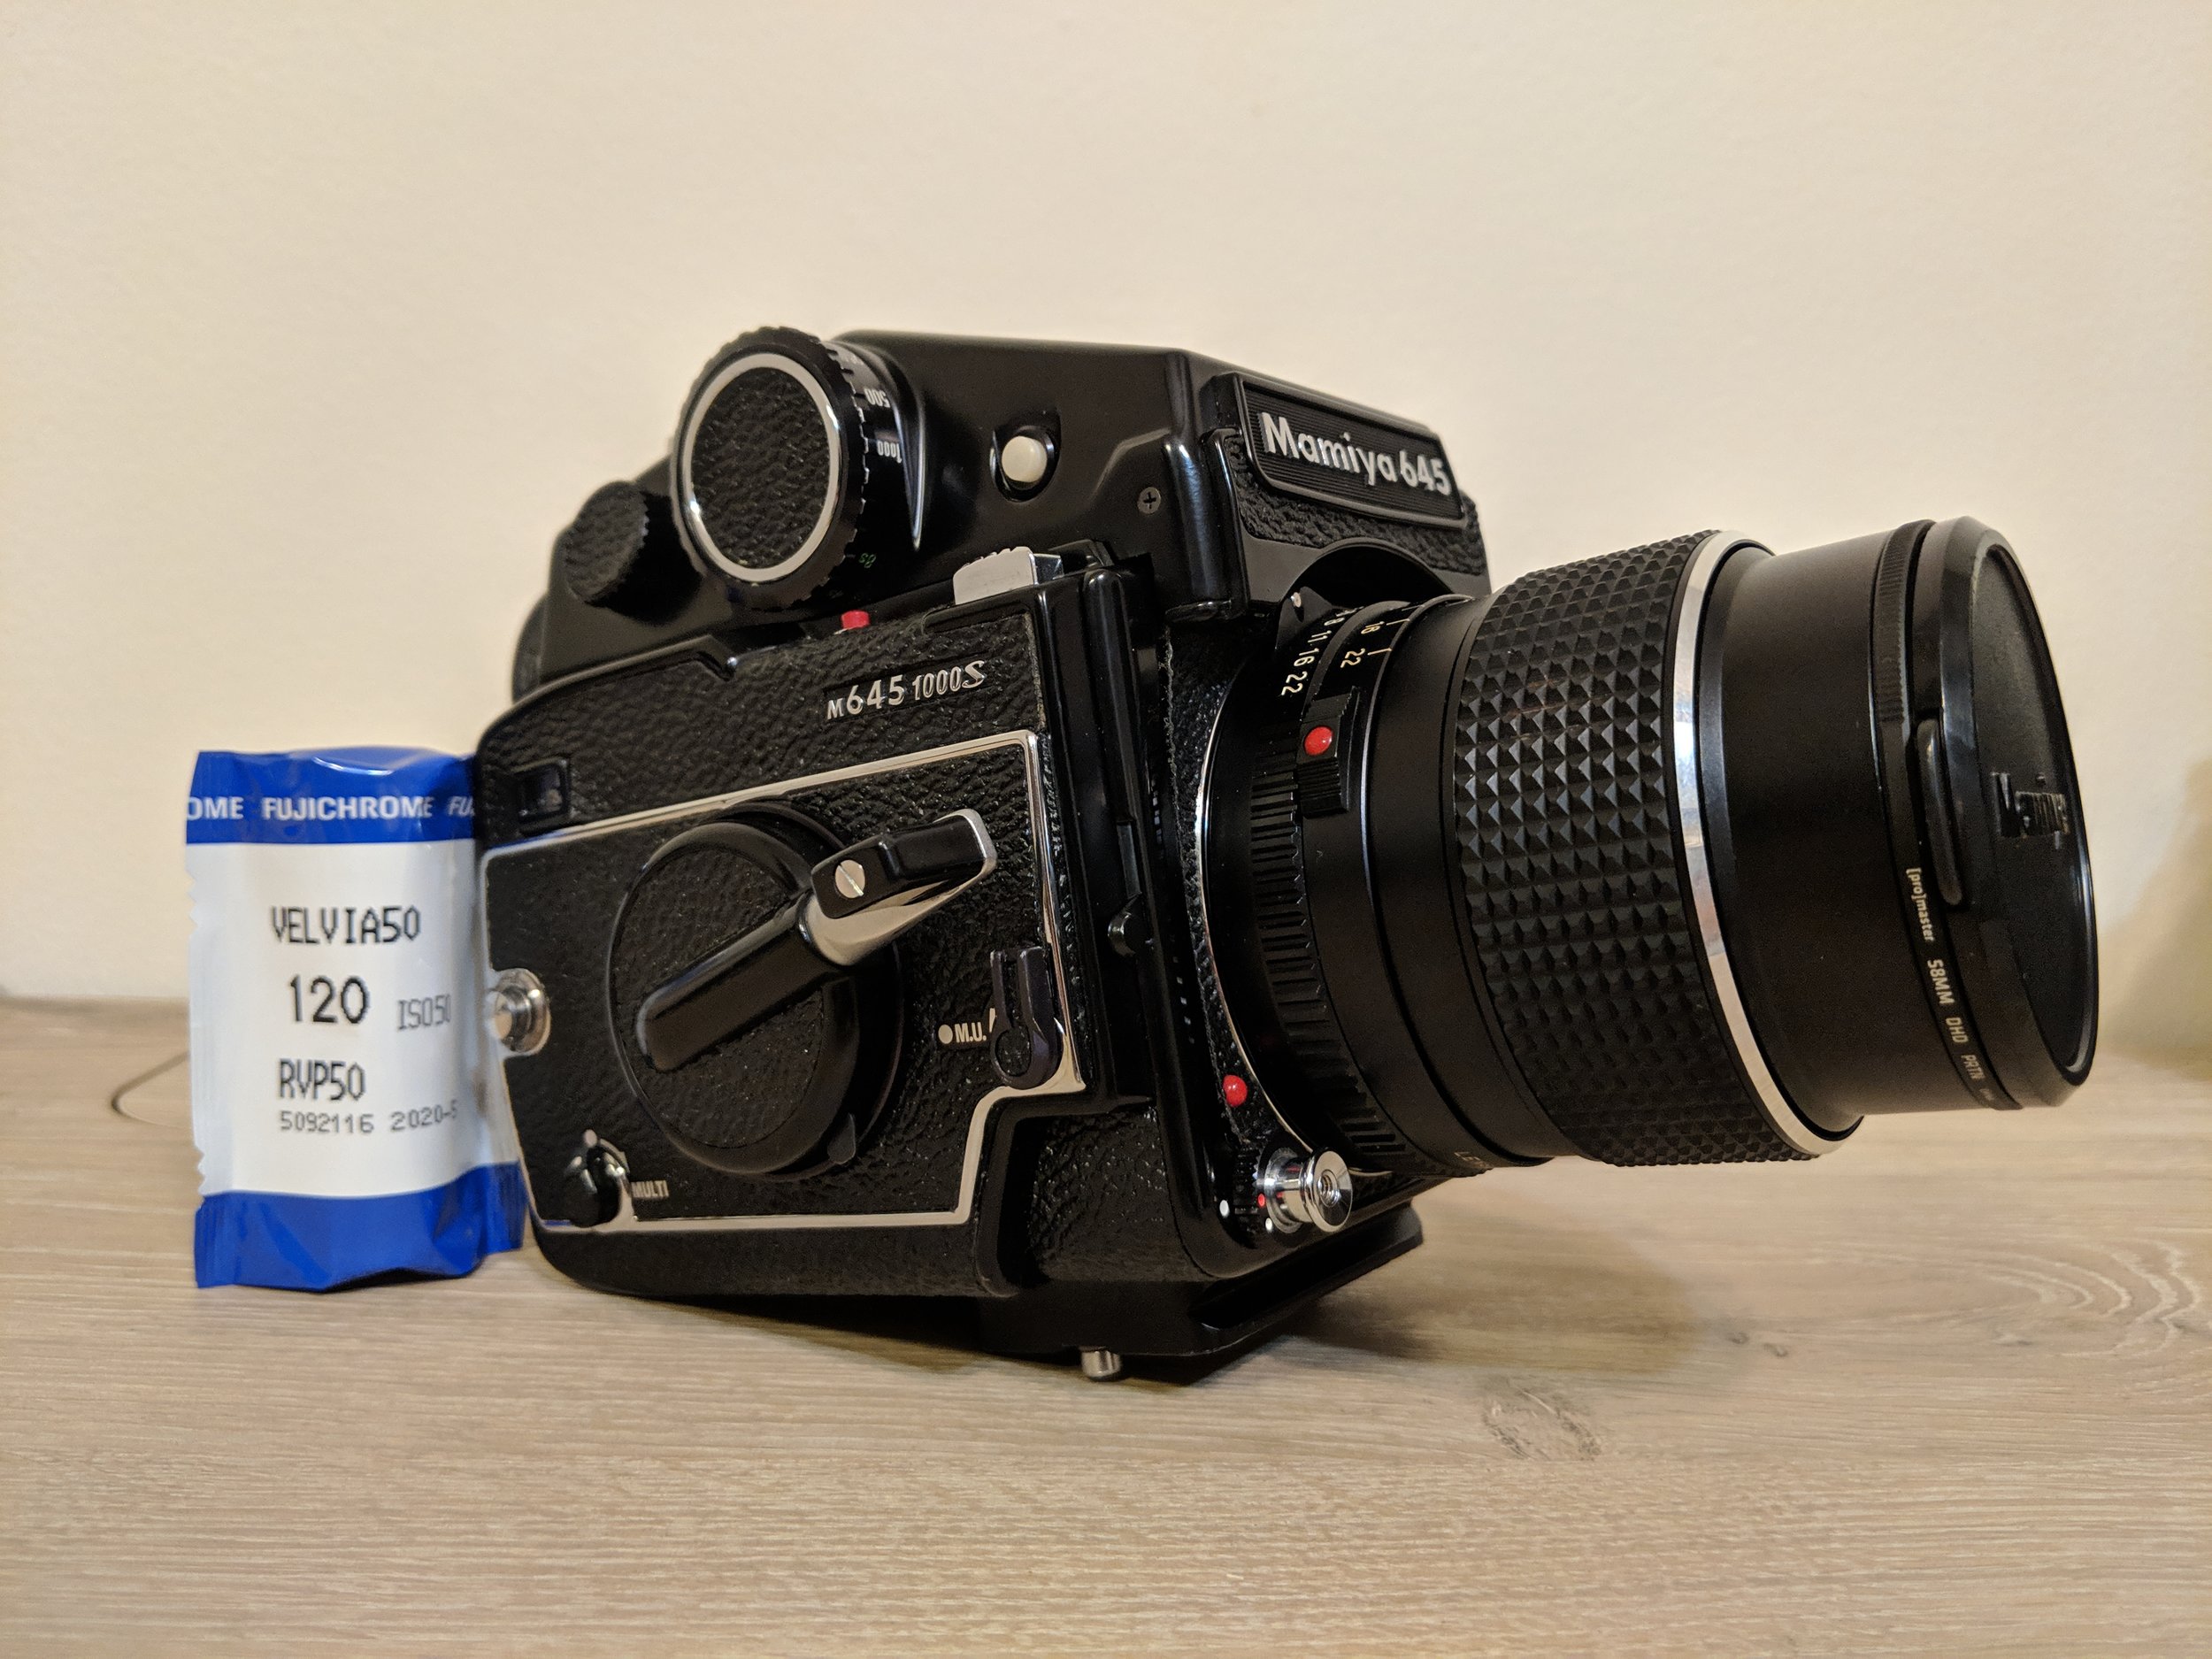
My dive into medium format film was hard and fast. Less than two months after I started shooting film again, and after buying a Leica M3, I found this beauty of a Mamiya M645 set up on eBay. It originally came with the 80mm f/2.8 but I wanted to go a little wider. The 55 f/2.8 offers a full frame equivalent of about 36mm. This lens has barely left the camera, and allows me to hand hold most shots at 1/60th of a second with ease.
The lens itself is small and decently light for being mostly metal and glass, where as the body weighs at least two and a half pounds with the metered prism attached. It's a honker, that's for sure. The body is solidly built, the mirror is massive and claps loudly when either of the shutters is pressed. The 1000s has a mirror up lever (highly suggested for slower speeds) and a multi-exposure opposite of the mirror up. I haven't experimented with how many exposures are possible, but I imagine it could go on endlessly if necessary. Shutter speeds range from 1/1000th of a second to 8 seconds. The multi-exposure lever could be utilized for astrophotography if need be. It's not my favorite camera to lug around, but it certainly gets used the most.
It produces 15 images when 120 film is used, 30 with 220. Each negative is 56mm by 42mm, so not quite 6x4.5. Since the shutter button located on the front of the body is rather touchy, I would highly recommend locking it after each carefully curated shot. Film in general slows you down, but medium format does so even more.
Here's to making those 15 shots count.
Velvia 50 - Lanesboro
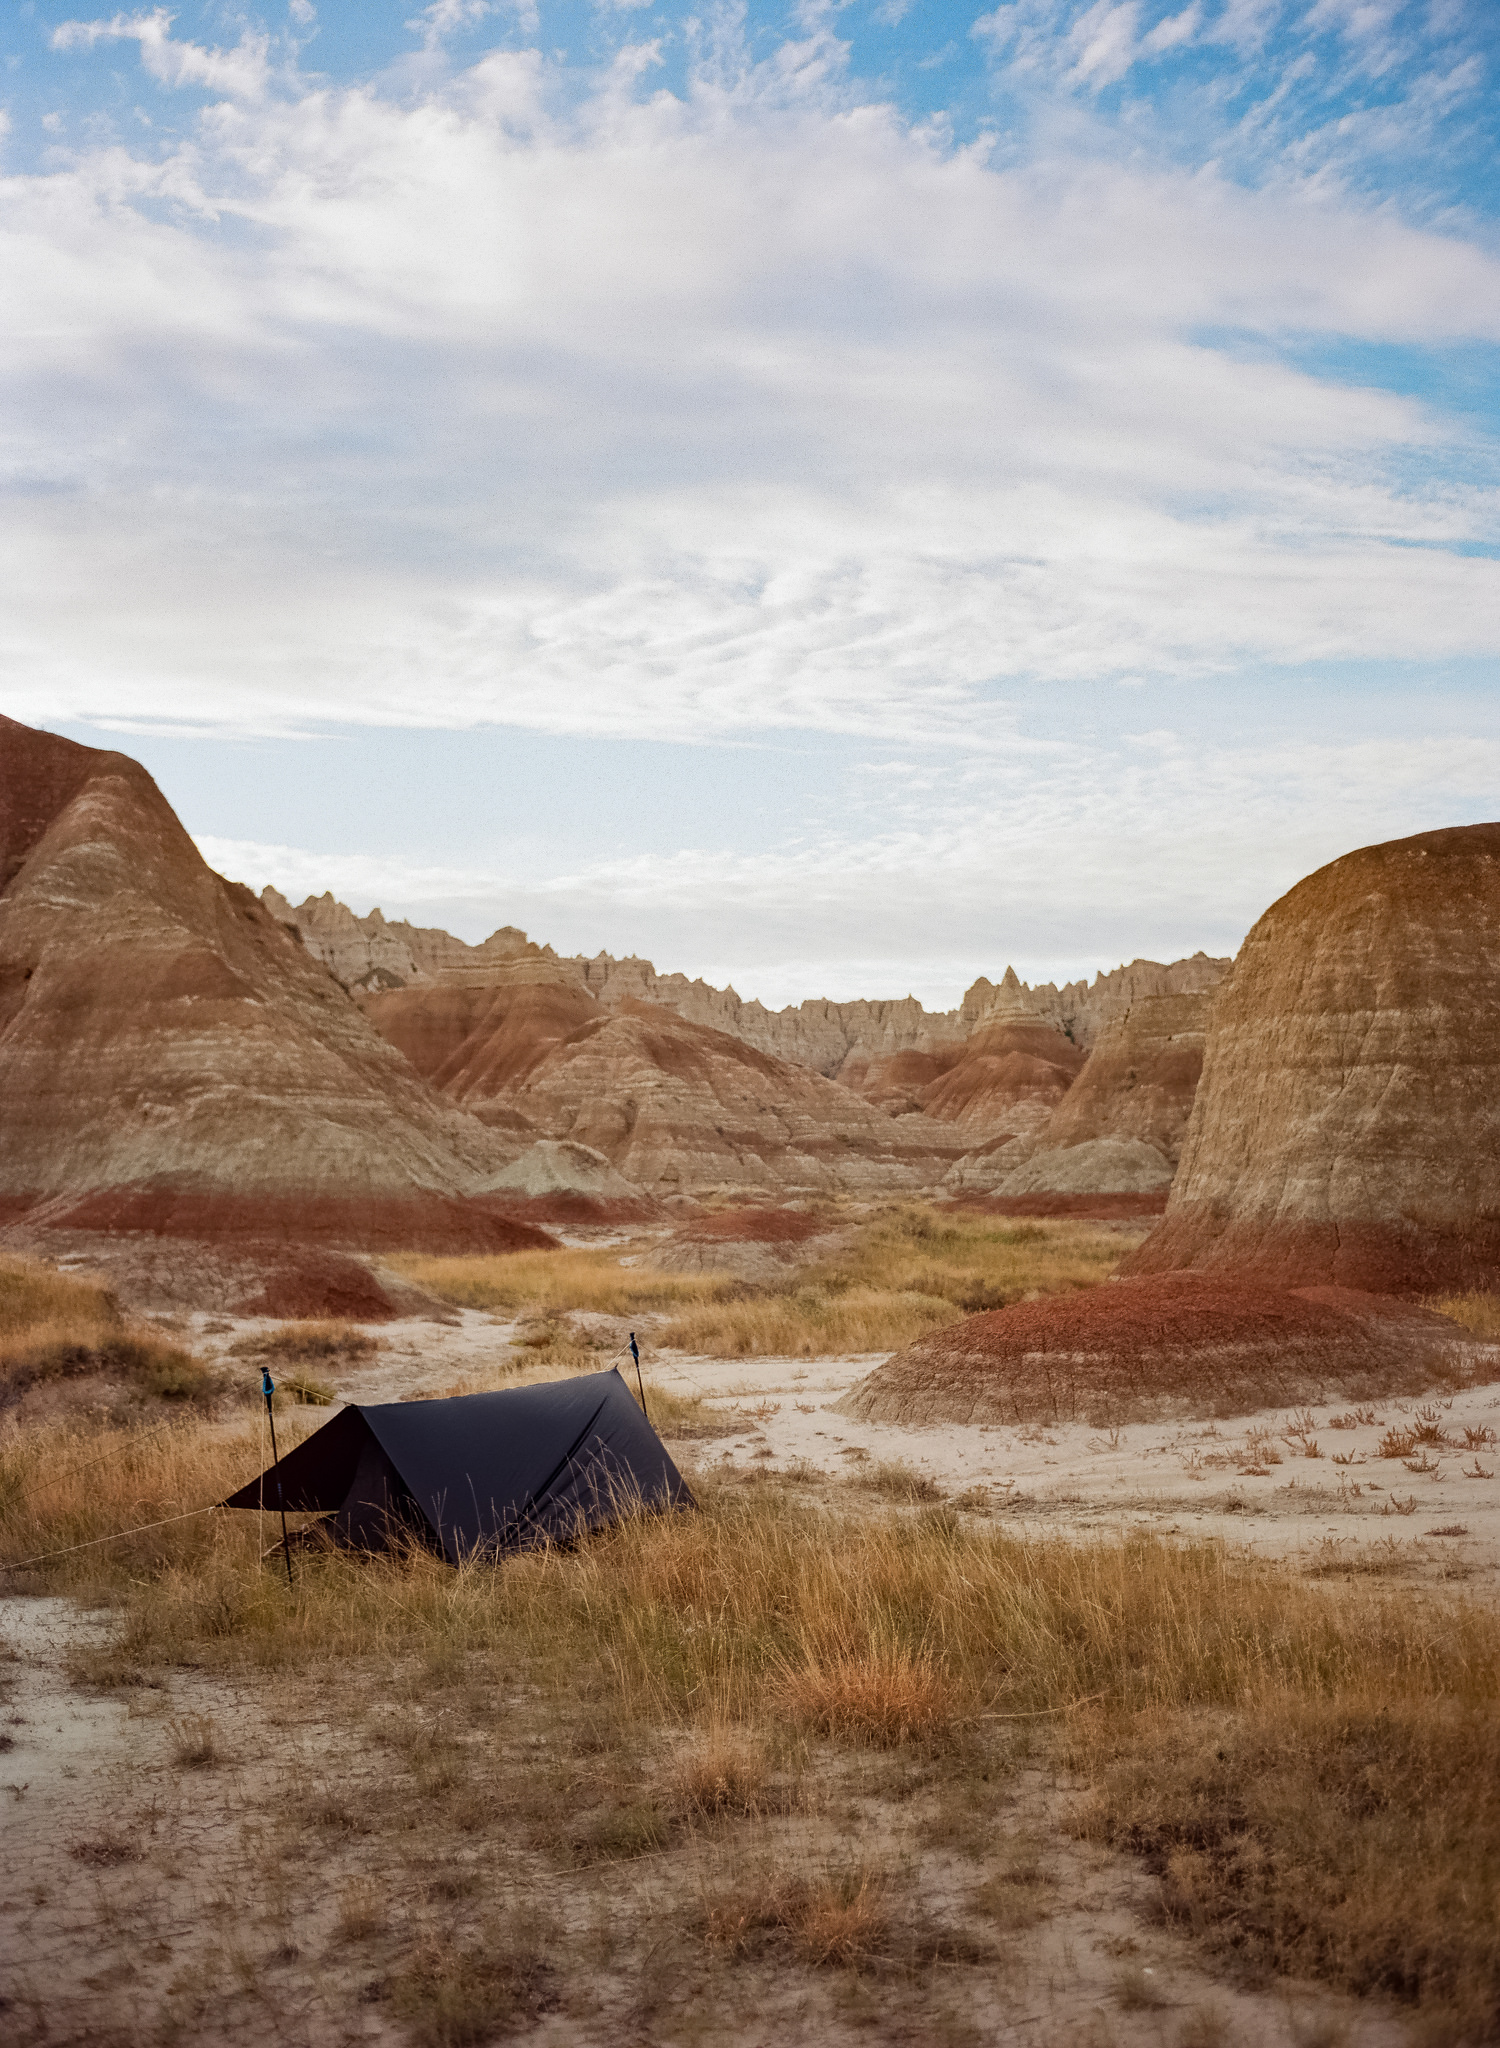
Ektar 100 - Badlands National Park

Velvia 50 - Lanesboro

Ektar 100 - Badlands National Park
Velvia 50 - Lanesboro